Saturday, March 31, 2012

Wish List...A Blue Buffet, Part 1.

I've been pining after a blue buffet for my dining room for awhile now. My "Blue" board on Pinterest is full of photos of awesome retro buffets redone in wonderful blue paint finishes. I Googled and sighed and pinned and kept planning what I would do with the perfect vintage CHEAP buffet when I found it.


Love this color. Cuz it's blue and it looks old. I'm a serious blue freak, let me tell you. But then, look at my blog header. Blue! Ahem.


The color, it makes me happy. I used turquoise blue in my craft room and with a bit of tweaking I could totally make this color work in my dining room. Le sigh.


 The Welding Man took a look at this photo and said, in his best husbandly manner, "That looks kind of cruddy." Yes, but it's blue and its vintage looking and is loaded with character! Like me! LOL!


And look what I found! A vintage 70s Mediterranean buffet for $20!!! 

The guys brought it home and I immediately started loading it up with all manner of decor items, cuz I am loving it. Yeah, that eclectic mix includes a genuine Poortvliet gnome (looks like The Welding Man), cobalt blue glassware, an Oriental teak chest,  retro wire fruit basket, galvanized tin lantern and an apothecary jar full of  orbs with family names. And a samurai sword. And a painted butterfly rock. And an earthenware vase. Ok, I'll stop now.

Hey, Pottery Barn I'm not.


It is beat up and exactly what I was looking for. Look at that retro detail! The shelves inside are solid and the doors are straight and tight. And soon, it will be BLUE. A nice denim blue with a touch of turquoise. And a bit of crackle (using Elmer's glue, of course), and some glazing, and sanding, and distressed edges. Maybe with a dark walnut top. Or not. And oil rubbed bronze fixtures (thanks to Krylon spray paint) and maybe a bit of  Mod Podged book pages on the inside because I'm just that excited about this project.

Does it need legs or not?  Still deciding.

Don't you love it when a plan comes together?

And one last comment by The Welding Man. "I like the way it looks right now!" Funny man, he knows I never leave anything well enough alone.

I'll post progress right here, so check back for part 2.

Mosaic Tile Window Sill

I'm intimidated by tile work. There, I said it! Maybe because I've seen some horrific DIY tile projects that made me cringe. I mean, how hard is it to follow a level chalk line? But I digress...ahem.

But smashed tile mosaic work? Ah, now THAT I can totally do. This was my first ever mosaic project and I totally loved the way it came out.


Ooh aah! This mosaic covered my ugly, grungy kitchen windowsill that had gotten the worst for wear over many years. I needed a good, cleanable surface that looked good for my houseplants! Because, ladies, I am seriously infatuated with my houseplants.

http://makethebestofthings.blogspot.com/2012/03/house-plant-fanatic.html


I bought 4" tiles in two colors and put them in a paper bag before breaking them up with a hammer. THIS IS IMPORTANT-breaking tile is like glass, it is sharp and dangerous and flies everywhere! Safety glasses are good, too. Next step-I marked the dimensions of the window sill on a bit of cardboard and laid out the pieces on the counter, right next to the kitchen window where I was working, so I could transfer each piece with no fuss.

I used tile adhesive to glue each piece in place. This does not set up quickly and gives you a bit of leeway to move things around. I made sure to use the edge pieces to line up with the front lip of the windowsill.


I waited overnight then spread the grout the next day. This will be messy (I wore latex gloves and used an old plastic spatula) but make sure you get in between each piece. At this point it will look horrible, but wait! Following the directions on the grout package, wipe off the excess with a damp sponge. You will see your project transform before your eyes. So cool and so satisfying!

Using the tile pieces with straight edges made adding the reed molding on the front easy peasy since everything was nicely lined up. I love how this came out!  But, alas, we left it behind when we moved into our new place, so I'll be doing this soon on my new kitchen window sill, now that I know how easy it is.

Plus, I've been seeing some very cool pebble mats out there in blog land and I just have to try making my own. Hmmm, a pebble mosaic window sill mosaic maybe? I'll be posting right here when I do either project!

Please join me at the linky parties on my sidebar. You never know what cool and creative ideas you'll find.
Posted by Picasa

House Plant Fanatic

My name is Ann, and I am a Plantaholic!

 Yup, no matter what else is going on in my house decor-wise, I always have LOTS of house plants. Back in the 70s I had a window full of hearty Purple Queen/Wandering Jew growing in water filled mason jars. I made macrame plant hangers and I was hooked!

Note to self - Get more Wandering Jew plants and make some macrame hangers. Hey, macrame is so retro it is due for a rebirth, doncha think?


My dining room window is very plant friendly and this low bookshelf has half a dozen plants. Love that colorful begonia! It is only a year old and looks great. The bright green schefflera plants are super easy to grow from cuttings.


 I love ferns in any way, shape or form. Boston ferns can be persnickety but these airy Asparagus Emerald ferns grow well for me. This one was a 3" Walmart starter from last spring. This plant looks fragile but it is really tough. And it has thorns! The stems look like mini bamboo. Feed it well during spring and summer and it will get more lush and beautiful. Prune it for thicker growth. The stems look wonderful in flower arrangements. 


We haven't yet redone our master bath, but the great light and tall cabinets are very houseplant friendly. The Pothos and Sprengerii fern are totally happy on top. On the counter is a planter that started out on the patio and will go back out for the summer. The very happy mama Spider plant has loads of babies and shares the pot with a nice heart leaf  Philodendron. Reflected in the mirror is a healthy Peace Lily (aka Spathiphyllum) whose white flowers resemble Calla Lilies. 


 Ah, heart leaf Philodendron, one of my favorites. Easy to grow, easy to start from cuttings, beautiful dark green, shiny leaves and  beautiful trailing stems. I have half a dozen of these growing inside. Love them!


 Another outside plant brought in for the winter, this Peace Lily in a pretty urn LOVES it on the bathroom counter. Above hangs another Philodendron. Beside it is a Maidenhair fern and another, small Peace Lily.


Hard to see in the octagonal window is a pink striped Prayer Plant ( aka Maranta) which folds up its leaves at night, hence the popular name. The smaller plant is a pretty Croton. The big planter holds yet another happy Spider Plant mama with lots of happy babies. On the back side of this planter is a Croton, Philodendron and Lady fern.


My mom used to grow beautiful sweet potato plants this way when I was little and now I'm trying for one of my own. Can an avocado pit tree be far off? Lol!

Houseplants give me my gardening fix while I'm waiting to work outside. What about you, how do your houseplants grow? What are your favorites?

I am so ready for warm, sunny spring weather. It has been so rainy and cold here in Oregon that NO yard work has been accomplished. A recent bout of the flu and a new prescription have conspired against me. Curses! Or should I say, Rat Damn Fink! That was my "mom cussing" when the kids were little and they still tease me about it. :o)

Join me at the blog parties listed on my sidebar. There is LOTS of great, creative stuff for springtime out there in blogland. Enjoy!

Friday, March 9, 2012

Absolutely Blown Away


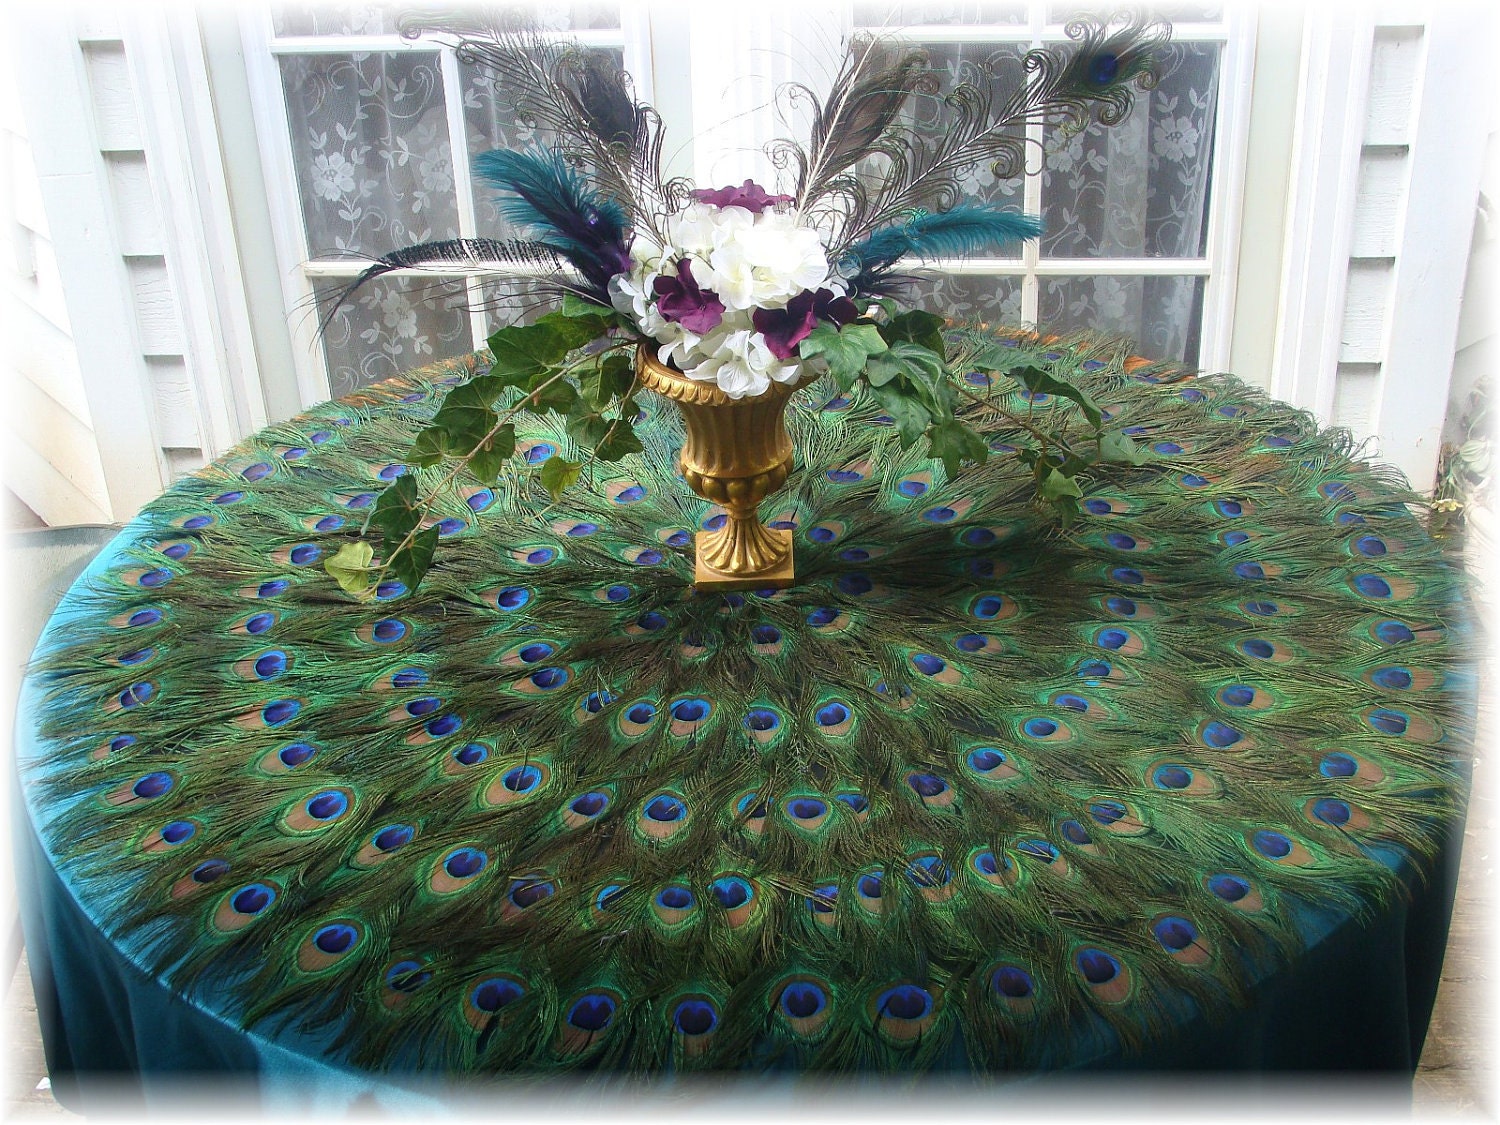
Ladies, I had a jaw dropping moment on Etsy today, and I just had to share. LOOK at this!


It is a round table topper made from peacock feathers! The creative artist is Shawna Chriestensen and her Etsy shop is called Ivyndell. She is based in Gresham, Oregon and I am absolutely giving her some free exposure, because her store is FULL of beautiful things like this. But wait, there's MORE.....


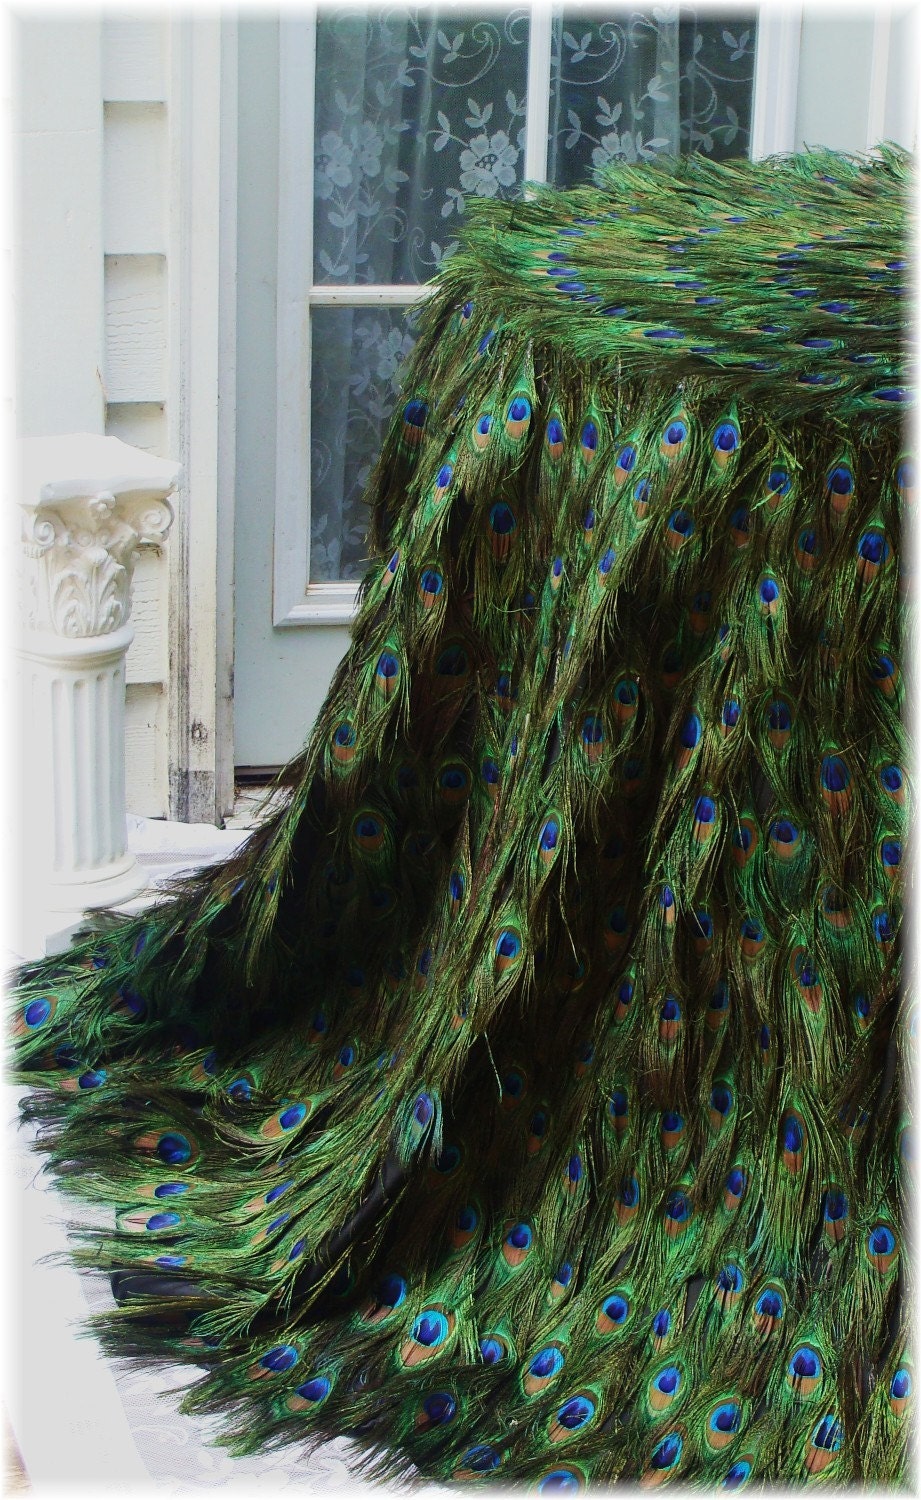
She also makes full, to the floor table coverings. I am almost speechless. Even The Welding Man was astonished at the beauty of these pieces. AND she does placemats, round centerpiece mats and MORE. 

 I do not know Shawna and I'm emailing her to let her know about this blog post. Go here to see her shop on Etsy....


Visit her shop and maybe give her some email love. I know I appreciate it when somebody emails unsolicited praise.

And here is Shawna's very sweet email in reply.


Hi Ann!

Thank you soooo much for showcasing some of my peacock feather creations. . . what an honor and I so appreciate your kindness. :-) 

I am such a newcomer in the wedding business and it was just two years this month when I started with a single peacock cake topper. . . and now 1100 weddings later, I am still overcome by the blessing of so many brides who have trusted me with their most Special Day.

So thank you again, Ann. . . I tried leaving a comment on your blog but I don't have a profile with any of those accounts listed. I've been working 16-18 hour days now for more than a year now so I rarely peek my head out of the Etsy Universe. My husband has been working with me full time for over a year now and one of our sons is helping too. . . so my goal is to start having one day off each week, YAY! :-) 

With love and gratitude,

Shawna


P.S. Your comments inspired me, knowing you have survived cancer and have been creating your own art and keeping up your own blog! Thanks so much again! :-)

Enjoy!

The Other Side of My Life


Does this sound familiar to you? You create/paint/recycle/sew/craft something you think is totally awesome and you send out a family email about it? That's what I used to do all the time and that's why I decided to blog instead.

My poor family, including the retired Lieutenant Commander and the active Air Force Captain, were getting crafty emails with lots of FUN DETAILS. And PICTURES. LOL, I knew there had to be a better way to get my creativity out into the world.

Hello world, anyone interested in what I'm saying?

So I started blogging to give the fam a break and share my creative side. I emphasize cheap ways to recycle, refurbish, re-imagine and rework items for your home. I feature lots of tutorials and try to post some useful and imaginative content every week. I'm always thinking how to provide interesting ideas.

Align CenterWho knew my post about making a cheap crackle effect with Elmer's Glue would be so popular?

http://makethebestofthings.blogspot.com/2010/05/crackle-finish-with-elmers-glue.html

BUT, my creative side and this blog are not my life. It is an important and interesting part and certainly loads of fun, but the most important side of my life revolves around my family.


We used to live hours away from our four kids and their families. (I must point out that our son has become a runner and lost 50+ pounds since this photo).


The ladies!


We drove thru ice and snow to get to the family Thanksgiving of 2010, when I was in chemotherapy. My daughter's house had a great kitchen and I didn't have to do any of the cooking!


We put our property up for sale with the plan to move much closer. This was our view from our front deck. It was a beautiful place. When I was diagnosed with breast cancer in October of 2010 the pressure was on to sell and move quickly. By the time I had surgery and a long regimen of chemotherapy we were lucky enough to find a buyer and make the move.


By the good grace of God we found an affordable house in the very town where our kids are living, and I was able to continue with my radiation treatments at a nearby cancer center.We bought our home at a GREAT discount. The kitchen is large with solid oak cabinets and the living and dining rooms are spacious. I have many many plans for this house.

And since moving here in April of 2011, we've hosted over 2 dozen family get togethers. That's right...two dinners a month for at least a dozen people and many times alot more.

Birthdays, anniversaries, Mother's Day, Father's Day, Easter, the 4th, more birthdays, more anniversaries, Halloween, Thanksgiving, Christmas, New Year's.....We LOVE it! In May alone there are 4 birthdays plus Mother's Day. And no, I don't do all the cooking, tho I do make my hot rolls for almost every get together.

PLUS.....


The grandkids helped move all my planters in time for summer and set up a beautiful display.

My son and grandson built us a brand new porch. We use it every day in warm weather. Now my grandson is teaching me to play Halo. I think I have a crush on Master Chief.

In the summer  we enjoyed the annual Festival and Classic Car Cruise with family and friends. We ordered pizza and had it delivered in the middle of the Cruise, lol!


Every summer we take a family vacation with all the kids and grand kids and friends....this year we rented a vacation house with its own private swimming hole. In years past we've rented houses at the coast or had a family camp out. Splitting the vacation rental cost works out for everybody. We take turns cooking and it is a highlight of the year.


In August my parents celebrated their 60th wedding anniversary with a live orchestra, good food, my sister singing and lots of fun. This is the family photo and we had several dozen guests, too. Then we hosted a Day After Party for the family crowd. Too bad my folks still live in another state, but someday we hope they move much closer. My sisters live within two hours drive. Yay!


For Halloween we decorated to a fare thee well and had a family wii night on October 31st. Who knew old videotape and cut up plastic tablecloths could look so spooky strung up like that?


Don't forget most Friday nights are Family Skate Night. Good exercise and loads of fun every week. Sunday nights are for the family Game of Thrones get together.

Last Thanksgiving we had two turkeys. One for dinner and one for sandwiches :o)


We had two Christmas celebrations for the fam. The second one was to accommodate my sisters' work schedule and a Bon Voyage party for my daughter's departure to join her Air Force husband overseas.

Two weeks ago we hosted a birthday party for our granddaughter's good friend, Britnee. We even made her an honorary part of the family. She's got a tee shirt to prove it!

Tonight is a family spaghetti feed and game night at my house. Come on over!

And in February we celebrated...

...our 41st wedding anniversary. Yup, The Welding Man and I have been together for a long, long time. We've weathered alot together and we just keep on sailing. We have certainly been blessed and we count those blessings everyday.

Speaking of blessings, I just received a clean bill of health for my first post cancer year as did my son in law.

So my creative blog is a hugely enjoyable part of my life and keeps the engine of my artistic energy stoked. And my family keeps the gears and pistons of my life chugging along in a positive way. Counting my blessings? You bet!


Posted by Picasa

Faux Moss Decor Balls


Here's a reworking of one of my favorite springtime projects...mossy decorating balls. Just a beautiful bit of emerald green for St. Patrick's Day!

The Dollar Store sells sheet, roll and loose moss, which is sort of olive green and dull grey. But they also sell foam rocks covered in fake emerald green moss. What a beautiful color and texture! This is exactly the gorgeous green of the moss on our Oregon mountain. So these faux mossy rocks worked out great for my next project...mossy decor balls!


I spray painted a large Dollar Store Christmas ball brown (2/$1 after Christmas sale. Score!) 


 Then, at my grandson's suggestion, I peeled the pretty green fake moss off the fake foam rocks. The moss won't all come off at once or in a clean piece. Some foam will stick to the back.


I hot glued the pieces to the ball. They are a little irregular and the pieces of foam that stick to the back gave them a few small bumps, just like real moss.


I really LOVE the way these came out!


I made two more with different size Christmas balls then had some fun arranging them in a vintage wooden bowl with a gorgeous piece of driftwood, creek pebbles and my favorite paper dragonfly. So pretty!


Just lovely on our coffee table with the morning sun shining across! See how realistic those moss balls look?


And then I put them in a different display and added googly eyes. Why? Because I could, and it made the family laugh. It probably also made them worried about me, lol!

The cost for these mossy decor balls is minimal. I figure $2 for the balls, $2 for 2 packs of fake moss rocks, hot glue and spray paint I had on hand and an hour or so of fun crafting. So $4 total? The googly eyes are in my stash, you never know where they'll show up next. Let's call this fun project $4 for 3 pretty decor balls that are perfect for  spring decorating. Gotta love that!

I'll be adding this post to the linky parties in my sidebar, come visit and see what's cooking out in blogland.

Book Page Christmas DIY

Most of you have figured out I am a color freak with an obsession  for turquoise, red and cobalt blue.  However, I also obsess about ...