Tuesday, October 22, 2019

Lighted Autumn Hurricane So Pretty!

                                      I scored this gigantic glass hurricane at a yard sale for $2.
                       It is 20" tall and 8" across at the belly with a wooden base. I love the size
                                          and how I can dress it up all year long. Plus, $2!! 
                                                          
                                                           That still makes me smile.


Last spring I filled it with vine balls, book page decor balls, driftwood, monkey's knots,
pine cones and my favorite green glitter dragonfly. I LOVE how it looked with a
few of my cobalt glass pieces.


So this fall I restyled it for Autumn. Now it is a lighted accent to my
Thanksgiving decorating.

I like it. I like it alot!


         I grabbed a garland and a short string of 50 lights from my stash....both Dollar Store buys
                     from years past. I twined them together and stuffed them into the glass. 
                                             The problem was, they all fell to the bottom and
                                                       left the top of the glass empty.


I took a dowel the same height as the glass and wrapped it in autumn paper to blend in. 
Then I wrapped the garlands and lights together around the dowel using florist tape to secure it in a vertical column. One the dowel is nicely decorated it was easy to place
 the hurricane glass over it and set it in place. 

It worked!!


I love how it turned out!

It looks stunning and really lights up any corner I put it.
Me thinks I need to keep an eye out for more huge hurricane glass!

Image result for makethebestofthings autumn lighted hurricane

I used the same trick in the tall pasta jar right next to it. 

Easy peasy and didn't cost a dime.

Gotta love that!


Wednesday, August 21, 2019

BIG Planter Water Saucers from Trash Can Lids

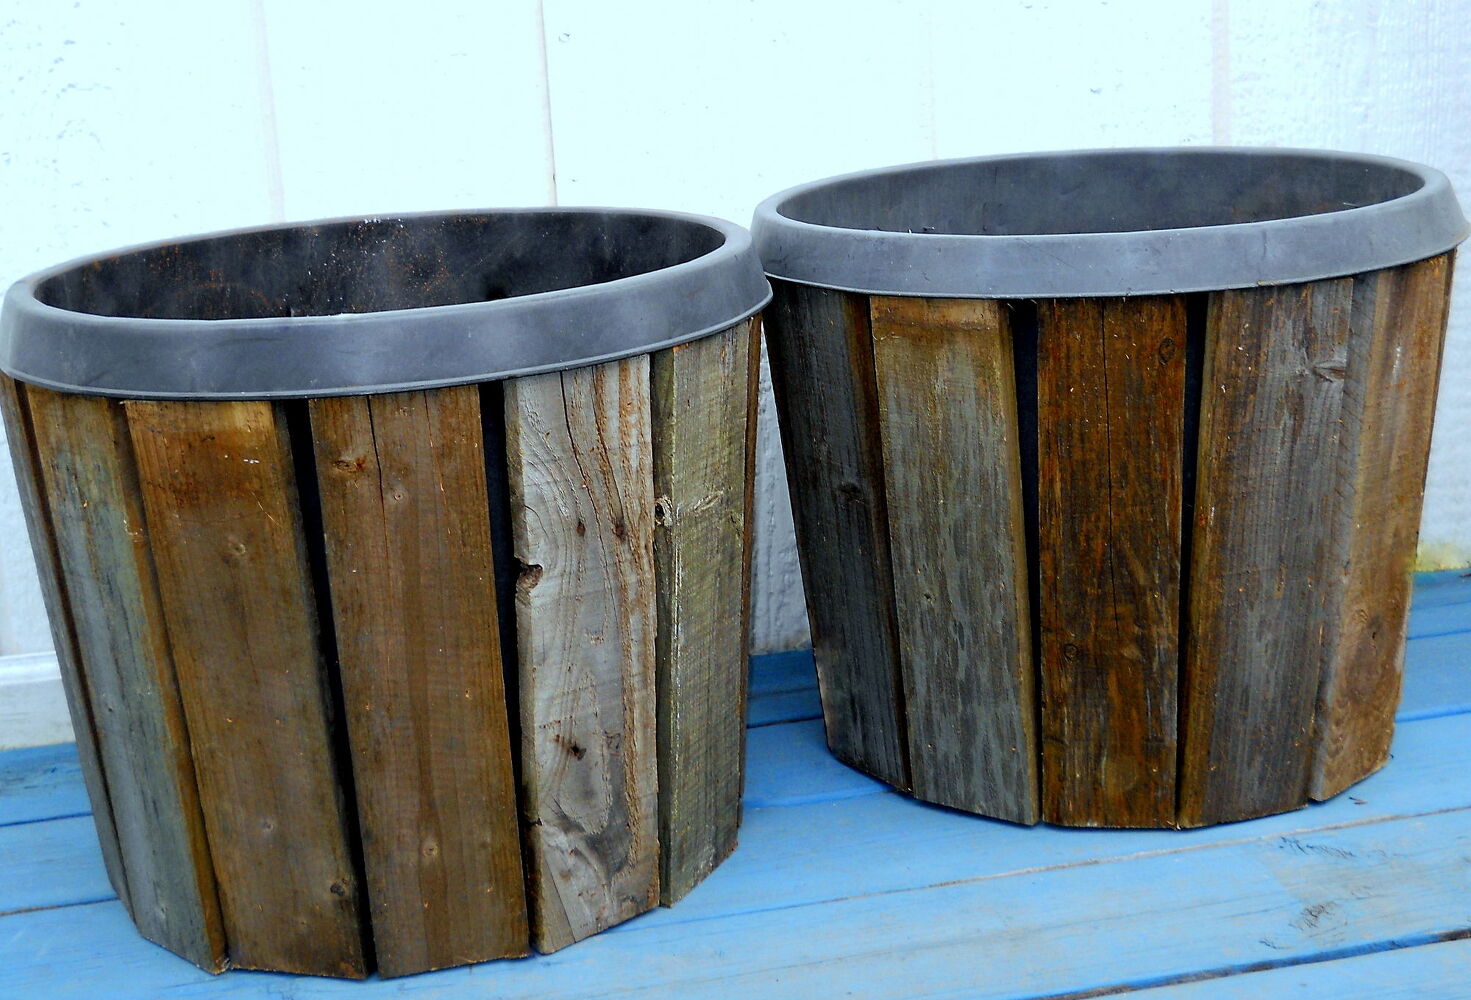
We make BIG planters for our yard out of plastic nursery tree pots 
covered with pallet boards. This pair are the 15 gallon size. 


The below pic shows a 25 gallon planter in the back and a 15 gallon planter in the front. 
I gave them a bit of house paint for color but let the rough wood grain show through.


But I couldn't find any plant saucers big enough to put under them until I saw
 two trash can lids in the garden shed. 
Yes folks, our garden shed holds lots of random stuff like that. 
Doesn't yours?


The trash can lids are the perfect size for these big 15 gallon planters 
and even bigger ones. I am so jazzed!


I filled them with rubber tire mulch to disguise their true origin, 
and they work like a charm!

Now I can water until I see the lids start to fill. No more over or underwatering, EVER!

It is an extremely cheap solution  and I am calling it a win win.

DIY Vinca Vine Wreath

As I was trimming the runaway vinca vines from my planters I looked at
 the handful of  cuttings and thought they'd make a great wreath.

I did a bit of curling and wrapping and added a few bits of florist wire 
and I soon had a pretty green vinca wreath.


But you know and I know that fresh and pretty green wreaths won't last very long. 
I set it aside to dry for a few weeks.

When it was fully dry and brown and crinkly and NOT green anymore,
 I assessed what I would do with it. 

Hmmmm. 

Spray paint couldn't do any harm and it might make it look pretty good.

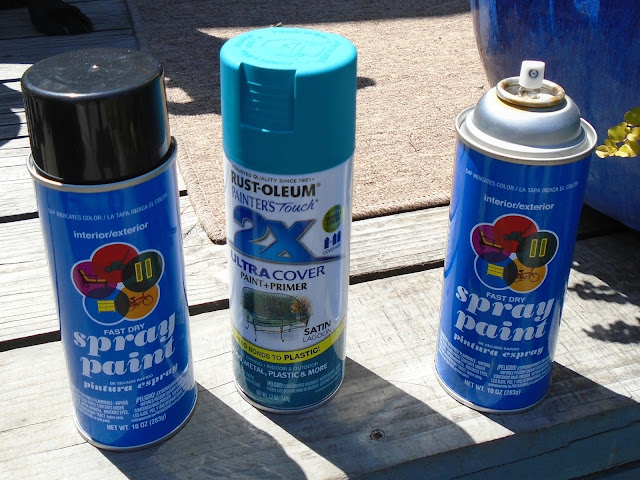
Where's that can of Rustoleum Lagoon?


Oooh aaah!

Not brown anymore! Now it's pretty and perfect for this little fence in my garden.
I love how it looks against all that rough wood grain.
As you can see I didn't paint it thoroughly, just gave it a few swipes of color.

Image may contain: plant, flower, outdoor and nature

I'm going to leave it out there over the winter and see how it does. 
Even if it doesn't last it's a pretty and eye catching bit of art in my yard
 that was simple to make and didn't cost a dime.

You can bet I'll be saving ALL my vine clippings from now on. 
I foresee lots of pretty little wreaths in my gardening future!

Zero Dollars To Make a New Fountain For Our Deck!


We've always had a fountain on our deck, not only for the beauty and the 

sounds of it, but for the grand babies to play in.


But this little fountain is past its prime.


We took it apart to see what we could salvage and found the pump is in perfect working order.
 All we needed were containers and a platform for a 
new little fountain.....hmmm.

Time to check the garden shed for what we already have.


I bought these matching plastic planters because they looked like wood. 
They don't have any pre drilled drain holes so they seem exactly what we need. 
We stacked them on top of one of my five gallon bucket tables 
that has a  microwave dish top (covered with pretty pebbles stuck on with GE Silicone II)

 It's a perfect solution!


 The Welding Man drilled the overflow hole and added a short pipe fitting. 
We added water, plugged in the pump...
and VOILA!

I dug up clumps of creeping jenny from the yard and planted them in little pots. 
We wired them to the fountain  and would you look at that..
an almost instant pretty deck fountain that did not cost us a dime!


We'll have to drain it for winter, of course. 
But these plastic tubs won't spring a leak like the wooden buckets did
 and we hope they'll last for years. 

This is my favorite kind of project...a bit of finagling and recycling what
 we already have to make something brand "new."

I call that a win win!

Tuesday, June 18, 2019

Flower Planter Thrift Store Chairs Two Ways!

Here is my original wooden chair I turned into a flower planter. 
I LOVED IT!
But it only lasted two years since it was an indoor wooden
 dining room chair and fell all to pieces.

Image may contain: flower, plant and outdoor

So this year I kept my eyes open for METAL chairs to use in the garden and 
LOOK!
I scored 2 of these beauties, both powder coated steel!


The seats are plywood and easily removed. I saved the plywood pieces for more projects.
I spray painted one white and added my "Green Man" sculpture to the chair back.
 Pallet boards fit make a sturdy shelf and a planter and saucer
 from my stash made this project easy peasy and pretty!


The second chair has a different look with Rustoleum spray paint in "Lagoon." 
The circular piece is from a broken hose hanger. 
A pink miniature rose fits right into the chair opening.


I decided to replace the planter of roses with some colorful annuals. A quick trip to the Dollar Tree got me a dishpan and a tray that fit the chair nicely. Pallet boards provided
 a sturdy shelf and here she is, newly planted with colorful annuals. 


Two metal chairs, two different looks. And the best thing is,
 they only cost $4.99 apiece!

Gotta love thrift store shopping for garden projects!

DIY Solar Light Hanging Planter Pole

I saw a planter pole with a solar light on top and knew I wanted one for our yard.

But I didn't want to spend over $120 for one with only two hangers
 and a mingy bottom planter. So, we built
 one ourselves and saved almost $100!


Here's the finished project. A solid 6' tall post with four metal plant hangers and a cool solar powered light on top. It's anchored inside a 25 gallon planter and it came out even nicer than I pictured!

        And here it is pictured below at night with the solar light glowing.
 So pretty!


Here she is below all loaded up with hanging planters and flowers in the bottom tub. 
We painted the pallet boards we attached to the bottom planter and 
also put up a pallet board fence topped with pickets 
(and a butterfly!) right there in her corner.


Here she is ready for her test run. Already she has a classy silhouette. 
The Welding Man made the hanging hooks for this.


And...progress photos below. The solar light installation and the
 planter positioned in the flower tub.
Below is the solar light and the thrift store porch light The Welding Man deconstructed
 then restyled into the top solar light. You can see what he kept and what he tossed.
It turned out GREAT!
          
             
Oooh ahhh, we love it!


Here's the supply and $$ breakdown for this  easy project....

Pressure treated 4" x 4" post cut off at 6'...........................$14
25 gallon tree pot................................................................ $6
Solar light ............................................................................$6
Thrift store porch light..........................................................$3
Four plant hangers, on hand
Pallet boards, on hand

This project turned out so well and was so inexpensive we are going to make another one!

Sunday, April 28, 2019

Save The Books! DIY a Fake Book Box


I saw a project on Pinterest where a crafter cut apart actual good books so she could glue the spines
 to a storage box. She chose the books for the look of their spines.
To be clear, I've cut up and recycled books when they are
 so decrepit that they won't hold together for reading
 but it makes me sad to see readable books destroyed..

BUT,
 truly do like the idea of some nice book themed storage,
so here's what I came up with. And NOT ONE book
was destroyed in the creation of this project!


Ooooh aaaaah!
And here's the best part....I didn't need to buy anything to do this project.
 I already had everything on hand and you probably do, too!

Here's the list of materials you will need-
A good sturdy cardboard box that will fit your shelves.
Inside rolls from gift wrap, paper towels or toilet paper, depending on your box size.
Hot glue
Tissue paper or printed napkins for texture.
Mod Podge.
Craft paint.
Sharpie marker.
Spray sealer.

Cut the cardboard tubes into roughly thirds. Flatten slightly so that they measure about 2" across. These will form your faux book "spines."


Measure the height of your box. In this photo I've covered the box with crumpled tissue and painted it white.

Cut off the flattened tubes to the correct height. At this point start fitting your  spines across the front of your box. Cut some narrower to make the design more interesting or you can keep them all the same size, it is up to you!


Use hot glue to make dimensional stitching and decor across the fake spines. Look at photos of old books for spine ideas.  You can also add other designs with the hot glue, such as  fleur de lis, capital letters or numbers.


Tear the tissue or printed napkins in small pieces and crumple up tightly then smooth out. Spread  Mod Podge on the spines you have made. You can paint the spines or cover them with printed paper as I have done.


Hot glue your finished spines to your chosen box. Remember not to glue them down flat but leave them a bit curved for the realistic book look. Here are two of my book spines glued to the box. As you can see I ended up painting the box black on this side so if it showed between the books it would blend in..

Cover the sides of your faux book storage box with glue and crumpled tissue or printed napkins to match the books on each end. Smooth with a soft brush but not too much, as the crumpled tissue will tear. It will give you a wonderful antique texture so it's worth it. Let dry completely.

I

 Dry brush the edges and spines black contrast color sparingly until you get the look you want. If you get too much on your project just wait for it to dry and do a coat of white over it to tone it down. I was totally going for a vintage look with my books.

You can use the Sharpie to add more details if you wish. 

 Ta da!

Look, you've made a clever storage box for your shelves that looks like you've collected
a set of antique books! You can also choose to make your book box
look like a set of matched books. It is entirely up to you.

Friday, April 19, 2019

Pallet Boards and Nursery Tree Pots = Vintage Style Planters on a Budget!

Gardening season is almost here and I was eagerly looking for some big vintage style wooden planters for my garden.

Dang! Big planters are SPENDY!

So look what we did...


Here's our solution using FREE wood salvaged from pallets and really cheap tree pots from our local nursery.


This 23 gallon planter is 24" across and 14" high. It was only $6 and
 it is plenty big enough for loads of flowers or veggies.

But yikes! It was ugly.


But here it is NOW.

Oooh aaaah!

It has just the perfect vintage vibe I was hoping for!

Look at this lovely FREE wood we salvaged from old pallets. 

We did not have to pull the pallets apart. Some of them were already falling apart and the others we just cut between the support boards. Two old pallets gave us got plenty of lumber pieces long enough for this project. 

Ahem. The Welding Man cut them to length with his big manly saw.

The boards are a mix of fir and cedar and have not been chemically treated, so the sawdust was not a hazard.


For this project we decided to go under the rim around the top of the planter. We laid out a few boards  and marked them before cutting off any of the ends that had nails sticking out.


Laying the planter on its side, we fastened the boards with a slight gap between them at the top because of the angle on the pot. We totally eyeballed the spacing so it isn't perfect. Then we used my favorite power tool of all time...the handy dandy air powered brad nailer.

 Kachunk! LOVE that brad nailer!


Ahhhh! Loving how this project is coming together As you can see the brads are sticking through to the inside of the plastic. The ends are easily bent down by hand or with a pair of pliers. If you cut them off you lose some of the fastening power of the brads and the boards could come loose.


The cost for these two vintage style beauties? $12 total for both of the pots. The pallet wood was free and we already had the tools and the brads.

We didn't even have to sand the boards!


I like them alot! 

Tomorrow I will do a  bit of dry brushing to the boards with the turquoise blue paint from the deck and maybe a bit of white. Don't know yet if I want to paint the black rims at the tops. I'll let you know and post photos if I do.

Don't you love it when an idea becomes a project and it works and it's just so darn CHEAP?


Wednesday, April 3, 2019

I Spray Painted My Outdoor Rug

So...here's my front deck in the middle of the warm weather fix up. I spray painted the plastic chairs a bright turquoise and found a boring tan rug for $20.
Good start.


I figured I could paint that blah rug as so many others have done on Pinterest, Hometalk, Design Sponge, Apartment Therapy....

I thought maybe multicolored stripes....or chevrons...or a pretty paisley stencil...or even FLOWERS!!! 

But what?
All of those ideas require precision measuring, detailed 
placement of yards of painters masking tape and hours of work.

That's enough of that noise. 
I figured I had two, maybe three days of really nice weather 
for this project but no painters tape or pretty stencil.

So today I just went for it.


What I DO HAVE are a 16" pizza cardboard, a Dollar Store plate and a leftover saucer. 

Hmmmm, the idea is coming together.


I also have cheap Walmart paint in flat black and white
 PLUS the bright turquoise spray paint I used on the chairs.


I figured, just do it.
It's a $20 rug. 
At least it won't be boring anymore.

Here's a tip-wipe the edges of the saucer and plate
(or whatever you choose to use) after each spray
 to avoid getting the wet paint from a previous color making
 a "drip ring" on your work.


Hey, I like this alot!


This is not chocolate pudding, ice cream or cake batter. It is craft paint to 
touch up the brown spray paint which disappointed me. 

But hey, I still like the way this rug looks!


No more BORING tan rug!


This was quick and easy and turned out even better than I pictured in my head!

And I didn't have to spend a dime for this project since I had everything I needed already.
I call that a win win!!


Book Page Christmas DIY

Most of you have figured out I am a color freak with an obsession  for turquoise, red and cobalt blue.  However, I also obsess about ...