Friday, February 22, 2013

Red Velvet Chair Cover or Hello, Downton Abbey!


See the oh-so-dusky pink throne chair hiding under the red throw? I snagged it at the end of a yard sale last summer when the weary yard sale guy sold it to me for $7 instead of the $20 he was asking.  Score and I'll take it!

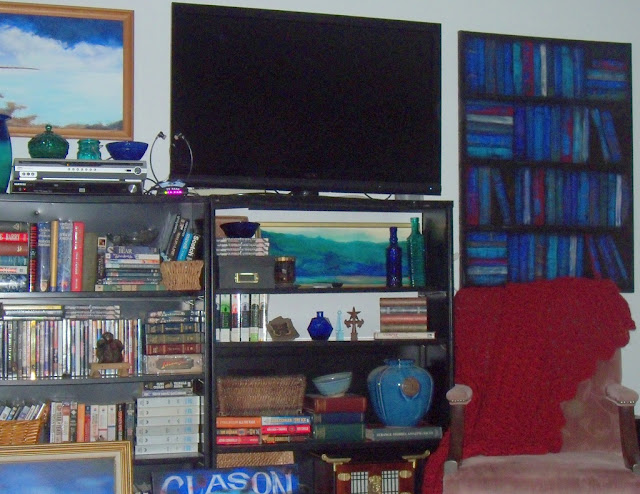
It is sturdy and well made with a label saying it was built in 1965 in Virginia. BUT, as you can see, it was PINK.  Pinkish mauve and not a color I have anywhere in my house. Here it was in my living room as I continue trying to style that space. 

Yeah. Pink.


I thought originally a denim slip cover would be a neat option to pick up all the shades of blue in my paintings and the shelves.


Yeah, maybe not.
I wasn't real thrilled with the too casual look of the denim tho I may still use it in this room.

Then, as I was indulging my Downton Abbey habit I saw the drawing room furniture....in red velvet! Including a throne chair that was a close cousin to my budget buy.


Inspiration!!!


Oooh aaah! Love it!

Have I mentioned I have a huge fabric stash? Just let me repeat, I have a huge fabric stash. And in that stash I found 4 yards of plush red velvet. The real kind that isn't shiny and doesn't crush and feels like soft brushed suede to your hand and was given to me. Le sigh. I had to start at once even tho it was 10 o'clock at night.

Don't judge. When an idea strikes I have to seize the day, as it were.

Carpe Craftem.


I used a soft touch staple gun for most of the work and if you don't have one for your craft projects you are working too hard! For less than $20 you can save your hand, wrist and arm alot of wear and tear. I borrowed Insanely Creative Christy's stapler and now I have to get one of my own.

I salvaged most of the upholstery tacks and straightened them out and used them, but I'll be replacing them with new ones the more the misalignments get to me and make me itch.

I threw the turquoise pillow on there and like chocolate mint chip ice cream, it's a combo that I love, so it's staying. I'm a looking for some afghan yarn in that turquoise color for my next project.

Basically I'm just sharing this with you since there are oodles of online bloggers who are total furniture recovering experts. Truly masters at their craft and generous in sharing their knowledge. Also, fearless about using expensive imported French linen, yikes.

This project is right up my alley. A freakin' steal of a good buy at a yard sale, an open mind and eye for inspiration, coupled with a no dollar cost except for extra staples.

Ahem. Just a note, be SURE to cut your fabric pieces plenty large for the area you are covering. Don't ask me how I know but let's agree that I'm glad I had so much velvet on hand. Just sayin'.

And I have velvet left over to make a gorgeous red pillow for the couch. My living room isn't lush like Downton Abbey's but it's mine to decorate as I wish. Gotta love that!

I'll be joining some of the parties listed on my sidebar. Come visit and discover some really creative projects.


Paint Fabric to Match Your Decor


Have you ever had an idea in your head for a decorating project and just could NOT find the right fabric to make it work? Here's a quick and clever solution. Paint your fabric to match your project! Yup, I did it and here's how.


When I redid my master bedroom in turquoise, brown, black and white I already had the comforter and some matching sheets but even with my huge fabric stash I just could not find the right color of turquoise for pretty pillows. Aargh! I wanted to make those pillows NOW! I could have gone shopping but there was no room in the budget for pillows. The REAL budget laughs at the concept of a pillow budget and would give it a wedgie if it came close. But I DID find these fabrics in my craft room......


I love the brown and white print and bought all they had when I found a sale for $1 a yard. I am an absolutely sucker for a fabric bargain! The teal fabric is a standard Walmart flat sheet, and I bought it because for $5 you get several yards of usable fabric. (Here's a hint-at Halloween WM has single flat sheets in BLACK for $5. That's enough for lots of Halloween projects right there!) And the embroidered white on black fabric was a remnant, but a big one, almost a full yard. BUT the two prints were not the right color. Soooooo....


.... I painted my fabric to match my bedroom! 
I was so excited how well this worked that I insisted that The Welding Man come look and feign enthusiasm! Hey, don't tell me you've never forced your hubs to "appreciate" your projects, lol!

 I experimented a bit with remnants and found a look that I liked and so I went to work. First I chose  craft acrylic paint in turquoise and watered it down to a skim milk consistency. Then I sprayed each fabric piece with water to dampen it and with a paintbrush just touched into the paint I then touched the brush to the fabric. The cohesion of the water in the brush to the damp fabric just drew the color into the threads and it was easy and fun to do. 

I actually laughed out loud as I was doing it cus it was coming out so cool! Since the paint is so thin, the fabric takes the color without getting stiff. No, I did not add fabric medium.

 I LOVE the watercolor look on the white and brown fabric, much better than a solid teal dyed background. I even sprayed it with water before it was dry to increase the pretty watercolor look. On the embroidered pillow I only colored half the embroidery so the pillow is half teal and half white stitching. It looks very much like a custom job. Oh wait, it is a custom job.

Once the fabric was dry I ironed the backside to set the paint. And yes, these covers are washable and the color holds true. Love that!


I made a pretty pin tucked pillow from that Wal Mart sheet following online tutes and I am pleased as punch with the way it turned out. It's a nice textured punch of color to go with my painted pillow covers. Score!

My total cost on this project was minimal but let's break it down...
brown and white fabric @ $1 a yard less than $1
white embroidered black remnant @ $1 less than $1
WalMart flat single sheet for $5 less than $1.00
(I have enough fabric left of all of these for more pillow projects)
Craft paint on hand zero extra cost
old pillows stuffed into new pillow covers zero
So total cost was less than $4

 Even the REAL budget condescended enough to give the pillow budget a nod of approval. And now since I saved so much getting the pillows I wanted I can take my teeny tiny budget and hit thrift stores and yard sales for neat accessories!!

Sharing this on the parties in my sidebar. Come check them out and find some truly Pinnable projects!


Book Page Christmas DIY

Most of you have figured out I am a color freak with an obsession  for turquoise, red and cobalt blue.  However, I also obsess about ...