Showing posts with label Dollar Store glass gems. Show all posts

Saturday, May 23, 2020

Glass Garden Balls DIY

By special and numerous requests, here you are, the tutorial for my glass garden balls ....originally posted in 2013!


My blog header shows my love of cobalt blue glass
 and I've added that love of blue glass to my garden art.


Years ago my family got me a big blue gazing ball for my 
daisy flowerbed and I knew I wanted more, more, more! 

But hey, those gazing balls are not cheap and they are surprisingly fragile. 

Basically they are just giant glass Christmas balls. 
And they break if they fall over.What to do?


My first idea involved a bowling ball and lots of glass half marbles from the Dollar Store. 
I got this idea from the Garden Junk forum over at Garden Web.

 I used Silicone II adhesive and  did a bit at a time, only glueing the gems
 on top and let the adhesive dry a bit the turning the ball and doing another little area.

 If you try to do the sides the gems will fall off before the adhesive sticks well, so slowly slowly.

 I LOVE how this came out!!! 

The bowling ball cost me $4 at a thrift store and I used about 6 bags of glass marbles.
The Silicone II cost $4.

 My first blue glass garden ball for about $14. I was hooked!


I snagged this round glass light fixture for 25 cents and knew it would be my next ball project.
 Dollar Store half marbles and garage sale finds gave me the blue glass I needed.
I decided to go with this Amazing Goop silicone adhesive because it was CHEAP.
 It is basically the same formula as  the Silicone II. The total cost on this 
pretty ball is less than $10.


This is definitely an OUTSIDE project since all the glues I've mentioned are incredibly smelly. 
Even outside I have a fan blowing across my work area to avoid the fumes. 
I settled on my front porch and started gluing. Put a small blob of glue on each
 individual marble, you do not have to goop it on. Smear a layer on the topmost 
area of your big ball and put your marble in place.

 I twist them a bit to make sure they stick together.


IMPORTANT! 

The adhesive does not set up instantly so you will have to do small areas
 of your ball and let it dry for several hours then turn it over to do
 the other sides. If you go too fast and  skip this step  you'll have
 glass marbles falling off all over the place! 

In this project patience will reward you with a beautiful art piece.
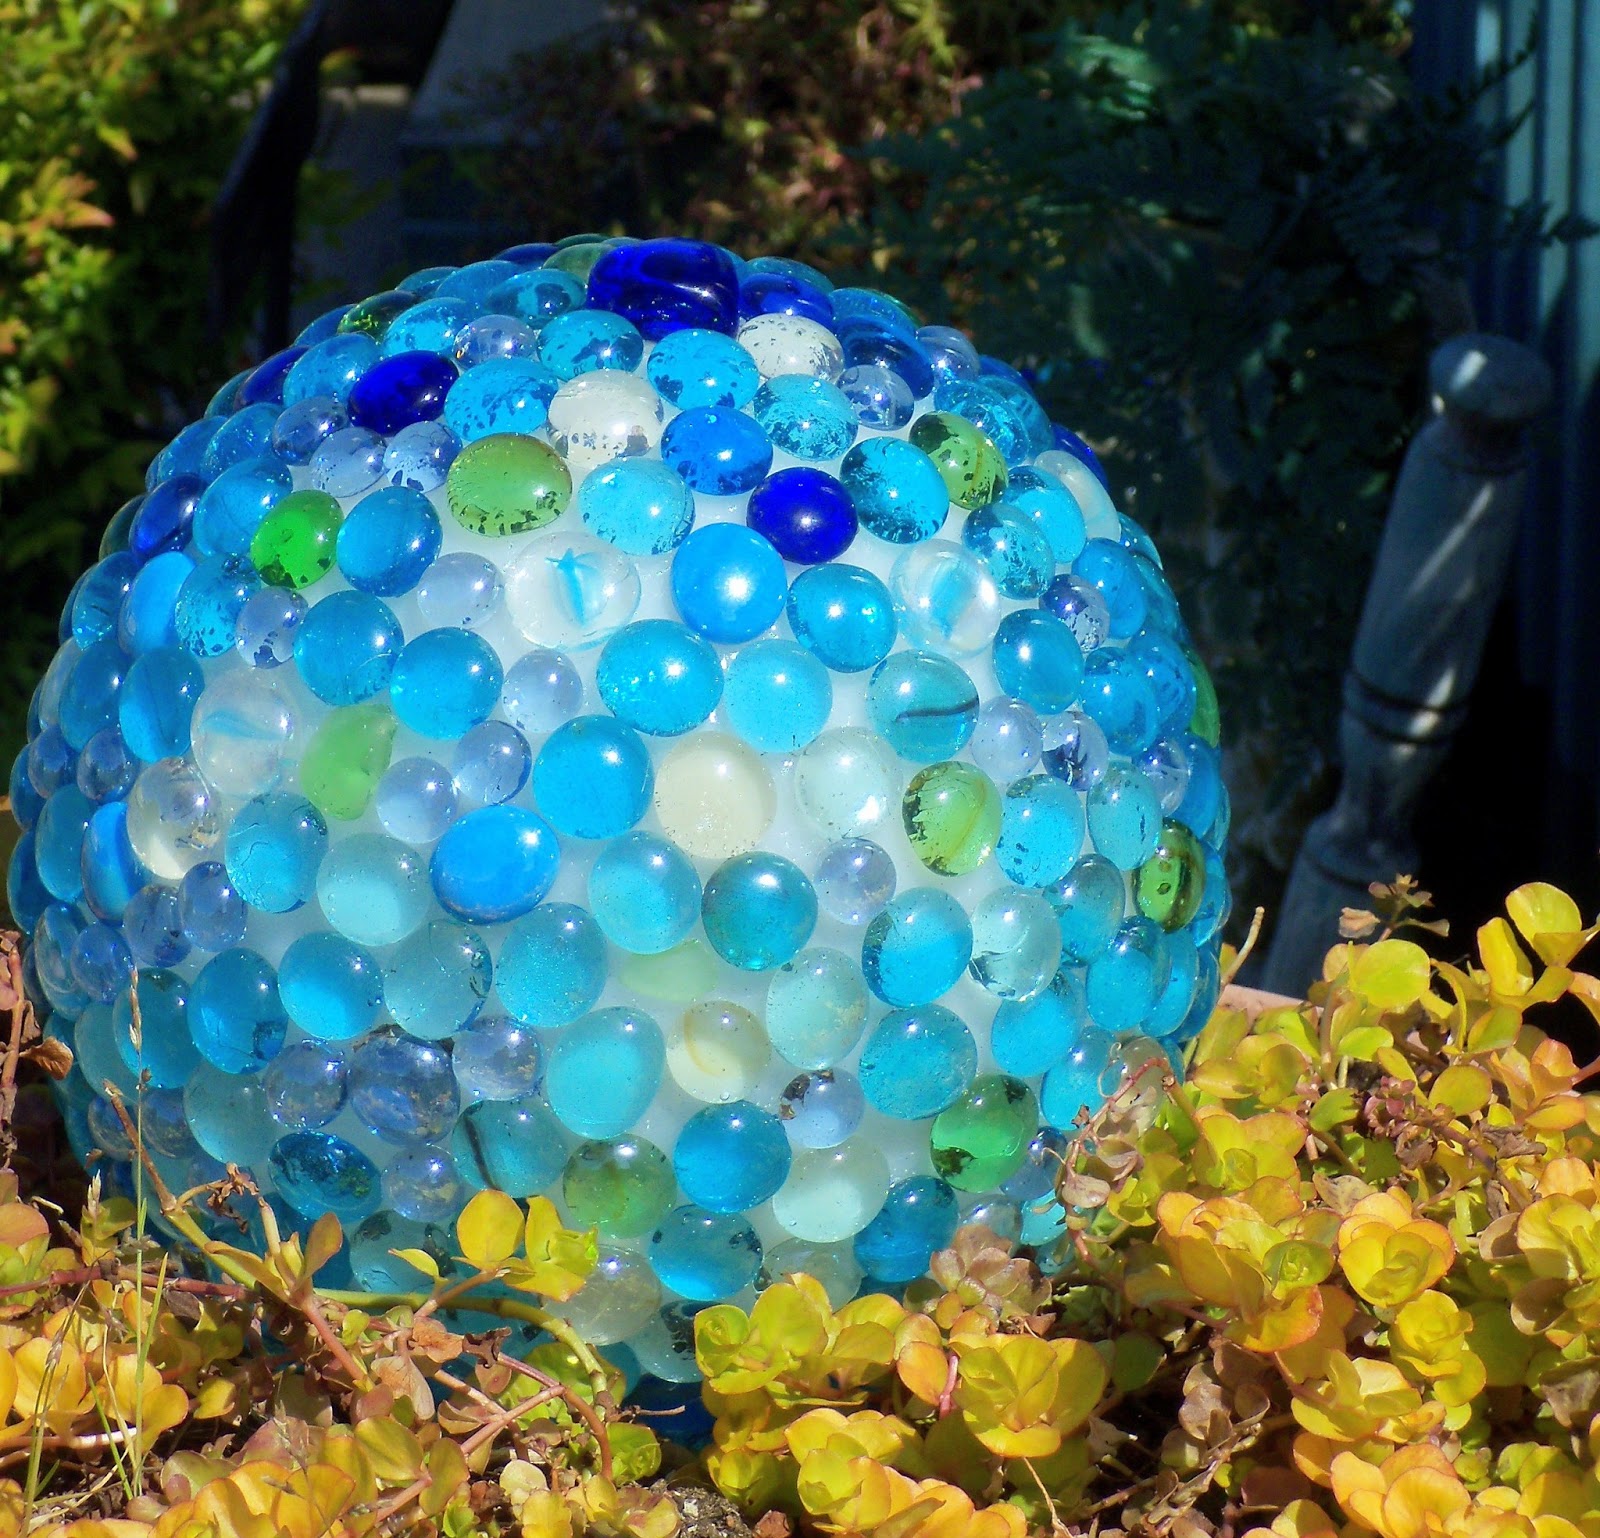

And done!!


Here she is (of course she's a lady! LOL!) nestled in a soft bed of creeping Jenny. 

A hot pink petunia will join her soon.

 I love the bright blue glass against my blue deck railings and house color.


Oooh ahhh!


And here is the first bowling ball I did 20 years ago!

 She's looking pretty good for her years.

Since then I have glued glass gems to lamp gloves, plastic Christmas balls, 
styrofoam craft balls, soft balls, plastic balls from Dollar Tree and even a hampster ball!

I am always looking for more round balls to decorate for my garden!

Monday, January 27, 2020

Five Gallon Bucket Table With Blingy Blue Top

You know the drill by now. I wanted something but didn't want to spend any money. 
In this case, a nice little side table for our front deck....just a pretty little place to put things when we're sitting out there visiting or enjoying the sun.

I knew we had to have something in all of our stuff that I could use for this project.
Heeeeyyyyy....

We have a stack of five gallon buckets in storage. Sure, they smell like pickles but 
they are free and they are also the perfect height! In this case, 13" tall.


Here is the spray paint I keep on hand for our plastic patio chairs that are still sturdy and I am too cheap to replace. Painted this beautiful turquoise blue they even look good. 

The bucket is now Lagoon blue. And soon the boards will be, too.


Pallet wood scraps, baby!
I knew if I rummaged around enough in the scrap barrel I'd find enough to cover this bucket.
Yeah, they look rough but they're scraps and they're free and it was starting to get hot....

Okay, used air nailer to attach boards to bucket. Easy peasy.


Checking the kitchen I found this 15" microwave plate under the counter. We've never had a microwave large enough for this plate so I must have bought it at some point,
 but hey, serendipity! Perfect for the table top I have in mind.


Yeah, I have a stash of blue gems from the Dollar Store and thrift stores and yard sales. Don't judge me, I use these all the time! Shhh, they're pretty and they're cheap and perfect for this next step.


I laid them out in different ways and decided I liked the random look. I used a caulking gun and that tube of silicone sealer and added a small cookie sized blob of silicone in each area of the plate and smooshed each glass marble into the blob, giving each one a twist to seat it. In a bit I was looking at.....


A five gallon bucket table with a blingy glass top! 

I made this photo all gauzy and glamorous on purpose. Because I'm not quite sure if the style
 of the top goes with the style of the base, even after I painted the base turquoise blue.

Hmmmmm.


Look! All's well that ends well! The silicone dries clear and makes the glass marbles look like they are surrounded by water.

This pretty little FREE table is perfect for the purpose I had in mind. With a bit
 of ingenuity and time and a bit of work, I now have a blingy blue glass table for our front deck. Not only is it FREE, but it is totally waterproof and can stay outside all year long. 

Plastic bucket.
Reclaimed pallet boards.
Silicone sealant.
Blue glass gems.
ALL totally weatherproof.

I am calling this a win win, even if I'm not completely satisfied that the top goes with the bottom. But I've got a few ideas, and a few more five gallon buckets, to try and change things up.

Stay tuned!!

Here's my second table, so pleased with it!


Book Page Christmas DIY

Most of you have figured out I am a color freak with an obsession  for turquoise, red and cobalt blue.  However, I also obsess about ...