Sunday, February 21, 2016

Vase Repair with Wallpaper? Yes!

THIS is what happens when you drop glass marbles into an empty vase.


It was a gift and I wanted to save it but I certainly couldn't use it with that ugly Gorilla Glue
 repair job.


 So I dug into my craft stash for some textured wallpaper and a bottle of Mod Podge.


The Mod Podge worked very well to stick the wallpaper in place. The paper is thick and heavily textured as you can see.


Voila!

 Here is what the rescued and repaired vase looks like today!


Here she is in her place of honor. She holds dried arrangements very well. I don't want to risk filling her with water and ruin that pretty textured paper.

Wallpaper made this a quick fix and a pretty one.


That's a win win in my book!

Felt Bird Pillows...and More


I made these bird pillows for my sister for this last Christmas. I like them alot. And most importantly, she likes them, too!


I make them using felt appliques and loads of freestyle sewing machine embroidery stitching on cotton canvas.


I've been making felt applique pillows for a while now as gifts for new brides, housewarmings and birthdays.
Once I decide on a design and the shapes I cut the pieces from brightly colored felt and sew them on the cotton canvas pillow tops.

 I've also made a few for my own living room, since I LOVE bright colors in my house.


These are the first pillows I've made with bird shapes and the design and execution were challenging but also fun!


This fat chickadee is made of white, cream, grey and black felt with loads of machine stitching in shades of yellow, gold, a little orange, white, grey, black and cream. His bright eye is a glossy black metal snap.

The leaves and tree branches are all sewn with black thread.


This handsome goldfinch is made of layered felt in yellow and black with machine stitching in yellow, gold and white. His eye is also a black metal snap. I've embroidered the leaves and branches with black thread.


I was so pleased with the bird designs that I tried out a brand new fox pillow. I LOVE the way he came out!

So with the bird pillows, fox pillow, wreath pillows and tree pillows I completed gifts for my parents, sisters and niece and I had fun doing them.

Now the fam insists I list some of these designs in my Etsy shop and you know what? I guess I will.

Have an idea for a design with felt? Try it out yourself or even message me. I'd love to see if I could make a new design in felt appliques!

Dollar Store Toy Gun to Steam Punk Halloween Pistol


For Halloween I made a complete Steam Punk outfit for myself and had a lot of fun at our family party.

I restyled a plastic water gun from The Dollar Store into this steam punk gem and had a good time doing it!


I knew I wanted something that looked authentic in the Steam Punk style, so I started out with this orange plastic water gun on the left.

Then I spray painted it with metallic silver then gold.


The plastic is easy to cut, so I removed the curved trigger guard with a pair of wire cutters.
Next I used  Rub 'n Buff in gold and silver, plus the two Folk Art craft paints in metallic copper and burnt umber. 


I dug into my craft room stash for all kinds of fun additions like sewing snaps, curlicue scrapbook embellishments and a piece of faux leather fabric for the handles. I kept adding the metallic accents as I went along to make the whole thing look vintage and used.


 I painted a necklace chain with the metallic paints and rubbed on burnt umber to age it, then wrapped it around the end of the barrel. I used hot glue to attach most of the embellishments and Tacky Glue for the paper items. 


In the end it was a fun grown up prop for the party and didn't look anything like the orange toy I started out with. I'm thinking I could do this with other Dollar Store items for a cool Steam Punk look. I'll post about those projects when I do them.

This would even be neat for a costume for Comic Con...perhaps with a nifty looking fake holster?

We'll see.


DIY Zen Stone Stacks


Whenever we go on vacation I make these zen stone stacks and take photos for some pretty memories.


Pin It
The trick is to find compatible stones that have flat surfaces and balance. This is a fun project to do with the grand kids!


None of these stacks are permanent and probably are knocked over as soon as we leave.


So when I get home I wanted to preserve that vacation vibe with some zen stone stacks for my own master bath.


I brought home a whole bag of flat rocks in different sizes and stacked them up. Here they are next to a succulent terrarium made for me by Insanely Creative Christy.

 So pretty!


So zen.

But I wanted these stone stacks to be PERMANENT. 

Well, that's so easy to do with stacking stones and a tube of E6000 adhesive!


This glue is specially made for glass, stone, metal and jewelry items. It is strong and easy to use but it is really smelly. Be sure to use it in a well ventilated place, like outdoors.


This year I'm going to make some of these stacks for my deck garden.

I'm trying out some miniature bonsai trees and they would go perfectly together.

I'll post about it here when I do!

DIY Gift - A Coffee Bean Photo Holder

I try to make almost every gift I give throughout the year, whether for birthdays, weddings, showers or Christmas. I am always on the lookout for items I can use and things I can make. 


Like this cute photo/note holder that I made for a "Coffee Lover's" basket this last Christmas. And unlike other cute, crafty gift items, this one will actually get used to hold a photo or a note every day, either on a desk or next to the coffee pot.


When I am browsing my favorite thrift stores I always have a list of ideas and supplies in my hand so I can make some unique items.

Fortune favors the prepared mind. Look at all the good stuff!

Ahem.


On this trip I found several white espresso cups. They are thick and have a bit of weight so they were perfect for this little project.

I bought a scant 2 ounces of loose coffee beans and made sure to discard the broken or cracked ones.


In my stash at home I used florist foam cut to fill the little cup to the brim and used hot glue to secure it at the bottom and sides.


Here is one of the staples of my supplies stash - plain old black wire from the hardware store. It is listed as "rebar wire" for securing metal rebar rods for strength in concrete projects. It is inexpensive, pliable and very versatile. It does have a dark powderish coating so I usually spray paint the pieces black when I use it.


For this simple project I cut a piece about 12" long and made one end into a flat curl. This will be the photo holder. I "eyeballed" the curl to get the right proportion to the cup.  I left about 2" straight at the other end to stick down into the florist foam inside the cup. I secured that wire with lots of hot glue.


Now comes the deliciously fragrant and satisfying part of this project. Start gluing your coffee beans around the top of the cup and onto the florist foam. You can overlap the top edges as I did or keep it all inside like a "real" cup of joe. Keep on piling and gluing until you have a satisfactory heap of beans in your little cup.

You can melt the stray strings of hot glue with a heat gun or even a hair dryer. 

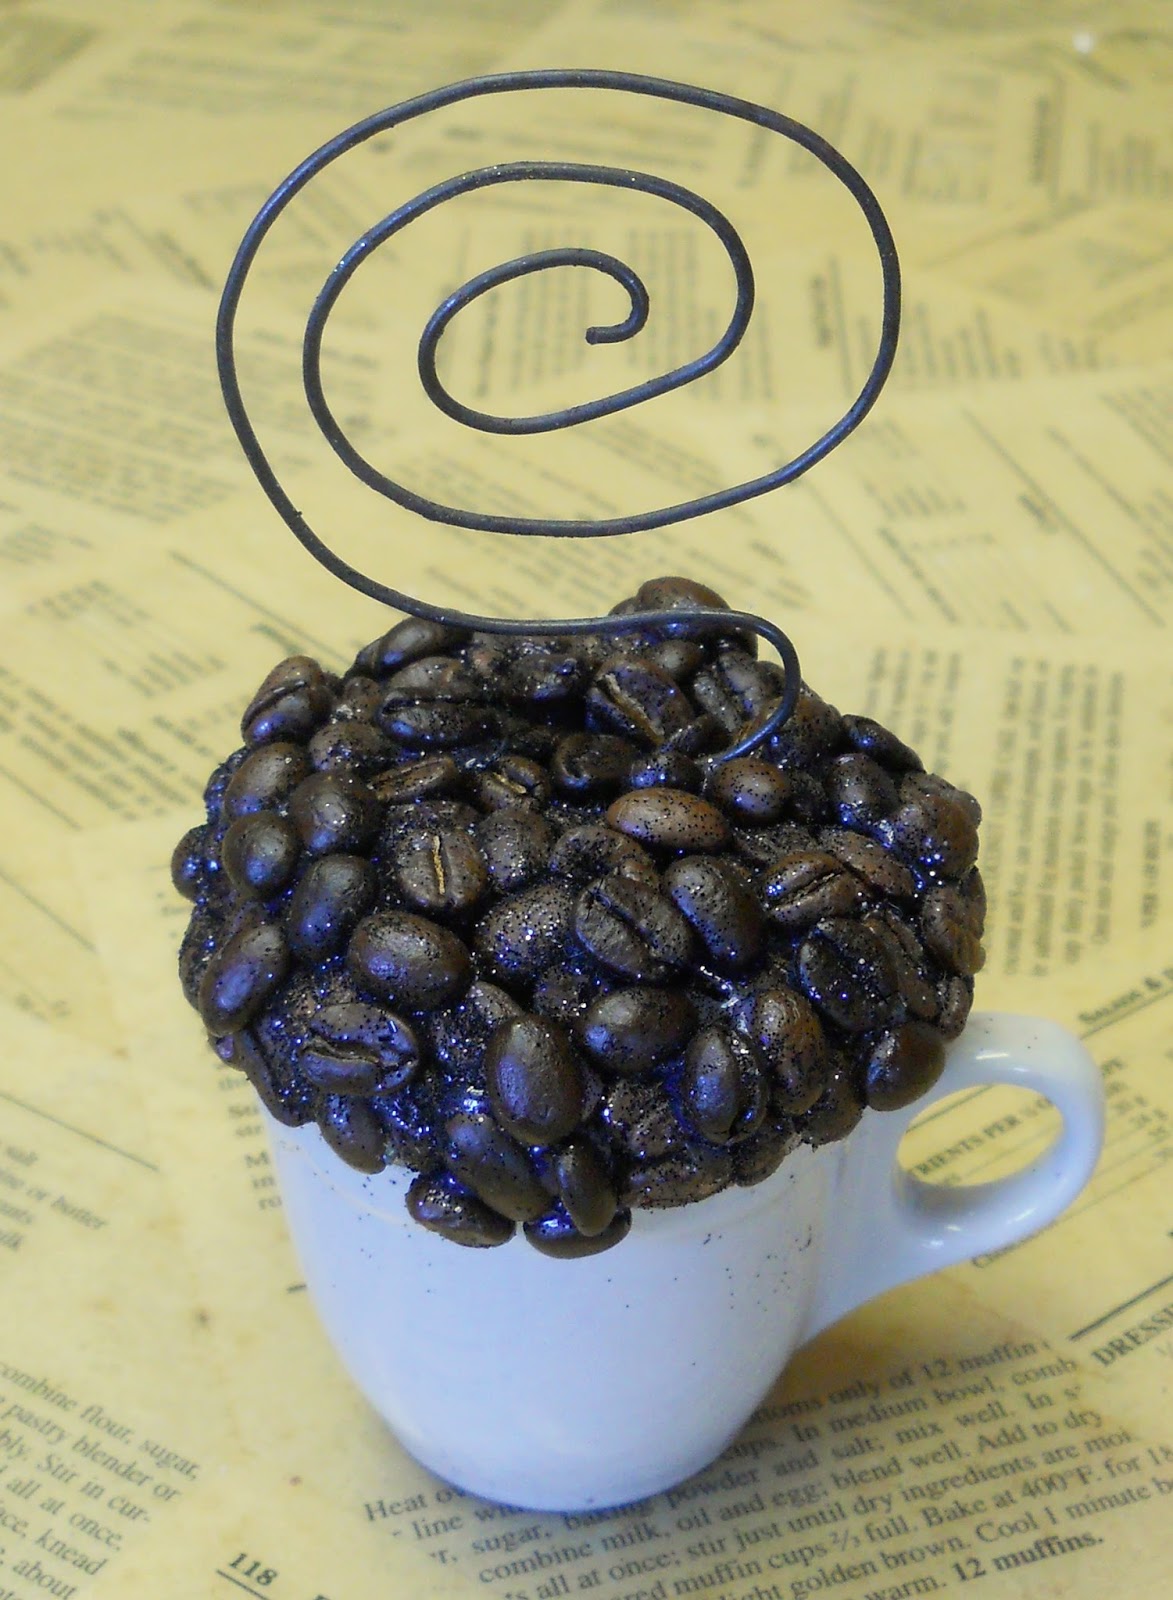
As a final detail paint some white glue (like Elmer's school glue) inside the nooks and crannies between the coffee beans. Set your cup on a piece of paper and sprinkle the beans generously with fine black glitter.


After the white glue dries, brush the excess glitter off onto the paper so you can save it for another project.

In this photo the blue areas are actually the black glitter reflecting the light. 
This looks awesome in real life and it smells wonderful!


I put this with a gift tag in the wire curl to the gift basket. I added flavored creamers and syrups, plus biscotti and a pair of cute mugs. It was a perfect themed gift basket!

Now my mind is working...what if I did the same thing but with a cupcake holder? I could use little glass beads for the sprinkles and clear glass glitter in between. Maybe make the "frosting" of something white and fluffy?

I'll have to think about that one a bit then try it out. I'll be sure to post about it when I do!

Book Page Christmas DIY

Most of you have figured out I am a color freak with an obsession  for turquoise, red and cobalt blue.  However, I also obsess about ...