Monday, September 10, 2012

If You Have to Give a Eulogy, Make It a Good One Part 1


I was recently asked to give a eulogy for my sister in law, Lynn, who died after a tough five year fight with cancer. This is the second family eulogy I've given and although it is not easy, I will do it not only for the family but for myself.
If and when you are asked to give a eulogy, give it your best shot. Make it personal, interesting and detailed. This is your very last chance to paint a bright picture of this beloved person you have lost, from their personality to fond memories.
Here is the text, which contains mild profanity, so be warned.
*************************************************************************
I am so glad to see you all here today to remember my high octane sister in law, Lynn. When her kids asked me to speak I knew I wanted to share a few memories and thoughts while I had the chance, since I've never regretted speaking up at a funeral and was always sorry if I didn't take the opportunity to share some memories.
So, how do you describe such a unique woman?
She was a live wire. A spitfire. A high energy bundle of guts and determination. I remember a Charles Schultz poster back in the 70s. It showed Lucy carrying a football and running hell for leather. It said, "Outta my way, I'm going for it!" That sums up Lynn perfectly. Get out of her way or help her move along, but either way, she went for it. You know it's true!
She loved her kids, fiercely. There's a word that fits...fiercely. That's Lynn all the way. We give our kids our genetics then watch to see how the family mix shows up in them. Her children and grandchildren have that stubborn family pride. But you also have your mom's determination and grit. And her zest for life. And her lasting love.
She could be hard headed but with a soft spot for kids, puppies and kittens.
She loved her horses when she had them.
She loved her family and friends and she loved working hard at her job AND she was good at it.
She loved fielding those tricky hops in the outfield and throwing you out.
She loved shooting the moon in pinochle and you were a shitbird if you succeeded in tripping her up. And yes, shitbird was kinda sorta a term of endearment.
She loved reading good books and bad. Even the romance novels she called "smut." And she loved to try, just one more time, to win a jackpot at the casino.
She did not suffer fools gladly.
And, oh, did she love to laugh.
Oh my God, did we have some good times. The four of us went to see Schwarzenegger in Conan the Barbarian and carried on so much during the show we just knew we were going to get kicked out. After the show was over the teenagers behind us said they'd never laughed so hard at any movie. But Lynn started it...when the movie opened with the hunters bringing a deer carcass into the camp, she said out loud in the almost silent theater, "Did they kill Bambi?" And we were off....!
At literally dozens of family gatherings there would always be a moment when the two of us would look at the table loaded with goodies (including holidays when there would sometimes be a whole pie for each person) and we'd ask each other, "Do you think we have enough food?" Then we'd both shake our heads and say, "Nah!!!" And we'd crack up.
One time when she was married to my brother in law, we were at a square dance and it was his birthday. The ladies lined up to give him a smooch. But it was Lynn who grabbed his brother and put him in line, too. The kissing came to an abrupt halt right then and there! And somewhere there is a photo of that event, with his brother kissing him on the cheek and her husband flipping off the camera.
I have to tell you that nobody wore 80's fashions like Lynn. For one thing, she was thin as a whip and had legs that looked five foot long. Picture her in a fitted pant suit with big shoulder pads and high heeled boots and some chunky jewelry. Man! She rocked it. The picture for her obituary? The kids chose it just for that reason.
I have to tell the girls in the family that she looked upon your significant others with a gimlet eye and strong opinions. Which she mostly kept to herself. Mostly. If she was here she'd say, "You be good to our girls, now."
I have to tell the boys in the family that she always knew you were good men at heart and would do the right thing for the ladies and children in your lives. And that you all threw off the prettiest babies! She would say to you, "Cowboy up and do what's right."
I have to tell you that she thought people should do right by their family and friends. You did not want to be on the wrong end of that opinion! She was generous and affectionate and would do just about anything for you but boy, you did not want to take advantage of that generous nature. And more than once I've heard her say, "Enough of that noise," or "Been there, done that. Got the tee shirt. I'm outta here."
I have to tell you that nobody loved her coffee more than Lynn. Am I right? You know I'm right. Tho I know there's a generation of coffee lovers out here that would give her a run for her money.
And I have to tell you this....when I put together my Fantasy Tribe to survive the Zombie Apocalypse, I've got Lynn on my list. Not only could she butcher a deer, build a fire, sharpen a knife and siphon gas, but she was a crack pistol shot. She could jump start a battery and start a rolling car by popping the clutch. She could cook a full meal over a camp fire. She could drive a stick, a 4 x 4, a tractor, a semi, a 4 wheeler and a forklift. She was a helluva horsewoman. She would have had no problem with a sword or a bow and arrow. She was sharp witted and sharp eyed. I want this warrior on my team!
A few days ago I got to hold some fluffy puppies and I thought, "Lynn would have loved you guys!" I see where an author is writing another book in a romance series, and I know Lynn would have devoured that book. I watched the newest Conan movie and even though the new guy is a hunk, I know that she still liked Arnold better. I will remember her in ways I haven't even begun to count and I will miss her more than I can stand.
Do you remember in Lord of the Rings, the scene where Gandalf is falling with the fiery Balrog down thru the darkness and he is fighting hard all the way? That was Lynn.
The Welsh poet, Dylan Thomas, wrote, "Do not go gentle into that good night. Rage, rage against the dying of the light." That was Lynn.
She fought her battles hard until she couldn't outlast this final enemy. She didn't want her greater circle of family and friends to fuss over her. It actually would have pissed her off. But right here and right now we want to say thank you to the ones who took care of her and helped her. Remembering Lynn ties us together today. I'm sure there are stories that some of us haven't heard. Now is the time and the place to share.

*******************************************************************************
I am by no means a professional public speaker. Through the years I took the lessons from Speech class in high school and applied them to teaching Sunday School, leading worship services, Rotary functions, employee training and family reunions.
If you are asked to give a eulogy give it your best and put aside your own nerves for the good of the group. Remember, they are on your side and want to hear the positive things you have to say. And better to share your good memories and say a loving goodbye than keeping silent and wishing you'd said something as a farewell. Too often the eulogy is left to a religious leader or even someone referred by the funeral home, and they may not know your lost one as a real person.
For example, at one of our family funerals the only speaker was a preacher who mispronounced the family name all the way thru his short, impersonal speech.
So, think on these things. You can do this for someone you have loved and lost.

Sunday, September 2, 2012

A Pop of Red With Rolled Felt Roses

I've been seeing rolled felt flowers all over blogland and Pinterest, so I decided to make some for a bit of red in my craft studio.

The Dollar Tree sells these oversize Christmas balls every year and at the clearance sales afterwards you can get these two for a buck! Much cheaper than a similar sized styrofoam ball.


Cut out circles in your felt color choice. Cut each circle into a spiral. Note that neither the circles nor spirals have to be perfect. This is a quick and easy project!


Make LOTS of rolled roses from your spiral cut felt. LOTS. Like, dozens. You can vary the size of the circles and cut some spirals tighter for different sized rosettes. Start hot gluing those babies on your ball. Very quickly you will be grinning and gluing because this decor ball shapes up fast.

Then, and you can hum while you're doing this, go around your house and try it out on different bases. A crystal candlestick, a small glass votive, a shot glass, that odd pottery vase on your bookshelf....just have fun and find the perfect holder. I used an old wooden candle holder. Poifect!


And here is Rosy in her new place of honor, right there near the far corner of my studio. She's a lovely accent to all the white and cream and look how great she looks with the other red accents. Don't you love it when a project comes together? Especially when you don't have to buy anything and just make the whole thing from start to finish out of your stash leftovers, so it is essentially free.

Yeah, I like that, too. :o)
Posted by Picasa

Cocoa "Tin" Redo for Craft Storage


Readers ask me where I get the ideas for my blog, and I can only say I have my eyes wide open all the time for items I can use for projects. For instance, I am always looking for clever and cheap ways for craft storage to help me tame the Clutter Monster, and if I can make them from what I have on hand that's a win win in my book.

Once a container is empty in my house, I repurpose it for my craft studio. It has to be useful and I try to make it pretty and I admit more than once I have bought groceries in nice jars because I want them for my space, lol!

But what about the odd container, like the plastic cocoa "tins" that Hershey's is using now? They are a nice size, have a good lid and come in a rich shade of brown....plastic. What to do?


I crashed my stash and put together fabric and trims that go nicely with cocoa brown. Here's what I came up with! A strip of white burlap, a nice piece of wide lace, a rose applique and mixed buttons. Using my trusty hot glue gun, it was easy and fun to put together. I even put a bit of lace on the lid.


And here is the back side. I almost like it's simplicity more than the front. But either way, this storage container looks cute! I like it alot.

I would even use this for a gift container. After all, it is pretty and easy to do and I already have another one coming from the new can of cocoa!

So many of my ideas come from looking at ordinary objects in a new way. Some of the most clever ideas I see online are smart and different re uses of totally familiar items. Keep your eyes open, ladies, and your brains engaged. You never know when inspiration will strike!


Zen Stone Stacks


What do you do when you go on a family vacation? Besides have loads of fun we like to leave a bit of whimsy behind with water smoothed stones put together in zen stacks.


The acts of collecting and carefully balancing the stones are contemplative and patient endeavors. Also, fun!


Here is the private swimming hole we enjoyed all week. This is a photo downriver. Man, I wish I was still there!


And here is a photo upriver. Can you see the trio of stone towers in this picture?


Here's a single stack up on the beach.


A set of three on some bedrock.


Another trio down by the water.


Can you see the stacks in this picture yet?


Here's a closeup in the morning sun. They are in the lower right of the previous picture. We left over a dozen stone towers for the next guests to find down by the river....


...plus this sweet driftwood heart with a tiny stack right in the middle.


When I got home I wanted a nice reminder of those warm sunny days down by the river. With some E-6000 jewelry adhesive and a bunch of collected river rocks, I now have these beautiful and soothing zen stacks for my master bath. Along with loads of houseplants and a sweet terrarium, they remind me to slow down and just enjoy my days.

Saturday, July 14, 2012

Front Deck Flower Planters

Last year, soon after we moved here and while I was still undergoing radiation therapy, my son and grandson built us a new front deck. Here's what it looked like last July.....


Molly Brown, our chocolate lab, started enjoying it right away. I didn't have many flowers last year but I knew I'd hit on a winning color combo with the hot pink petunias and turquoise blue railings. So this year I went all out/completely crazy.


THIS year I've got a few more flowers, lol! Everything is in roomy planters so I can move them around as each pot fills in with colorful blooms.


I've redone that wreath at least 4 times and I really like this fresh green look. The glass marble balls are sitting on a candelabra built by the Welding Man. The corner plant stand is also one of his designs. On the top shelf is another marble covered ball in the perfect turquoise color.


More petunias in box planters, with creeping jenny and sweet potato vines. Needlepoint ivy on trellis towers built by the Welding Man. More planters with petunias, alyssum, dianthus, snapdragons, coreopsis and impatiens. And, of course, more blue glass marbled garden balls!


I love the golden lime green contrast of the creeping jenny against the hot pink flowers. Lavender, petunias, miniature roses, coreopsis, ivy, coleus and succulents are in these pots along with more balls and garden art. The green glass globe in the bottom planter is a "crackled glass" ivy bowl disguising a solar light.


I made the tall pillar for the blue garden globe out of a two foot length of PVC pipe. I glued on the glass marbles and other glass bits with Silicone II adhesive. The smaller blue glass pieces are Christmas ornaments which I've repurposed for the garden. The fleur de lis trellis tower is also the Welding Man's design.


Weed cloth and a layer of gravel keep grass and weeds in check around the groups of planters. I like the contrast of the exuberant plants with the zen look of the pebbles. This photo shows dwarf nandina, alyssum, succulents, "bamboo" grass, creeping jenny, dianthus, salvia, petunias, vinca and ivy on another tower.


I love how the cool cobalt blue glass cools down the hot colors of the pink and purple petunias. Can't have too many blue glass garden accents OR hot pink flowers!


This dining room chair had seen better days, so I dry brushed it white, popped the cushion off and found a planter to fit into the hole. Golden creeping jenny and dark green vinca spill over the sides and a pink snapdragon adds contrast. The Green Man planter is filled with ferns.


This blue ball is made from a bowling ball! The same Silicone II adhesive holds the marbles and sea glass in place. I am always on the lookout for different size balls to use in the garden, with and without glued on marbles. I've used different sized Christmas balls, styrofoam balls, light globes and ivy bowls. Anything spherical will work!


So pretty! Many of the plants I've used will return next year and the petunias are easily replaced each spring. The creeping jenny and ivy are so prolific that I'll be dividing them into even more containers next year. And of course, the blue garden balls will look good all year long.

Between a HUGE amount of family activities, my continuing treatment, my Etsy shop and this front yard project, my time has disappeared in great chunks. But as you can see, I have something to show for the time spent outside.

AND, this year we've planted all our vegetables in big planter pots in another part of the yard. Gardening in planter pots works so well for me, next year I plan to use even more. Because with beautiful plants and flowers, more is better, right? I'll let you know when I reach my limit!

Wind Chime Rescue

When we moved from our mountain side to our new home a year ago, the Mountain Man saved a few of our many wind chimes and brought them with us. I thought I would buy new wind chimes for our new yard but the prices shocked me! 

So, you know how I roll; I told him I was ready to take a look at repairing the old ones and he gave me this "wind chime stew" in an old canning kettle. (A wonderfully dented, chippy, rusty and blue enamel canning kettle which would look great holding a big bushy lavender plant and maybe some cascading petunias and alyssum....ahem, I digress. )


Whoa. What is in there? I see parts of four wind chimes! I sort of wondered if I'd really be able to salvage four complete sets out of this smorgasbord.


Here is my wind chime rescue kit...four and six pound clear fishing line, plastic beads, a yarn needle, split rings from 1/4" to 1", plastic rings, scissors, jewelry pliers, wire cutters and needle nose pliers. 

Just a note-Light fly fishing line is also excellent for wind chime repair and it is not expensive. It is very similar to the cord used in commercial wind chimes.One roll will give you enough to make/repair LOTS of wind chimes.

For these repairs, though,  I used clear fishing line and a 2" long yarn needle with a large eye. 


I set up on the front porch on a warm summer morning and got to work.


I had a gorgeous view of my 3 barrel fountain with ivy and flowers cascading around. It's just me and the hummingbirds and the butterflies out here. With a little Pandora on my Kindle and a big cup of coffee, it was a wonderful way to start the day.


So, DON'T do this first thing. Yeah, how pretty the shiny rings look against the porch boards! I couldn't believe I did this.  Moving on.....


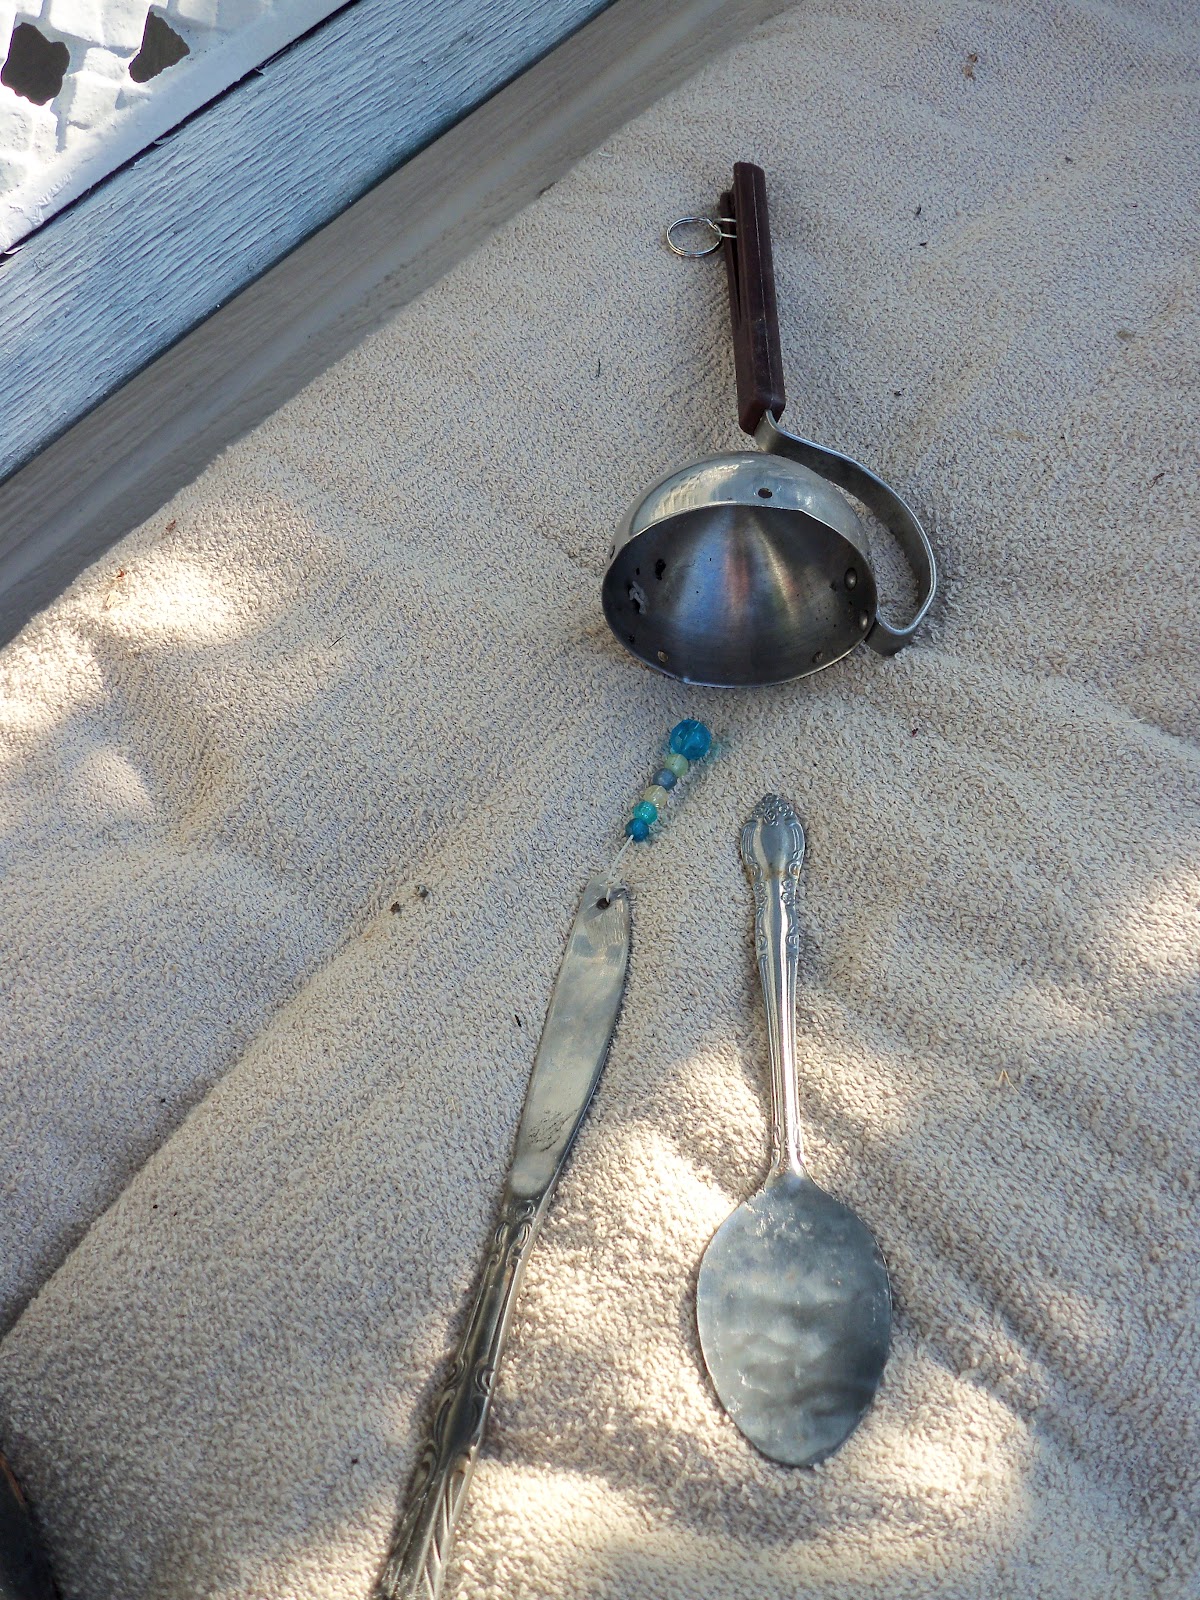
I untangled a surprisingly intact wind chime that we'd made out of flattened and drilled kitchen ware and some light metal rods. I hung it inside this trellis tower and went to work. The top is a soup ladle that the Welding Man drilled to hold everything in a balanced design. He also drilled a hole in the middle to hang the "clapper," which is a spoon. I added more beading to each peace and triple tied the fishing line back and forth thru the mounting holes. One down!


Here is a light and airy metal wind chime that I am surprised is still around. I reattached all the pagoda pieces and the hanging chimes with fishing line. If you are repairing a wind chime, take a close look at how the chimes are attached. The lines for the chimes should not be rigid and should let the pieces swing freely. When in doubt, tap your hanging chime parts and listen for the best tone. You will soon hear the difference that long or short lines make to the sound of your chimes.

Since both of these wind chimes sounded good but  still looked beat up, I hit them each with a coat of silver metallic spray paint. 

 Ooh aah!
The silvery paint made all the metal look just shiny enough and the colored plastic beads are a perfect blue touch. The flatware by itself is not too "chimey" so the addition of the metal rods gave this a beautiful, tinkly tone. I like this so much I think I'll have to make another!


And here is the "pagoda" wind chime after a shot of that silvery metallic spray paint. Pretty and delicate and perfect for a gentle tone when the wind blows.


Here is the largest wind chime, the parts of which you can see scrambled up in that canning kettle. I put it back together with fishing line and the Welding Man made a new "sail" for the bottom out of a scrap of wood and an eye bolt. The metal and wood were grungy so I primed it with white spray paint followed by a good coat of that same silver metallic spray paint. Now this wind chime looks almost brand new!


Here's what's left after all the other chimes were put back together. The soup ladle is already drilled and we saved two pieces from an old wind chime. I gave the Welding Man three pieces of yard sale flatware to drill so I can get this chime repaired and hung up. Since I don't have any small metal rods left I am thinking of using some old keys and other metal hardware. I hope it comes out as neat as my mental image!

I'll post pics on my blog if it looks good. And if it doesn't it will just quietly go away, never to be mentioned again. :o)

I'll be joining the parties in my sidebar, come visit and link up. You never know what cool, creative and interesting ideas you will find!

Friday, June 8, 2012

Damask Countertop Redo


I am always looking for ways to improve my craft studio, and last month I decided to cover the long counter in oilcloth. I found the black and white damask remnant for $2.50 and grabbed that baby up, because I knew it was perfect for my space.


Ooh aah!

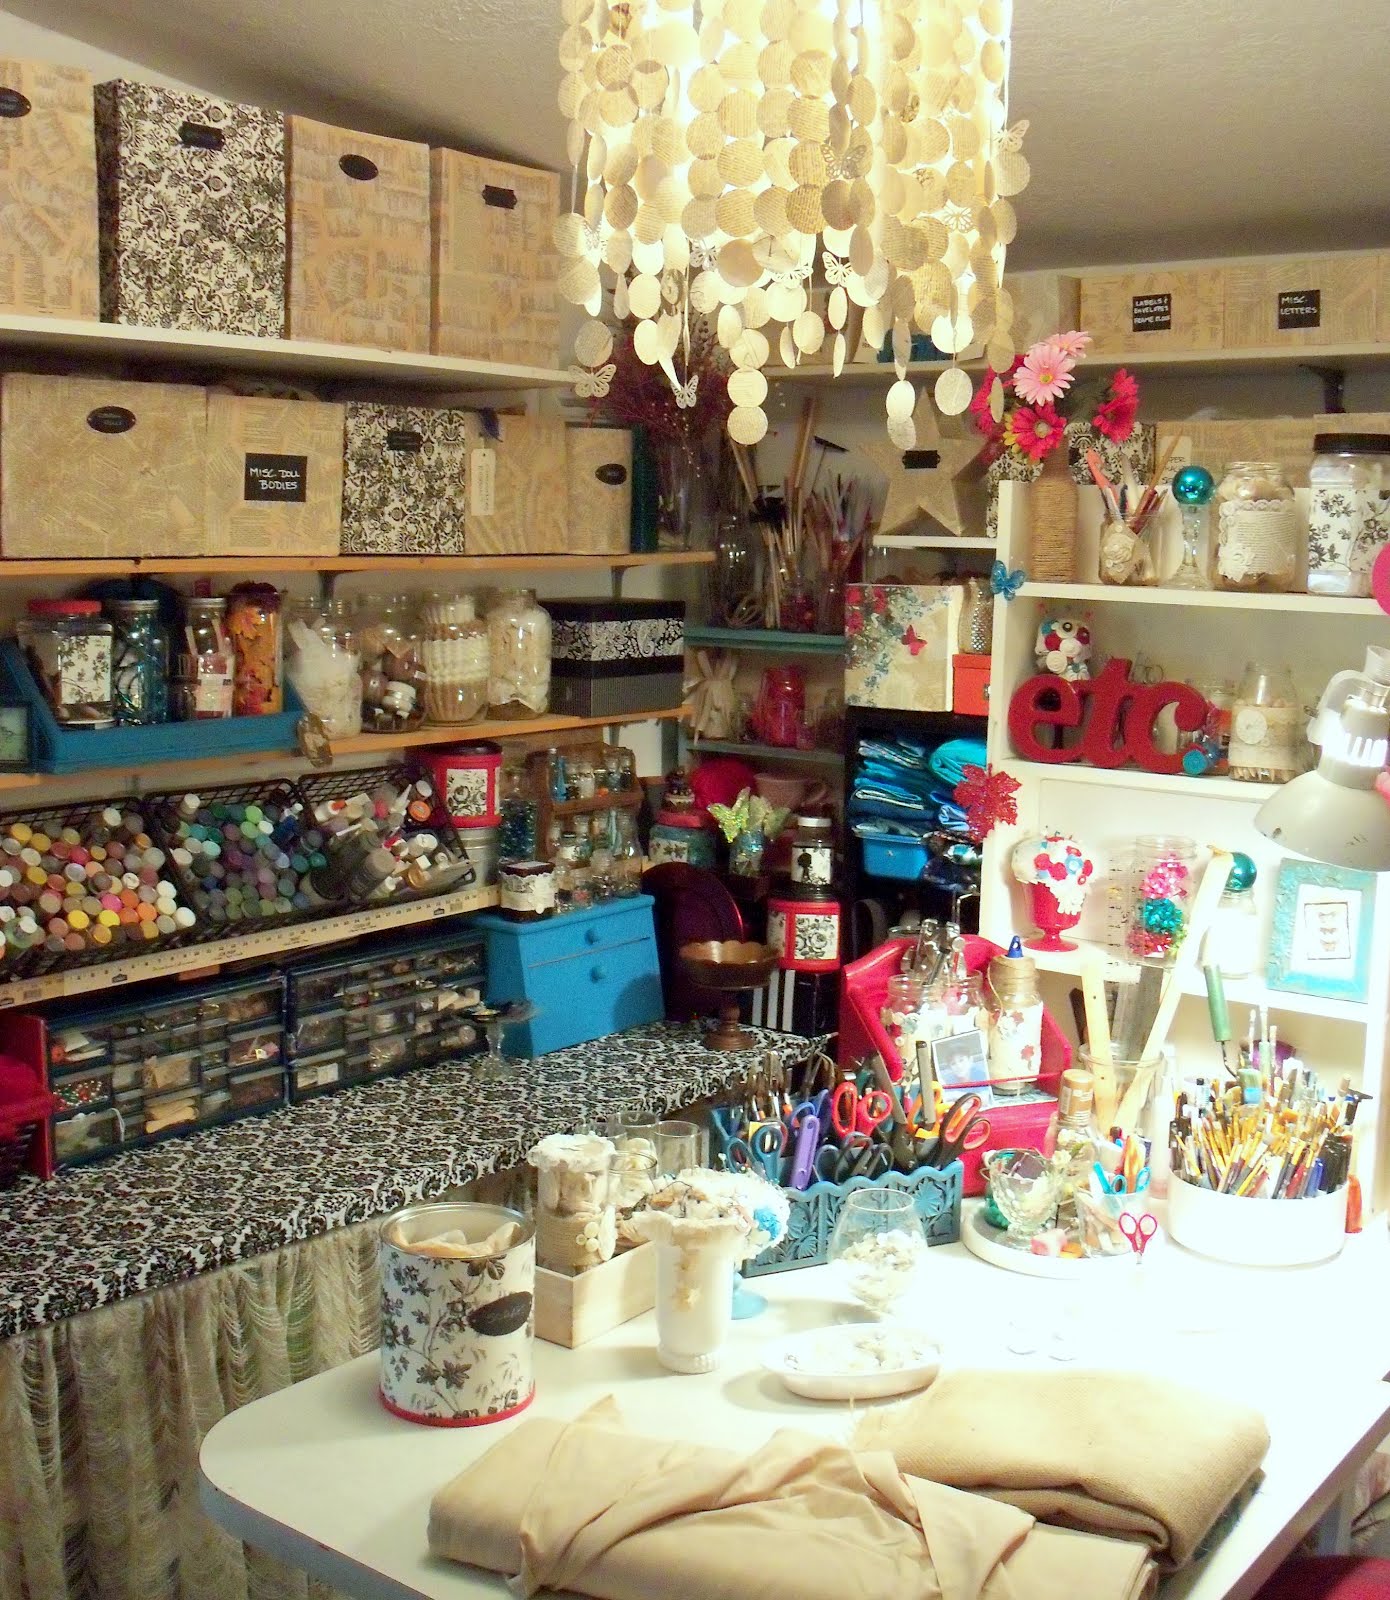
My room has lots of black and white prints and book page covered storage boxes, plus several covered in black and white damask print tissue paper. With lots of turquoise and red pops of color, this room makes me happy everyday. I'm so lucky to have this space!


The Welding Man and Insanely Creative Christy built the counters and shelves for me. This is a ten foot long counter and perfect for craft storage and projects. I used yardsticks on the edge of one shelf and like it so much I'm going to put them all around the rest of the shelves, too.


And we scored big time when we found this shelving for $2 each at the Habitat store. We bought everything they had in stock! I used double stick carpet tape on the edges to hold the oil cloth in place. This is strong and sticky stuff.


Once the tape was in place I laid the oil cloth down and smoothed it over the edge. This went so fast and was so easy.


It looks good, it goes with my whole design mix in here and it cost less than $3!! That's a win win. The oil cloth wipes clean with a damp cloth and since it is not permanently fixed, I can use it later for a cute black and white tote bag if I want.


I'll be linking up to the parties in my sidebar. Come visit and enjoy the creativity in blog land. You'll be glad you did!

On Sale in my Etsy Shop....

Yes, dear readers, like many of you I have an Etsy shop! I just finished setting up the special sales on my listings this month. If you're a fan of my burlap pillows....or rosette necklaces....or my original vintage style Halloween banners, click on over there!


A vintage brooch centers this pretty rosette necklace!


A pretty red and black necklace with a Steampunk vibe and a teeny tiny skull with red crystal eyes!


One of my popular Halloween banners hand painted in a vintage carnival style.


Click on over and check out my shop. You never know what you will find!


Book Page Christmas DIY

Most of you have figured out I am a color freak with an obsession  for turquoise, red and cobalt blue.  However, I also obsess about ...