Monday, July 26, 2010

Quick rosette pillow project

I was inspired by some turquoise pillows with yo yos in someone's header and I didn't tag it, darn it all! I'll know it when I see it, trust me, and I'll send her some love. Note-FOUND HER! Jen, the wonderfully creative author of Tatertots and Jello. Go check her blog out, you'll see the pillows I'm talking about. Thanks, Jen!

Visit tatertotsandjello.com


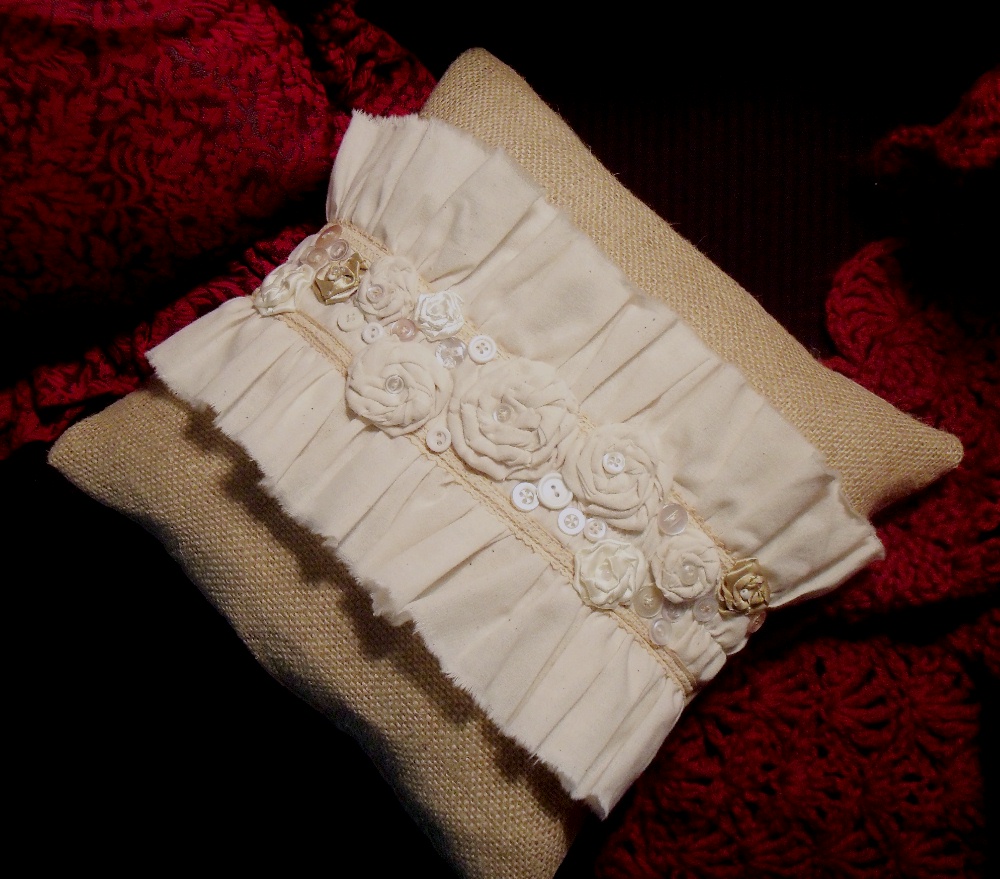
So I had this sorta boring $1 thrift store pillow on my bed and I decided to "rosette it." I will pretty much put rosettes on anything. I sew the smaller rosettes while half watching TV in the evenings so I have lots on hand. And the bigger rosettes are hot glued. Yup. I told you this was quick!


So I hot glued the rosettes, large and small, added buttons (including some YUMMY turquoise sea shell buttons, just gorgeous) and beads and whatever the heck looked good and had fun. It took less than an hour and I really had to stop before I went too far from "sweet pillow" into "Las Vegas showgirl," you know how that happens. ;0) Oooh, I like it alot! Here she is on my brown couch with her cousins, the bedroom pillows.

Now, I would NEVER, EVER hot glue rosettes or anything else on my projects I sell in my Etsy shop. I hand sew every bit of trim and beading and ribbon to my pillows and necklaces. With hot glue it is too easy for restless fingers to seek out a weak bond and just pull stuff off (I'm looking at you, terrible toddlers and mischievous teens!) But this was a quick and easy, totally spur of the moment project. It was too much fun, too.

Now here's a total surprise. I put Rosie and her blue cousins on my brown couch and look what happened...they picked up the blue in the sky of my poppy painting and kicked up the total style of my couch a notch! So I'm leaving all of them for a day or two and see if I really like that kick. So far, so good. And I'm starting to think a crocheted throw in a nice shade of turquoise would really be nice......

By the way, the little beaded pin tucked turquoise pillow will be another blog post. She deserves it and she's super easy, in a not expensive, crafty way.

Thanks for stopping by!

Sunday, July 25, 2010

All A's for my birthday


I was going to call this "Straight A's for Mom!" but as you can see, they're more angled and curvy ;0)


In May my insanely creative daughter, Christy, posted her clever, chunky, handmade letters on her blog.

I totally loved the letters and the option of making my own for my projects and craft room. I put this on my big list of "Crafts To Do and Soon!" Doesn't everyone have a list like that? And I really planned to make some chunky letters that week. Truly. Ahem, really I did....


http://christylovespaper.blogspot.com/2010/04/brought-to-you-by-letter-m.html


And then she posted a tutorial in June on making curved letters. So cool! Now I could make my own chunky curvy letters in different fonts and sizes for the neat idea I have for an "A" display in my craft room.

I was excited and planned to make some that very week.Then life happened and I got busy and distracted and....you know how this goes. But I totally wanted to make these....soon.

http://christylovespaper.blogspot.com/2010/05/letter-s-and-to-go-with-m.html

Okay, then it was July. Yeah, sometimes I slack with the best of them. Big plans, not alot of progress on the letters. Sigh. But I was busy doing other, important stuff. Okay.

So when she asked me what I wanted for my birthday, you know what I told her. Some "A" letters in different fonts for my craft room. And boy, did she deliver!!


Look what I got....three chunky letters in different fonts and even one she mod podged with book page scraps. Too cool!

I love the way they look! I have big plans for the other two, baby, big plans! And now I can put them together with the other "a" I have, a chunky ceramic letter I bought years ago that has survived a dozen moves.


Isn't there a saying that 3 of anything is a collection? Well, then, I am on my way. Thanks, Christy for the birthday letters! They are too cool for school, and so are you. Loves, Mom.

And here's a link to her main blog...http://christylovespaper.blogspot.com/


I'll be linking up this post to the fun parties on my sidebar. Come visit and see all the wonderful creative projects and great bloggers out there in blogland. See you there!

Friday, July 23, 2010

REPOST - Paint your pillows? Sure!


This is one of my early posts when I started blogging in April. It's an oldie, but it's a goodie! Someday Crafts is having a pillow party this week and I'm joining in. Come on over and look at all of the pillow projects, they are so creative and clever!


Look, new pillows for my bedroom! And they only took a bit of thinking and best of all they were almost (less than $1 each ) free! (I'm still pretty new to the whole blogging thing so I'm working on it with these pillow posts. Bear with me, I plan to make things better but as they say, practice practice practice. And maybe you'll get an idea for your own projects.)


Okay, I switched to a teal comforter on our master bed and wanted/needed pillows to give it some ooomph but as usual, I had no pillow budget. The REAL budget laughs at the concept of a pillow budget and would give it a wedgie if it came close. But I DID have this fabric in my craft room stash......


I love the brown and white print and bought all they had when I found a sale for $1 a yard. I am an absolutely sucker for a fabric bargain! The teal fabric is a standard Walmart flat sheet, and I bought it because for $4 you get several yards of usable fabric. (Here's a hint-at Halloween WM has single flat sheets in BLACK for $4. That's enough for lots of Halloween projects right there!) And the embroidered white on black fabric was a remnant, but a big one, almost a full yard. So here are two of the pillows.....


.....and yes, I dinked around with the fabric to make it match my bedroom. Yup, I painted them. I experimented a bit with remnants and found a look that I liked and so I went to town. First I chose a craft acrylic in teal and watered it down alot. Then I sprayed each fabric piece with water to dampen it and with a paintbrush just touched into the paint I then touched the brush to the fabric. The cohesion of the water in the brush to the damp fabric just drew the color into the threads and it was easy and fun to do. I actually laughed out loud as I was doing it cus it was coming out so cool! Since the paint is so thin, the fabric takes the color without getting stiff. I LOVE the watercolor look on the white pillow, much better than a solid teal dyed background. I sprayed it with water before it was dry to increase the splotchy quotient. On the embroidered pillow I only colored half the embroidery so the pillow is half teal and half white stitching. It looks very much like a custom job. Oh wait, it is a custom job.


And the pin tuck pillow? Talk about a big bang for notalotta effort and cheap. I like cheap. I found a tutorial online for making pin tucks and if I had been thinking then I'd have a link now. But it's very easy, and I will be posting a tutorial on that one one day. However, just for this post, I'll tell you that marking a grid on the pillow fabric then pinching it up and sewing around that pinched up fabric gives you an awesome effect on the other side. The more you pinch, the deeper the pleats and the more plush the effect. I will be making more pin tuck projects in the future you can bet!


So my total cost on this project was minimal but let's break it down...

brown and white fabric @ $1 a yard less than $1

white embroidered black remnant $1 less than $1
(I still have enough of each fabric to make a smaller pillow)

Craft paint on hand zero extra cost
old bed pillows stuffed into new bed pillows zero
WalMart flat single sheet for $4 less than $1.00
(I made 6 full size pillow cases with the rest of the sheet)

So total cost was less than $4 which brings each pillow to less than $1 each. Even the REAL budget condescended enough to give the pillow budget a nod of approval. And now since I have the bed pillows I wanted, I can get on with the fun part of redecorating our master bedroom with a new color scheme....shopping for accessories at thrift stores and yard sales!!

REPOST-Pillow Cleverness from sweaters


When I saw this pretty creamy cable knit sweater at my favorite Goodwill, I knew I would finally have the warm and wonderful throw pillows for my couch that I keep seeing online at upscale and expensive sites like Eddie Bauer. Fortunately it was too small to fit me or I would have worn it, it was that nice. (Okay, so I really wanted the pillows more than I wanted to lose that last 5 pounds, lol!)

No progress pics since I wasn't blogging then and the fam was already getting waaaay too many "look what I made!" emails. Here's a tip-cut a fabric backing for each sweater piece to stabilize it. I used muslin. This will keep your pillow piece edges straight and eliminate bunching and distortion when you sew your pillow. I zigzagged the edges and top stitched over that to make sure every bit of yarn was stitched down.


And here they are on my newly recovered couch. I knew I wanted some vanilla/creamy pillows to offset the strong chocolate brown and red, and these pillows are perfect. And since the sweater was acrylic, the pillows are washable. Bonus points!

And here it is MONTHS LATER and Someday Crafts is having a pillow party! Yippee! I'm posting several of my pillow posts over there, come on over and join the fun!

Tuesday, July 20, 2010

Can you see what I see?

On the way out the door yesterday morning I spied this little guy.....


....warming himself in a spot of sunlight on one of my blue garden globes.....


he's teeny tiny and sitting so still and calm. You know, I could use a few moments like this....


...sitting in a spot of sun and just taking it easy for a few minutes. I'll just grab my cuppa and a bit of light reading and bask in a sunny spot for awhile. Why don't you?

Monday, July 19, 2010

New Burlap and Muslin pillow....


....and I'm lovin' it! Love the mix of textures and shapes and colors of the burlap and muslin and buttons and ribbons and rosettes and.......just everything.Oh, and the vintage lace! Wish I could find yards and yards more of it.


I was planning to keep this one on my couch for awhile so I can bask in its wonderfulness, but I think it's going in my Etsy shop, too. Can't help it! I LOVE IT when I can make stuff and sell it!
And now, I've made one using white burlap and muslin...see how it came out?


Sunday, July 18, 2010

Beachy Solar Apothecary Jar

I see mason jars repurposed into solar lanterns all the time, so when I looked at this cute apothecary jar in my stash, I knew it would be a cool project.

I put this beachy themed solar light together for my daughter in law's birthday this week. Love you lots, Tracy! I love the way it turned out and I'll be making more, that's for sure. I've been seeing different solar light projects in blogland and knew I had to do this.

Walmart has these CHEAP, 2 for $3 CHEAP, solar lights on sale. The post is cardboard and plastic and striped, as you can see, with stars around the solar unit at the top. Yeah, you know me, I could NOT leave well enough alone.

The solar unit fit into the lid of this apothecary jar with some judicious toothpick spacers. Classy, eh? Still, far from what I envisioned. But the solar unit gets plenty of charge through the glass lid, so that's what I was looking for.

Twine wrapped jar neck, baby! Hot glue ahoy! Already I like the way it looks. Dollar Store twine and hot glue sticks plus a $2 thrift store apothecary jar. Simple simple simple.


Using some of my go-to textured wallpaper, I tacky glued it around the solar unit. It looks soooo much better and fills in the space formerly taken by my toothpick spacers. Much better.


I painted the top of the unit and the wallpaper to closely match the twine color. I shopped the house for beachy filler and added shells, sea glass and half marbles in green and white. Also, for texture and interest I added sliced pieces of cork. I love the smooth texture of the shells and glass with the cork's roughness. I added some trim using string, beads, buttons and a cork slice embellished with a tiny metal skeleton key . This was so much fun as I tried different combos of items to fix this light up!


And this is a real bear to photograph but here's what it looks like in the semi dark. The welding man used his dremel tool to cut off the little protusion at the bottom of the light, so it looks much cleaner. This light out on the deck after dark is just GORGEOUS! Love the soft glow on the glass and shells !!


I love the way this came out! And so did Tracy! Score! I will be watching for more of these jars to make her a set and also some for me.

I will be posting this pretty little light on the fun parties on my sidebar. Come visit me there and check out all the wonderful projects. So much cleverness and creativity out there, don't miss out!

Saturday, July 10, 2010

Most clever Family gift, ever!


Every year at Christmas our family gives loads of hand made, personalized gifts. Through the years the wonderful gifts of scrapbooks, family calendars, custom tee shirts, paintings, custom items and CDs of my sister's beautiful singing have been mind boggling. Yes, the ladies of the fam are a totally creative bunch!! One year my mom made afghans for everybody. That is dozens of afghans, dude.

The guys are clever too, but in a less crafty, more blue collar guy kind of way; as in rebuilding a truck engine, remodeling houses, welding and fabrication,motorcycle building, building an airplane, panning for gold, paving a highway, fine tuning a chain saw, building a custom computer and yes, two of them have mad skills with aircraft maintenance...one is in the Air Force and the other is a retired engineer from the Space Shuttle program.

So, back to the "Family" picture at the top. This last Christmas my daughter in law got the idea and my son, the mad computer genius, implemented her request and the whole fam got custom family pictures, totally unique to each person's identity.

Look closely. Look very very closely.....


Do you see what I see? Dozens and hundreds of tiny family portraits taken from our vast catalog of family photos. They must have worked with THOUSANDS when you consider that each portrait was skewed specifically to the recipient, with my mom and dad getting shots of their vintage wedding photos and their 50th wedding anniversary as well as all their kids and grand and great grandkids. My youngest daughter and her husband got shots of their wedding, their two dogs and their high school graduations. In fact, everybody's pet dogs and cats made it into the frames. We are a group of photo taking fanatics and we share our albums back and forth and hither and yon. Almost every shot we've taken over the years made it into these fantastic collages. Even the not so flattering photos were included. No two gifts were the same!


My parents' gift spelled out the word "Legacy." Every family's word was their last name. Each framed gift was unique and we spent a whole lot of time playing "spot the faces" that Christmas day.


I tell you what, if I can talk my son into writing this up in a tutorial, you can BET I'll be posting it here! It would be an awesome project for just about any occasion. In the meantime, we all agree that in the Christmas gifting category, my son and his wife win hands down. The rest of us are going to have to kick it up a notch to top this!

Thanks for stopping by. I'll be linking up to the blog parties on my sidebar, so come visit them with me. There are always LOADS of fun projects to be found. I've been offline since Monday, but now I'm back. Sorry I missed some of my favorite parties but now I'm off to link to my Thursaday favorites. Thanks!

"Times are Tough Thursday" SELLING blog party NEW this week!

I received a comment from Donna at http://myshabbychateau.blogspot.com/on my burlap and muslin pillow post. Thank you Donna for the sweet comments and giving me a heads about a new blog party set up especially for bloggers who sell their items online. Whether thru their blog, site, Etsy, etc., it's new just for creative crafters! Rory over at Tools are for Women Too is hosting and it will be held every week . It is called, appropriately, Times are Tough Thursday. When I last looked he had over 600 sellers listed, it's GREAT!

toolsareforwomentoo


Hie thee hence to this great party and linkup with Rory. Sign up as a follower to get linked and let's get this party the participation it deserves.

Thanks, Rory, you are the MAN!

Friday, July 9, 2010

My first burlap pillow with muslin ruffles

I've been making my ruffled muslin pillows trimmed with lace, buttons and rosettes for my Etsy shop for awhile, and I decided to try some burlap for the neat contrast between it's rough weave and the muslin's softness. So here is my first design. I like it alot.


I put the wide ruffle on first by sewing it down the middle, but it needed something more, so I added the vintage lace down both sides. Hmmm, I tried a row of buttons down the middle but it needed a little something something. You know me, I'll put a rosette on anything! So after placing three muslin rosettes I added two more of satin ribbon and then just a few mixed buttons for accent. Ooh, I really like it!

I had it on my couch and I LOVE the combo of soft and rugged with these two fabrics! Can't wait to make more of these! I decided to post it in my Etsy shop, see if anyone else liked this combo too.

And this pillow has SOLD! Looks like I'll be adding burlap and muslin pillows as a regular item to my shop. I just love when a design comes together like this and looks so good. Now I have more fundage to buy more burlap, it's a win win! There's a button to my Etsy shop on my sidebar. I'm having a FREE SHIPPING sale on any TWO of my ruffled muslin pillows, go check it out!

Wednesday, July 7, 2010

Spirits of Halloween Past


Halloween birdhouses? In July? Yup, that and much more. Yes, I'm thinking of Halloween in July! Pop on over to my primitive folk art dolls blog and see my new post about Halloween projects I remember fondly and a peek into what's cooking for this spooky holiday.

Click here to go over to Ruffles and Crows blogspot.


Tuesday, July 6, 2010

Skeleton Key Trapunto Pillow Tute

This was my guest post for Craft Envy this past week. I'm reposting here for all my friends who may have missed it. Thanks for stopping by!

I've been creating and crafting for a long time. A long, long time, lol! Here's a pic of my high school I.D. card from way back...way, way back. Let me just say, Class of 1970 RULES!!!

Back then embroidered denim cut offs were hot, because we could keep them from tearing and fraying with some cool embroidery. Now they're being sold at Old Navy. Back then crocheted ponchos, vests and ripple afghans were all the rage and now there are Etsy shops dedicated to crochet. And Danish Modern furniture was in (now there's Ikea) and wonderfully wild floral print hip hugger mini skirts were in style, which I and all my friends sewed ourselves because BACK THEN all the girls took sewing in Home Ec!

They say that everything old is new again and this little project I'm posting is no exception. Back then we discovered trapunto, the dimensional quilting technique, for our way cool embroidered vests and skirts. It's the perfect craft for making some unique home decor and especially that favorite project, couch pillows! So here we go, a trapunto skeleton key couch pillow just for you.


Skeleton keys are hot right now. Their vintage charm and character really bring personality to otherwise modern decor and they fit in with any number of styles, including shabby chic, farmhouse style and an eclectic mix. The dimensional look of the skeleton key on this pillow would fit in with all those styles. Annnnd, it's easy to get this look!

I used muslin for this project. It's my favorite fabric for home decor. It's inexpensive, easy to work with, a nice neutral color and works up beautifully. For the front of your pillow cut two matching pieces of fabric.

Using a quilting pen, whose ink disappears when you spray the fabric with water, I outlined a simple skeleton key shape (this one is grungeboard from Tim Holtz).

I simplified the detail within the key head to make it easier to stitch. Set your sewing machine stitch length to 3 or 2, since you want small stitches for this project. Sew around the shape and use your judgement, going slowly, turning each angle with the needle DOWN to make sharp corners. Feel free to simplify your design as you sew, this technique is very forgiving and looks better with a simple shape. For example, I eliminated the little bumps in the shaft when I stitched this key.

Sorry for the poor contrast in this pic, but if you look you can see I've stitched the outline of the key in matching thread with small stitches.


Next you will clip several small openings in the backside of the design thru ONE LAYER OF FABRIC ONLY. This will give you the openings for stuffing your shape. I used the blunt end of a crochet hook to get the small pieces of stuffing into all the small areas. You can also use a needle to "wheedle" the stuffing into place smoothly. Stuff your shape evenly until it is softly plump.

Here you can see the small slits in the backside of the fabric with the stuffing showing through. Once your stuffing is in place, handsew each slit closed. Your stitches do not have to be pretty, just as long as they work. Do not draw too tightly or you will distort your stuffed shape. Spray your design with water to erase the ink and at this point you can iron your pillow top around the stuffed shape if you wish. I put a simple envelope closure on back and put my new pillow cover on a 12" stuffed form and there you have it, a trapunto skeleton key cushion for your couch or bedroom. I like the way this came out. I like it alot! I'll be posting more projects using this technique, so if you have questions, drop me a line.


I'll be visiting the parties in my sidebar to share some linky goodness, so please come and visit. You'll love the creative projects and great bloggers you will find there!

And Someday Crafts is having a pillow party, come join the fun...

Book Page Christmas DIY

Most of you have figured out I am a color freak with an obsession  for turquoise, red and cobalt blue.  However, I also obsess about ...