Wednesday, April 20, 2016

A Living Plant Roof On Our Shed


Two years ago we recycled three doors for this gorgeous wedding backdrop for our grand daughter. Insanely Creative Christy made the huge poster board flowers 
and I grew the white flowers in the urns. 

THEN, we built this little garden shed out of the original three exterior doors and
 one more door from the local Restore. We built it in place and put a roof on it.
 It is the perfect size for our gardening tools and supplies.

The inside of the shed is lined with plywood for stability and strength. 
We wanted to be sure that our little shed was strong enough
 to hold the weight of the heavy roof.

I knew I wanted to put a living green roof with trailing plants and succulents on this little shed. 
Today it finally got done!

The Welding Man used cedar fence boards for the eaves and end caps.
Our grand sons finished the roof prep by stapling waterproof pond liner fabric in place
 and then helped to plant the roof! 


Oooh aaah! 

I like it alot!


I did extensive online research on this project and even got this library book...
Small Green Roofs by Dunnet, Gedge and Little. It is extremely informative!


Here is a photo of the pond liner stapled up and over the edge of the cedar boards.
 We did not pull the liner tight. We left a bit of slack inside 
the planting area for the soil and roots to fill in.

We recycled two layers of dormant grass turf so that we had 5" of 
planting depth within the pond liners and added potting soil to cover the turf.


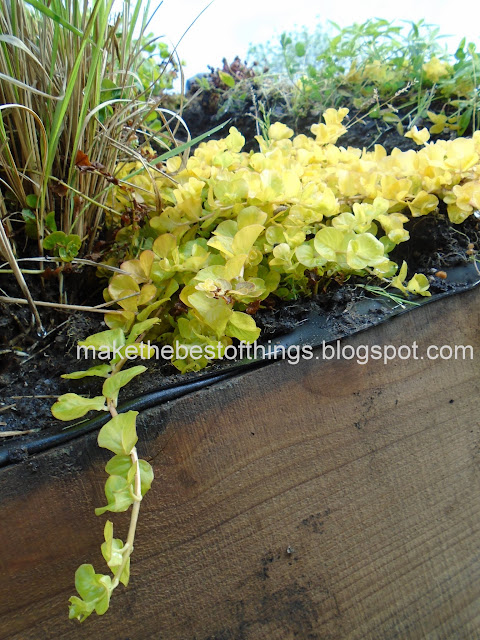
 I've been saving lots of shallow rooted plants like creeping jenny, different sedums and succulents and miniature viola vines. I added the clumps of Japanese blood grass for contrast and also as a thickly growing soil binder.

A small clump of scarlet dianthus is up there along with some pink and white bamboo grass.
I love how the red tips of the Japanese blood grass picks up
 the reds of the sedum and dianthus.


Now I will prime and paint this pretty little shed soft white after The Welding Man finishes the trim pieces.

For the roof I will sow handfuls of wildflower seeds on the roof and water them in with a sprinkler installed on a short hose. The plants I chose do well with less water and the succulents even like things a bit dry.


I will also get some summer annuals like lobelia and alyssum to trail over the eaves. 

I like it alot!

Here it is with a fresh coat of primer. I like the white on this little shed!


 I really like the hippieish Hobbitish look of this green roof.

The total cost, so far, on this little garden shed is $40 for the four doors at the Restore.
We paid $4 for a box of door and gate hinges at the same store.
Framing lumber and particle board are scraps we had on hand.
The cedar fence boards are left from our back yard fence.
I will use the leftover primer and paint from the wedding prep two years ago.
By far the most expensive item was the pond liner at $45 for a 5' x 12' piece. 
Screws, nails, staples, misc. hardware add $5.
The plants are starts from my own yard and planters I've been growing for two years.
So for less than $95 we've built a nice little garden shed that is perfect for that corner of our yard.

I will do another blog post once it has all the trim, is painted and has
 loads of flowering summer plants on the roof.

I'm really looking forward to that!


Saturday, April 16, 2016

Biiiig Mason Jar Terrarium

These big Mason jar type drink dispensers are everywhere these days. We've used them for at least half a dozen family occasions in the last couple of years.
They are handy and convenient and look great with
 fruit slices or ice floating in the beverage.


But what do you do when a big ol' drink dispense springs a leak around the spigot and doesn't work for serving drinks anymore?

In this case I put a cork in it and saved it on the shelf for an idea I had...
to make a big ol' two gallon terrarium!


There it sat until I started repotting some houseplants. I knew these smaller ferns
 would be perfect for the terrarium I wanted.


I layered gravel, soil and activated charcoal in the bottom. 
I trimmed the roots and the tops of the ferns so they'd fit inside the jar and grow bushier.
I also planted some pink and white bamboo grass and lime green creeping jenny.

Here in Oregon it is not hard to find moss at any time of year. I found
 three different kids in our yard and trimmed them to fit.

I added aquarium gravel and some quartz pebbles. 
Already I like this alot!


And since I'm a color junky I added some pretty blue glass and marbles.


Some larger rocks and a piece of interesting driftwood get added to the mix.


Using a mini Christmas ornament and a small spool of thread, I made tiny garden ball. I hot glued twine to the spool for a bit of interest.


Oooh aaah! I like this alot!

At one foot tall it is a nice focal point. I'll post more photos when the ferns and bamboo grass fill in a bit more.

It's the kind of project I like, using things I already have and recycling one thing into something unusual and pretty.

Zero cost, loads of enjoyment.

Win win!

Sunday, April 10, 2016

Painted Pallet Boards on Square Planter


I'm always looking for ways to use pallet boards in my garden. 
Since we covered black nursery pots with pallet boards my mind has been spinning!


I figured if pallet boards can make black pots look good,
 how about the other planters in my yard?

Here is the before of the kinda grubby square planter by my front steps last summer. 


Last week I painted it with primer then used our house trim color to paint it 
(and almost everything else) turquoise blue.

 I love the blue against all the shades of green and the flowers!

And here is how it looks NOW-


 For this project I drybrushed the turquoise paint on some pallet boards and used
 our handy dandy brad nailer gun to attach them.

You could also use outdoor construction adhesive but we like the
 security and ease of the nail gun.

We didn't even move it from the yard.
 We just rocked it up at an angle and nailed the boards in place.


Oooh!

 I like the whole vintage vibe this gives that plain planter!! It looks like
an old wooden container that has aged for years.


Aged, 
vintage, 
rustic
 and BLUE! 

Exactly my style!


In the future we MIGHT go ahead and cut some pallet boards
 to fit into the triangular spaces.

 But for now I really like the texture and AGE 
the painted boards give to this plain square planter!

Hmmmm, what else can I do with the rest of my pallet boards?


Monday, April 4, 2016

Thrift Store Dictionary and a $1 Cabinet

Let me start by saying that I LOVE books.
I have seven bookcases FULL in my home right now.

That said, I also love to use aged books
 in my projects and this outdated, trashed
 dictionary is no exception.

Upcycling an old book and restyling a cabinet? It's a match 
made in book and furniture recycling heaven.

This is one of my favorite projects!
Insanely Clever Christy is very methodical with the dictionary pages. I am more of a "tear it into random shapes" kind of gal. We knew this dictionary would be perfect for this project.


We found this solid wood cabinet for $1.

ONE DOLLAR! A SINGLE BUCK!

Ahem.

Finds like this are my number one reason for Thrift Store shopping.


After a thorough cleaning and two coats of Country White latex paint, the door panels get the book page treatment.

A bit of edge sanding give them a vintage vibe. 

Black spray paint updates the knobs and then creative wrapping 
of hemp twine  and hot glue for the edges and around the pulls
 gives it just the right touch!


Wow! I LOVE the way this came out!!


Clear acrylic sealer finished her up and now she is in our guest bathroom. 
She is a classy addition!

Best of all? The entire project cost us less than $5 total.

The old dictionary was $1.
The cabinet was $1.
The Mod Podge came from my stash.
The clear acrylic sealer was on clearance at $2.89.

Time invested....maybe four hours.

I call this one a win win!


And one of the best parts is that we still have most
 of this dictionary for MORE book page projects!

An old illustrated dictionary and a $1 thrift store cabinet. 
One of my most favorite projects EVER.


What's not to love? 

Book Page Christmas DIY

Most of you have figured out I am a color freak with an obsession  for turquoise, red and cobalt blue.  However, I also obsess about ...