Showing posts with label Dollar Store crafts. Show all posts

Wednesday, December 6, 2023

Wintry Snowflake Chandelier-Dollar Store Decor


!!!!!!


Okay, here is the early 90's brass and glass chandelier in my dining room. 
I'll give you a moment to bask in fond nostalgia.


Yeah, well, we're still living with this chandelier until I find exactly the right fixture and can wave a big ol' bag o' money at it, so right there it is going to stay. 
It's just so....brassy and perfectly functional and by the way, 
The Welding Man loves it just the way it is! 

So here are a couple of my ideas for coping with it's golden funkiness each season. 

Dollar Store to the rescue! 


Years ago I saw Martha Stewart's pretty hanging autumn wreath light and it stuck with me.
 So in October I decided to make my own version with several autumn leaf garlands around 
and around and around my light's brassy framework but
 without the candlelit mini pumpkins.
 
We tried it with and without the glass panes and the glass just 
gave it some extra shine at night, so they stayed. 


Ooh! I like it alot and it is a sure sign of Autumn in my house.

Come Christmas time and wintry weather,
 I hit my stash of Dollar Store decorations again and found 
many different styles and sizes of snowflakes. 

We took off the glass panes and hung the snowflakes willy nilly,
 just like they would be in a blustery winter storm.


With just a few icicle strands here and there and oooh! I like this alot, too! 

Even in the daytime in natural light the
 layered textures of silver, white, and glittery gold and 
silver pack a beautiful festive punch.

Even The Welding Man, who does not like it when I mess with "his" light, thinks that this is very pretty!


Note-If you hang enough Dollar Store snowflakes on a brass light fixture you can mostly hide it's golden shininess!


And kapow! Here she is all lit up! She is dazzling!


Ooh aah! So pretty! And with the cold, wet, rainy, snowy winter weather hanging on, I'm leaving these snowflakes on my chandelier at least until Easter!


Which version is better? Daytime or night time? I like them both but the daytime 
chandy looks more wintry to me. 

Go figure.

The Welding Man will be glad to know  I won't be replacing his chandelier anytime soon. 

But I can sure mess with it and make it pretty, can't I? 
 
And maybe I'll learn to appreciate it's brassy vintagey vibe? 

We'll just have to wait and see, lol!


Sunday, October 10, 2021

Melted Shot Glasses = Pretty Wind Chimes/Suncatchers

                                                        Yes, you read that right. 
                            Melted shot glasses can be used to make pretty wind chimes!

  Or, suncatchers, as one "helpful" commenter wrote. "These are not true CHIMES."

                                     Tomato, tomahto, but I understand the distinction. 

                  Ahem. They're fun and easy to make and look so pretty when they're done.


                             The look almost like glass and they have a merry plastic clink to them. 
                                                           And they sure are pretty!

                     
                                     I got the plastic shot glasses at our local Dollar Tree. 
                                                        I bought all the colors!
                     Using an old cupcake pan I put two or three glasses in each cupcake hole.


                                  We used the OUTSIDE oven in The Welding Man's shop. 

THE MELTING PLASTING OFF GASES SOME SMELLY FUMES. USE AN OUTDOOR
                   OVEN  OR BARBECUE, DO NOT DO THIS IN YOUR KITCHEN111

               I set the temp at 250 F and checked them often to assess how the melting progressed.
                                                     I think it took less than 10 minutes.


                                       Here is how the glasses looked before and after melting.


                                   Once they were cool I flipped them out on my work table. No, they 
                                                  did NOT stick to the pan.

We used a small drill bit to make holes in each disc using an electric drill. Then strung them up using chains and rings from other Dollar Tree items. The plastic thingy at the top was in my craft room, I                                                                        don't know what it was before.


                                            This turned out so pretty and was so easy to do!

                          I see online that this can be done with the larger thing plastic drink cups too. 
                                                 I will have to try that and write about it.

Monday, April 19, 2021

Repainted Dollar Store Butterflies

I just couldn't leave well enough alone...so I repainted these metal butterflies for my garden!


Before.......................................and after.


I found these metal butterfly stakes at the local Dollar Store and immediately made plans to repaint them for my garden.


I used two colors of spray paint to give me more of a turquoise color to complement our front deck.


Using a fine paint brush I followed the contours of the stamped metal. I added the tiny vein details to each wing then added some white dots. You can see the veins in this close up but not so much when it's outside in the yard. I also added a bit of glitter paint.


Wow! I love the pop of color against the bright green. Notice you can't really see the glitter when it's outside. But in my colorful colorful garden this blue butterfly really holds it own!

And here is the Monarch version of my Dollar Store butterflies. What a fun project this has turned out to be!


Saturday, November 7, 2020

Easy DIY Lighted Autumn Hurricane

Here's a unique...and easy...DIY for stunning autumn decor.
I "filled" a tall hurricane glass so that the garlands and lights stood tall
inside the glass.


I scored this 20" tall hurricane glass for $2 at a yard sale 
and I knew exactly what I wanted to do with it.


I had Dollar Store leaf garlands and white twinkle lights in my stash
 so I wrapped them together to make one string.

The problem was they would not stand up and fill the glass. Even wiring the garland to the top edge of the glass didn't fill the glass the way I was picturing.

Here's the simple solution!


Take a dowel that is just a little shorter than your glass. 
Cover it with some autumn paper or paint it to match. 
I used leaf printed napkins and wrapped them around diagonally.

NOW, wire your lighted garland to one end, making sure the plug end for 
your lights comes out at the top or bottom, as you wish.


Tada! 

Your pretty lighted garland will stand up and
 fill your glass from top to bottom!


I loved the look so much I did the same thing to a tall pasta jar 
and put both of them on top of a tall bookcase. 
The mirror behind them reflects the colors and lights
 into the room and looks dazzling.

I did a safety check on both containers and found the lights were only warm, 
not hot, so this display is safe.

My kids are kind of blase with all my decorating projects but my grandkids 
and great grandkids still react with wonder and delight 
when they come to visit our autumn house.

So, easy DIY lighting project plus kids' smiling faces?
Win win!


Saturday, May 23, 2020

Glass Garden Balls DIY

By special and numerous requests, here you are, the tutorial for my glass garden balls ....originally posted in 2013!


My blog header shows my love of cobalt blue glass
 and I've added that love of blue glass to my garden art.


Years ago my family got me a big blue gazing ball for my 
daisy flowerbed and I knew I wanted more, more, more! 

But hey, those gazing balls are not cheap and they are surprisingly fragile. 

Basically they are just giant glass Christmas balls. 
And they break if they fall over.What to do?


My first idea involved a bowling ball and lots of glass half marbles from the Dollar Store. 
I got this idea from the Garden Junk forum over at Garden Web.

 I used Silicone II adhesive and  did a bit at a time, only glueing the gems
 on top and let the adhesive dry a bit the turning the ball and doing another little area.

 If you try to do the sides the gems will fall off before the adhesive sticks well, so slowly slowly.

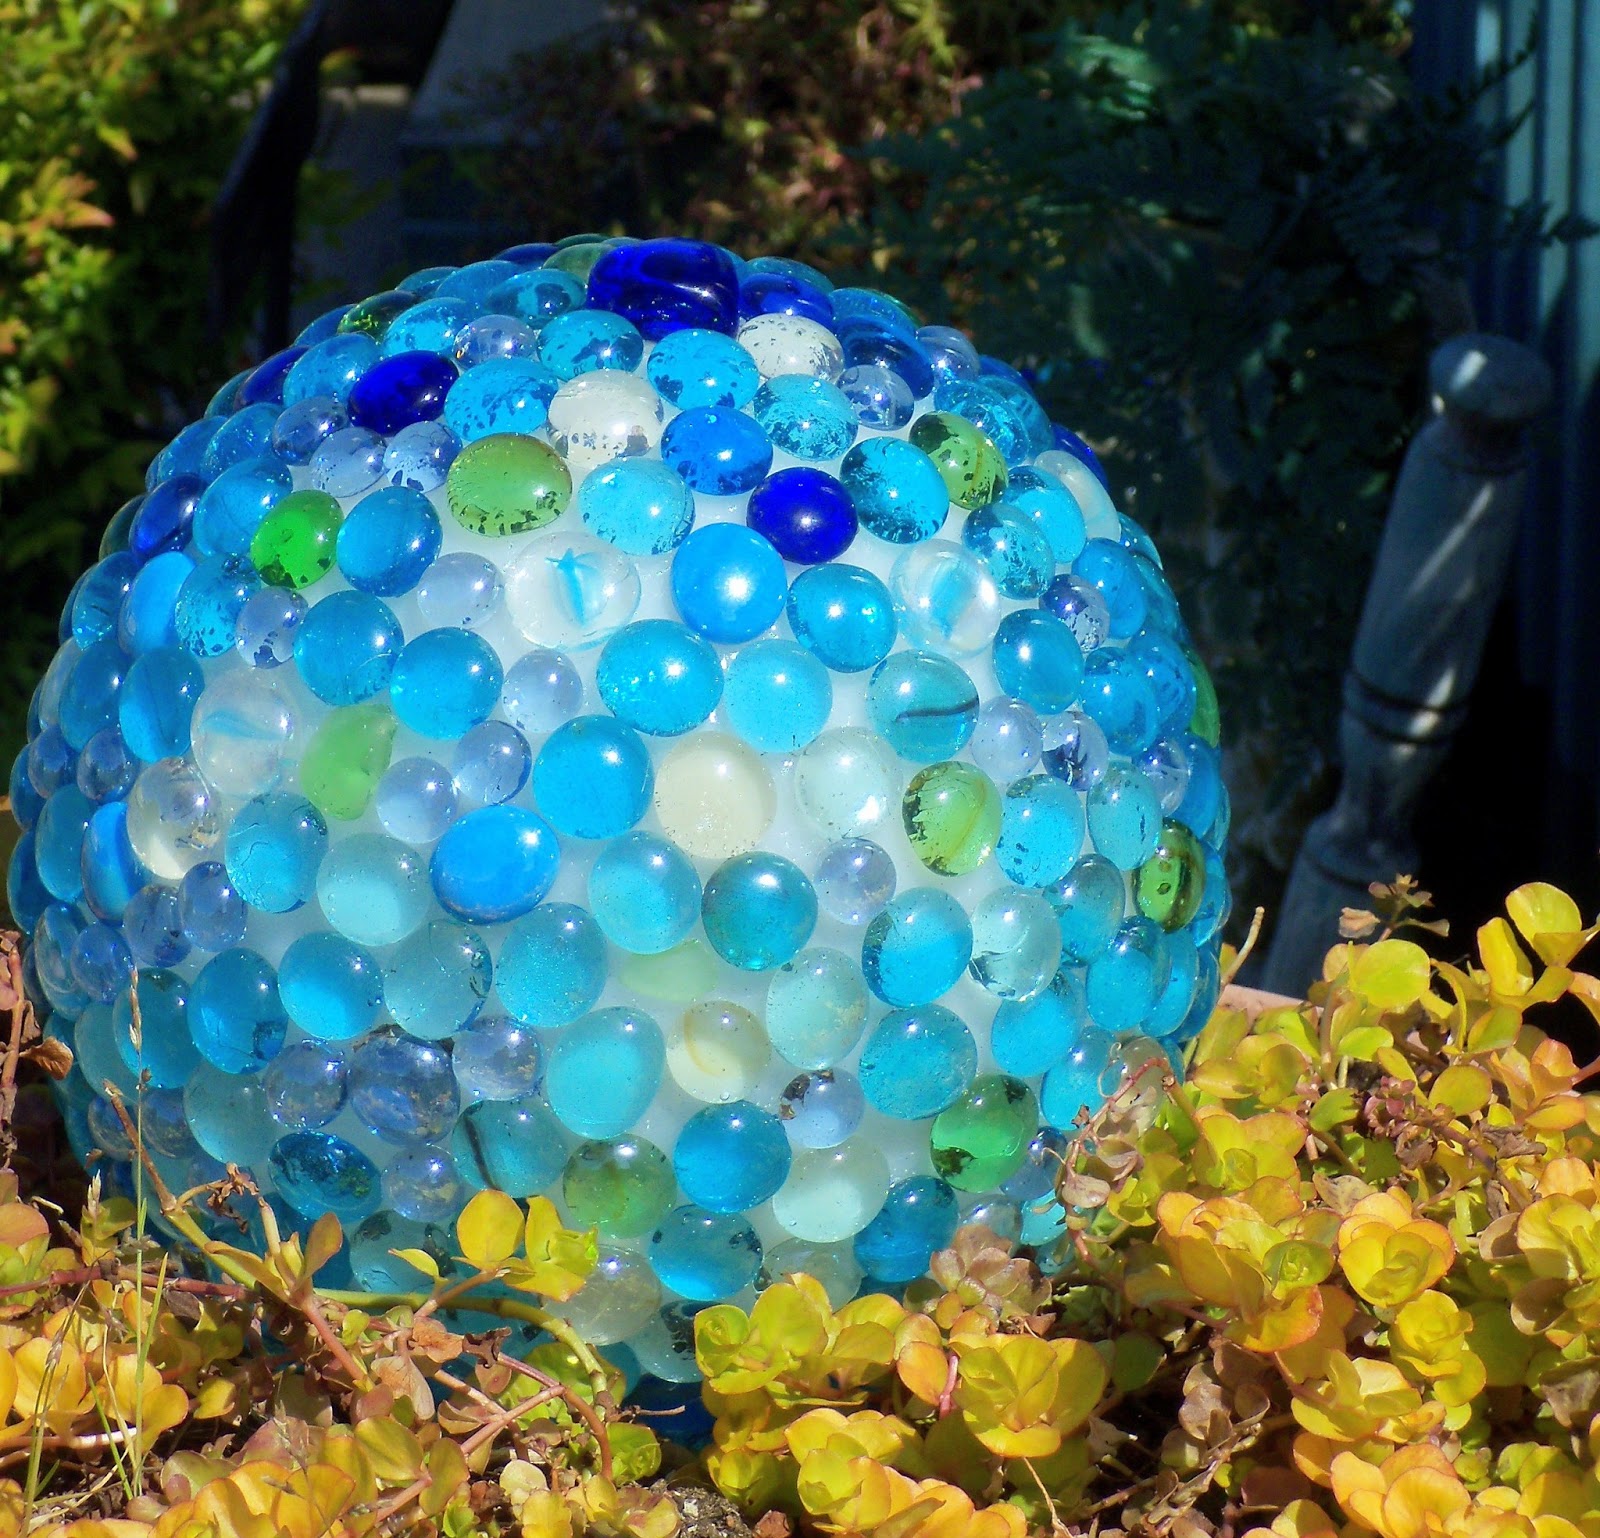
 I LOVE how this came out!!! 

The bowling ball cost me $4 at a thrift store and I used about 6 bags of glass marbles.
The Silicone II cost $4.

 My first blue glass garden ball for about $14. I was hooked!


I snagged this round glass light fixture for 25 cents and knew it would be my next ball project.
 Dollar Store half marbles and garage sale finds gave me the blue glass I needed.
I decided to go with this Amazing Goop silicone adhesive because it was CHEAP.
 It is basically the same formula as  the Silicone II. The total cost on this 
pretty ball is less than $10.


This is definitely an OUTSIDE project since all the glues I've mentioned are incredibly smelly. 
Even outside I have a fan blowing across my work area to avoid the fumes. 
I settled on my front porch and started gluing. Put a small blob of glue on each
 individual marble, you do not have to goop it on. Smear a layer on the topmost 
area of your big ball and put your marble in place.

 I twist them a bit to make sure they stick together.


IMPORTANT! 

The adhesive does not set up instantly so you will have to do small areas
 of your ball and let it dry for several hours then turn it over to do
 the other sides. If you go too fast and  skip this step  you'll have
 glass marbles falling off all over the place! 

In this project patience will reward you with a beautiful art piece.


And done!!


Here she is (of course she's a lady! LOL!) nestled in a soft bed of creeping Jenny. 

A hot pink petunia will join her soon.

 I love the bright blue glass against my blue deck railings and house color.


Oooh ahhh!


And here is the first bowling ball I did 20 years ago!

 She's looking pretty good for her years.

Since then I have glued glass gems to lamp gloves, plastic Christmas balls, 
styrofoam craft balls, soft balls, plastic balls from Dollar Tree and even a hampster ball!

I am always looking for more round balls to decorate for my garden!

Saturday, March 30, 2019

Wax Paper Capiz Shells and a Tabletop Chandelier

Pin ItI LOVE the look of capiz shell chandeliers and lamps but they are always too expensive for my (non existent) decorating budget.
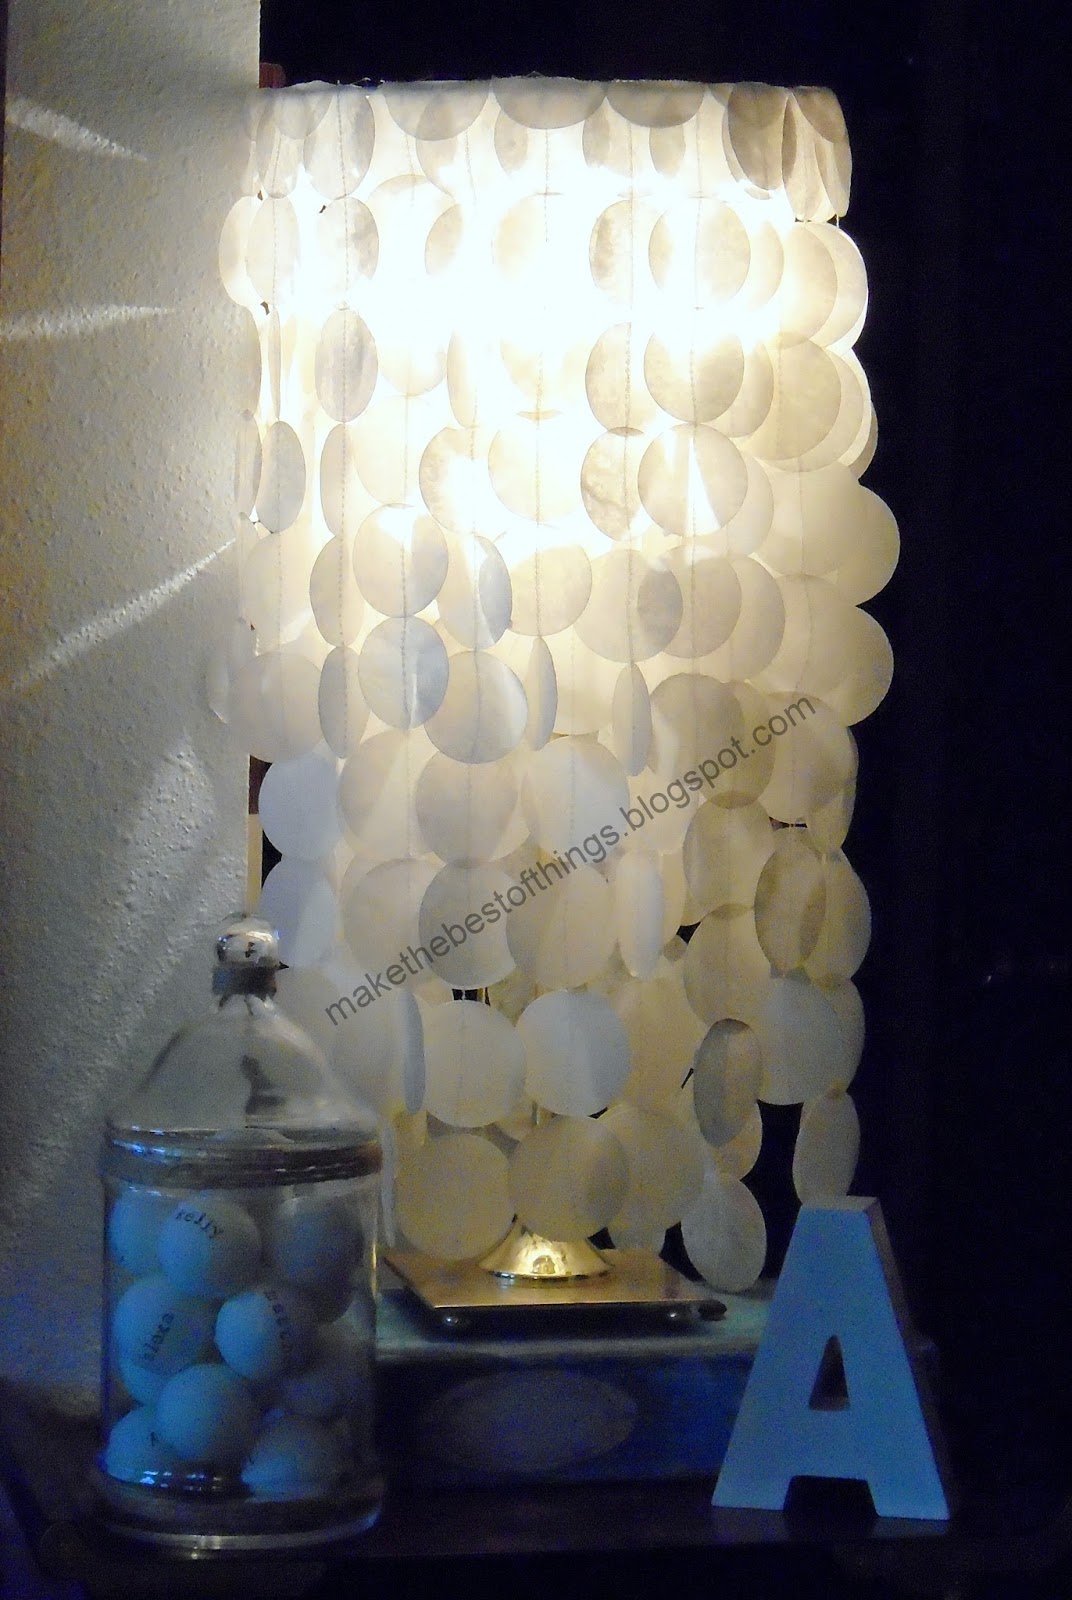
Then I saw some online made of wax paper and
 figured I can do that!

 I chose a tall brass tabletop lamp for the bookcase at the corner of our hallway.


I like it! I like it alot!!


It has a soft glow, great texture and a bit of movement when you walk by.
Even The Welding Man likes it,
he says it reminds him of a wedding dress. :o)


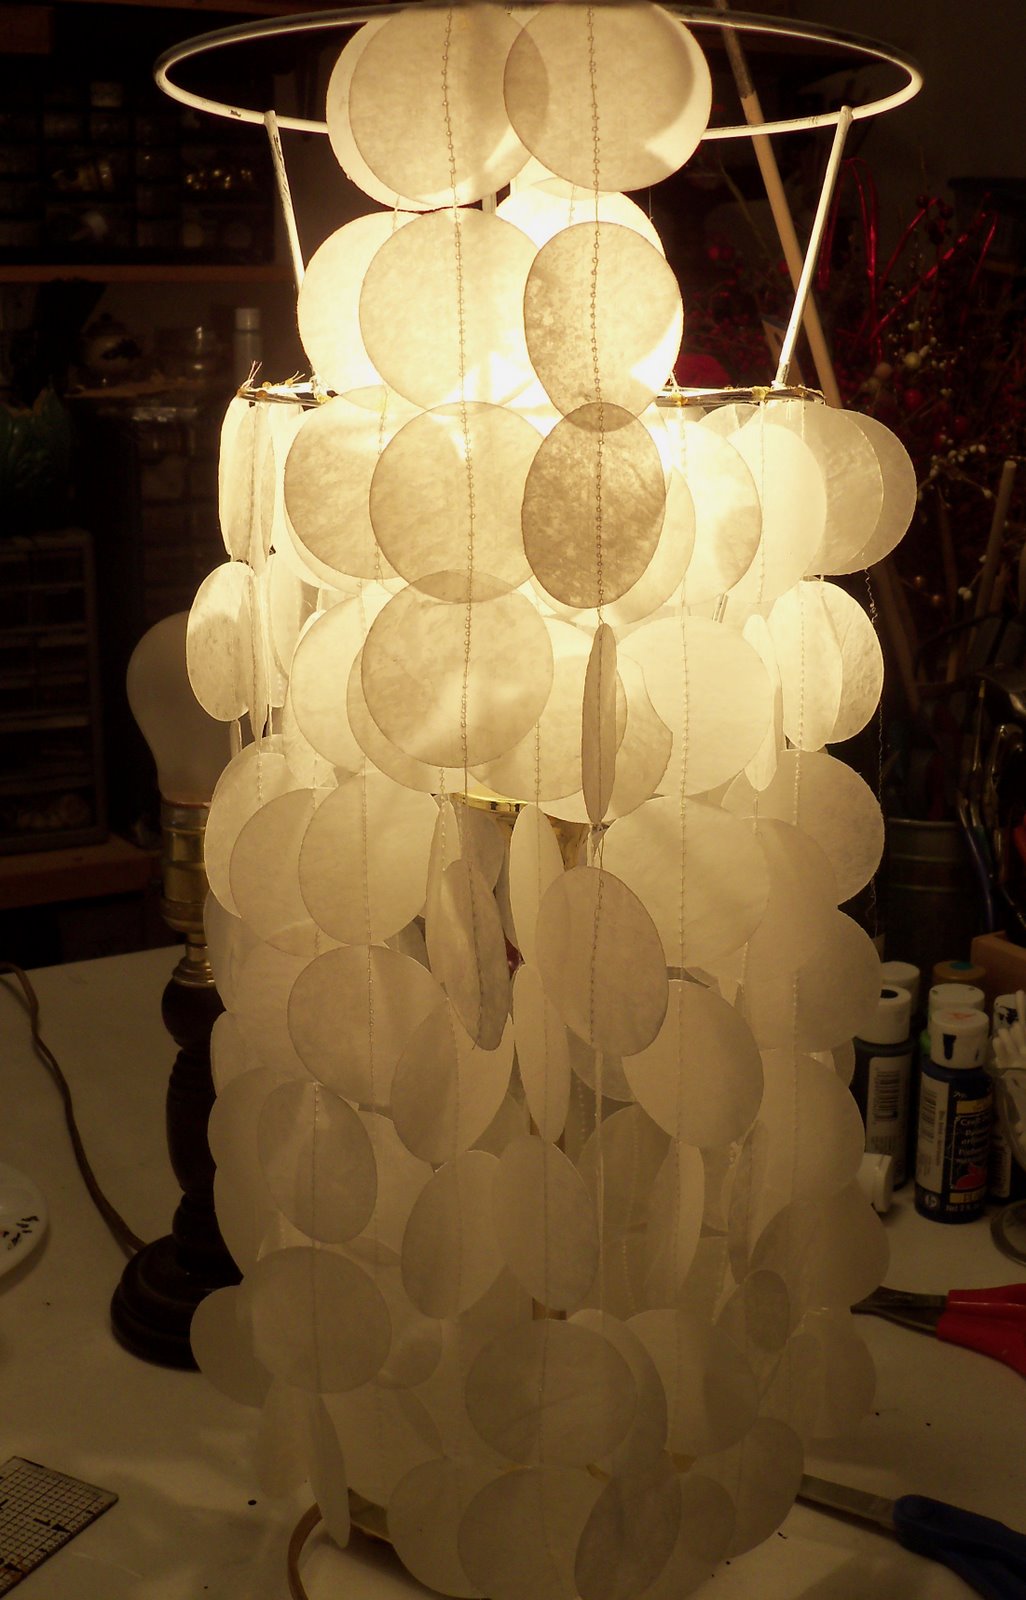
I took a lamp shade from my stash and removed the old cover.
I knew I wanted the rings to be larger at the top and smaller at the bottom.
And I wanted two layers of hanging shells. So I added another ring halfway up
 with craft wire secured with more wire.

After a coat of white spray paint I FLIPPED IT OVER and got all
my fake capiz shell circles ready.


Dollar Store wax paper, baby!!

Next I made the wax paper "shells." I used a dry iron on the cotton setting and put
parchment paper on the bottom between the ironing board and wax paper.

Four sheets torn off close to the same size melt together nicely and make a good, stiff 4 ply sheet.
Let the wax paper cool then start the circle punching. I found my punches did best
 with 4 sheets of 4 ply wax paper, your punch might do better with more or less.

I used a 2" and an 1 3/4" circle punch. I figured I needed about 400 circles total, plus I cut a few extra in case of mistakes or design changes.


I sewed my circles together using my machine's longest stitch and placed 9 circles on each "run."
I sewed several sets of nine together in a single sitting with about three inches
 of thread between each set. I cut them apart into sets of nine and started assembling.


I wound the thread from one set of circles twice around the middle ring and put a dab of hot glue over the thread. I placed each string of circles about 1" apart.


For the top ring I let six of the circles on a string hang down outside and folded the other three over inside the frame, using a dab of hot glue on the thread at the top. This gave the upper half of the lamp a fluffier look and more visual "weight."


Extra circles folded in half and hot glued around the upper ring give the lamp a finished look.


As you can see, the stitched circles diffuse the light and overlap nicely, giving a nice soft glow to the evening. During the day they give that corner a bit of reflected light and nice texture.


I am already thinking ahead to doing this with my dining room light.
Maybe with a little color and a bit of glitter?

When I figure it out and make it I'll be posting right here.
Hmmmm. Stay tuned.


Book Page Christmas DIY

Most of you have figured out I am a color freak with an obsession  for turquoise, red and cobalt blue.  However, I also obsess about ...