Showing posts with label craft room storage. Show all posts

Sunday, March 15, 2015

THAT Dollar Store Contact Paper

Here's the contact paper I'm talking about.

That one print in the Dollar Store's inventory of faux wood and fruit and boring looking contact paper. It's been a regular item there for years, even tho the rolls are not quite as big as they used to be. The black and white toile print  looks a bit vintage, a bit shabby chic. It's a nice clean graphic and goes with just about any style.


See? You DO recognize it! 


I've discovered it goes so well with my book paper and black and white printed craft room boxes, and I've gone a bit crazy using it. 


So many labels are printed on the plastic containers now that covering them up is the best option. ALSO, if you cover them up you do not have to deal with the mess of removing the labels and the sticky residue.


No container goes uncovered in my craft room. Especially if they have red or black lids.


I try to have a couple of rolls handy all the time, especially since I rearrange my supplies as I use them up. Here's an important tip that will save you no end of frustration... 

LABEL EVERY CONTAINER!

Chalkboard labels are cheap and hey, I just found chalkboard contact paper at our local Dollar Store.

That's what I call a win win!

Saturday, November 8, 2014

Matching Storage Boxes with Book Pages

You don't have to spend lots of money to get pretty and practical craft room storage boxes. Just use the containers you already have and cover them with old book pages.

That's what I do!


I painted this tall ice cream carton with white craft paint to cover up the bright design. Once it was dry  I brushed Dollar Store school glue over each section and laid down pages torn from a throw away book. In this case, an old paperback. The older books have nice golden hued pages that look great overlapped like this.

I smoothed the pages down with the same stiff brush dipped in more school glue. Let it dry thoroughly.


Then you can seal the box with spray acrylic or a layer of Mod Podge in whatever sheen you choose. I especially like their gloss hard coat for finished projects.

I add chalkboard labels so I can list what's inside my boxes.


I use a mix of lots of different kinds of containers in my studio and also use loads of book pages, Dollar Store contact paper and Mod Podged tissue or gift wrap on my storage. Even plastic coffee containers look good with a bit of contact paper and a new label! I like how all the designs blend with my jars full of supplies.


Here are bankers boxes we used for our move which I have covered and prettied up for my craft room. Now I just need to add labels and fill them up!

Once you start recycling containers with book pages and other papers, you will save money and have a neat and practical way to store your stuff.

I call that a win win!


Sunday, February 12, 2012

Recycled Blue Cubby Shelves

I started my craft studio redo with this bookshelf built by The Welding Man. I painted it shades of turquoise blue with burnt umber drybrushing and Mod Podged book pages to foam board for the backs of the shelves. Then I loaded it up with canning jars full of beads, ribbons, lace and all kinds of fun stuff. What a good start!


I remembered these two cubby shelves in my stash and decided to paint them the same way. I don't know their original purpose but they were covered in a band aid flesh color with some sort of maroon colored texture.

As you can see the cubby holes are just perfect for some striking studio storage with lots of different jars and bottles.

Love this turquoise color from Apple Barrel! Already this looks better and it made me smile to see such an awesome improvement.

I colorwashed with a lighter shade of turquoise then dry brushed burnt umber over all the edges.

You know I had to sneak some recycled book pages into the mix and here they are. Love this!

I was surprised that I already had so many small jars for storage. I love how the different sizes and shapes look in the little cubbies. I added book pages to the jars that had label residue.

And here are both shelves, painted, Mod Podged and stocked with all sorts of neat glass storage jars. I still need a few really small jars for the upper right cubbies. You can see the jars have to be pretty small, about the size of those spools of thread. Even baby food jars are too big! I may try to make containers myself, we'll see how the jar hunt goes.

I LOVE the way these little shelves come out. Having all my small trims and doodads in glass jars gives me a creative lift, and they look pretty darn cool, too. They anchor the left end of my shelves which span the window wall in my studio. Note the yardsticks which we used for shelf edging. I love how they look, I just need more for the rest of the shelves.

These shelves cost me less than $5 several years ago and I already had the paint, book pages and Mod Podge.Can't beat that for cheap and effective craft storage!

Posted by Picasa

Ooh aah. I knew when I started my studio face lift that I wanted it to be organized, functional and visually appealing. In other words I wanted my room to make me smile and inspire me creatively. It's not all the way there yet but boy, it is progressing!

I'll be linking up to the parties in my sidebar. I am amazed and inspired weekly by the creative ladies in blogland. Come visit and have some fun!

Tuesday, February 7, 2012

Little Red Shelf For My Craft Room


I bought this little flea market shelf years ago and as I pondered storage for my studio I saw that it would be a neat addition. I knew it would be a nice shelf for jars and storage, once I restyled it.


These are the colors of my craft studio redo, with a bit of black and white thrown in the mix. I already had several turquoise shelves, so I chose to go with red this time.

And I'm very glad I did! Here's the little shelf in it's restyled glory with a gloss red finish and Mod Podged shelf. Flowers punched out of the same paper style it up and also adorn the pretty glass jars.

Even after using Orange Glo, WD40 and acetone, the labels still left sticky residue on the jars, so I decorated them with torn book pages, rosettes, yo yos, buttons and more punched flowers, using hot glue.

I layered on bits of lace and sealed it all with Mod Podge. I like it. I like it alot!


And here she is on my work table along with my other handy tool holders. I love that bright spot of color. I'll keep it there until another spot calls out for a nice pop of red.


Another bit of blue would have been nice but boring. That little red shelf is just right.

As for the rest of my studio redo, it's coming along nicely. I'll be posting a few of my other storage projects as I go along plus a full reveal when it is finally finished.

I'll be posting this on the parties in my sidebar. Come check them out, you'll see lots of creativity out in blogland!


Saturday, February 4, 2012

Pretty Craft Room Jars

Ooh aah.


I am hip deep in my craft studio redo and I'm storing everything I can in glass jars and bottles. Since completing chemo and radiation last year I find my memory is not as good as before and I need to see what I've got in order to visualize a project. I am lucky enough to have lots of  Mason jars from pint size all the way to half gallon that I use as is. And I already had dozens of other bottles on hand and after a shout out to the fam on Facebook, I had lots more.

Most jars were ready to use but some had problems which I had to address.

See the mark on the $1 price tag? Half price, baby! But this fish bowl's hard-water stains just wouldn't come off.

And this almond label would just NOT come off, even after an overnight soak. Even tho this is a plastic container, it is clear as glass and a really neat square shape.


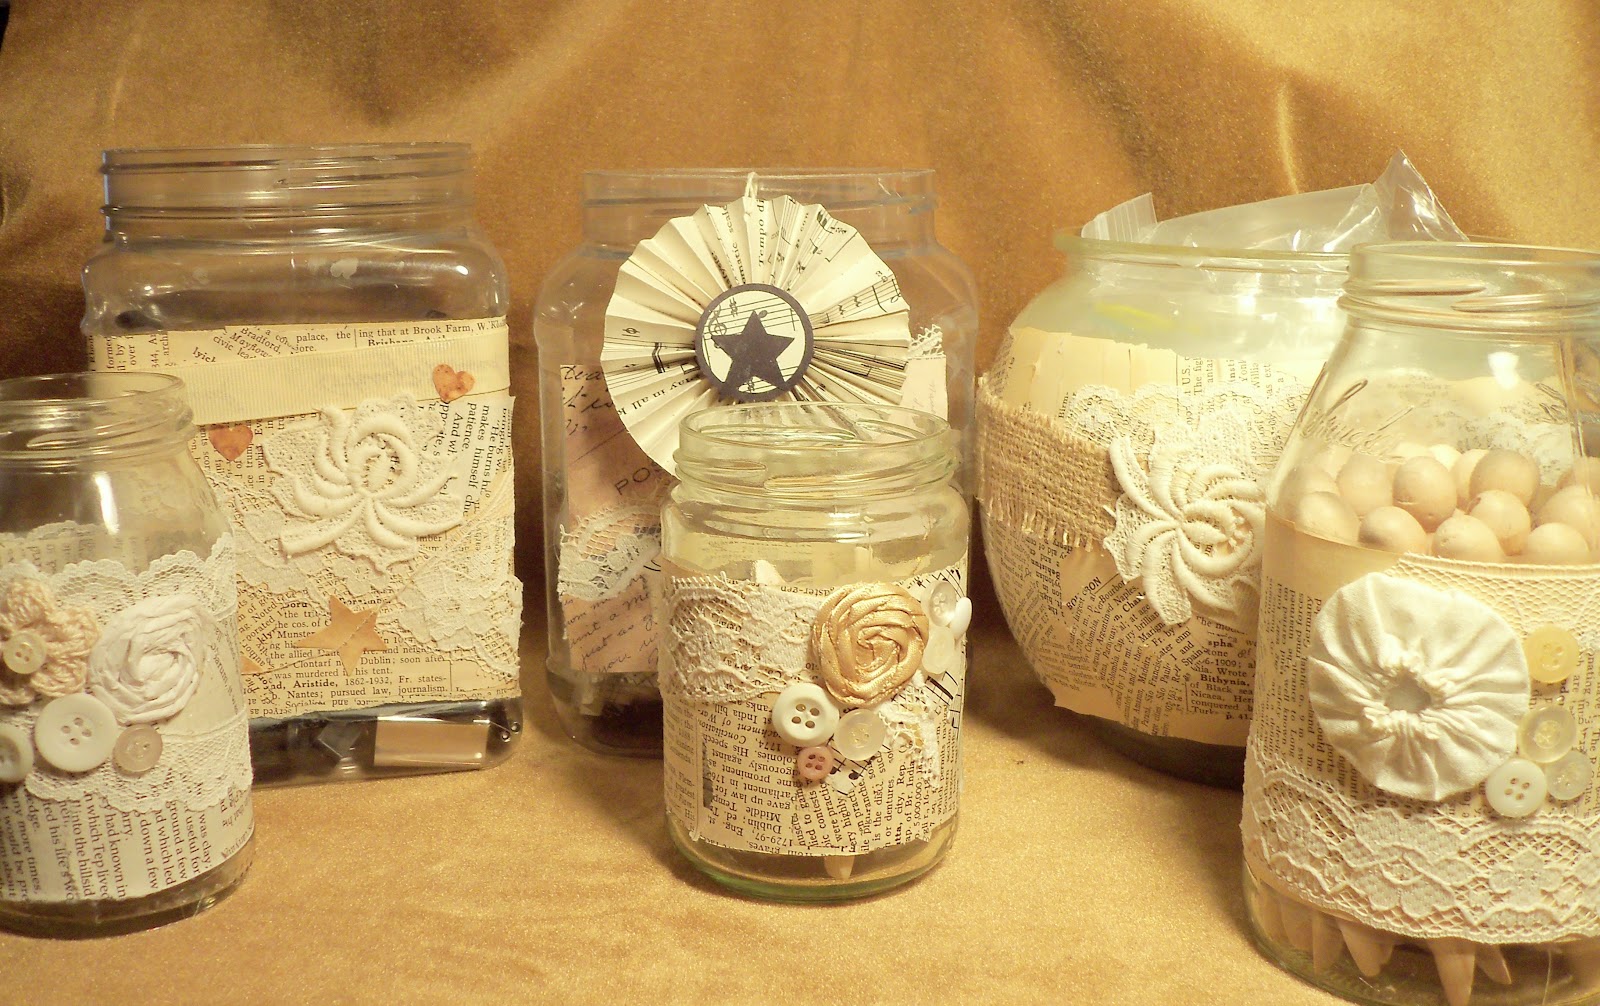
So with Elmer's glue, Mod Podge and various recycled book pages, music sheets, lace, ribbons, flower trims, scrap book paper, burlap and heart and star trims, those jars were transformed into pretty storage for my craft room!

I love how the mixed neutral trims and the clear glass contrast with the weave of the baskets on my old painted bookcase. I added the NEST garland made by Insanely Creative Christy, and this display makes me smile every time I see it.

Here is a stubborn label on a perfectly usable mayonnaise jar. It is a good storage jar but ugly. So I gave it and two others "the treatment" and here's how they turned out....

Everything is from my stash...a fabric yoyo, lace trims, buttons, hot glued on top of recycled book pages. So pretty!


The two smaller pint jars have a bit of music paper, a satin ribbon rosette, a crocheted flower and lots of buttons. I LOVE the way these came out! And you can't tell there are grungy labels underneath those pretty trims.

So pretty! And not only simple, but very very cheap. The jars were free and the trims were odds and ends in my stash. That's the kind of project I like-maximum impact and practicality and almost free. So with the shelf I painted turquoise and stocked with glass jars last week to this week's pretty glass storage jars, my studio redo is getting a good kick start. NEXT-easy, inexpensive and stylish craft room storage boxes on the CHEAP. So, stay tuned!

I'll be joining the blog parties on my sidebar. Come visit and be amazed at all the creativity out in blogland. I have to admit after seeing the wonderful projects on all these blogs, I am much less impressed with Martha Stewart and much more impressed with the consistently imaginative designs I see on creative blogs. And ladies, bloggers do it without any staff. You are amazing!


Posted by Picasa

Saturday, January 28, 2012

Turquoise Shelf For Craft Room Redo

We've been in our new digs for 10 months and it's time I truly set up my craft room the way I want it. It is not just a hobby place where I can create whatever my heart desires but also the production studio for all my Etsy wares. I dithered about the colors and gravitated towards red, black and white, until I saw this fantastic color combination.

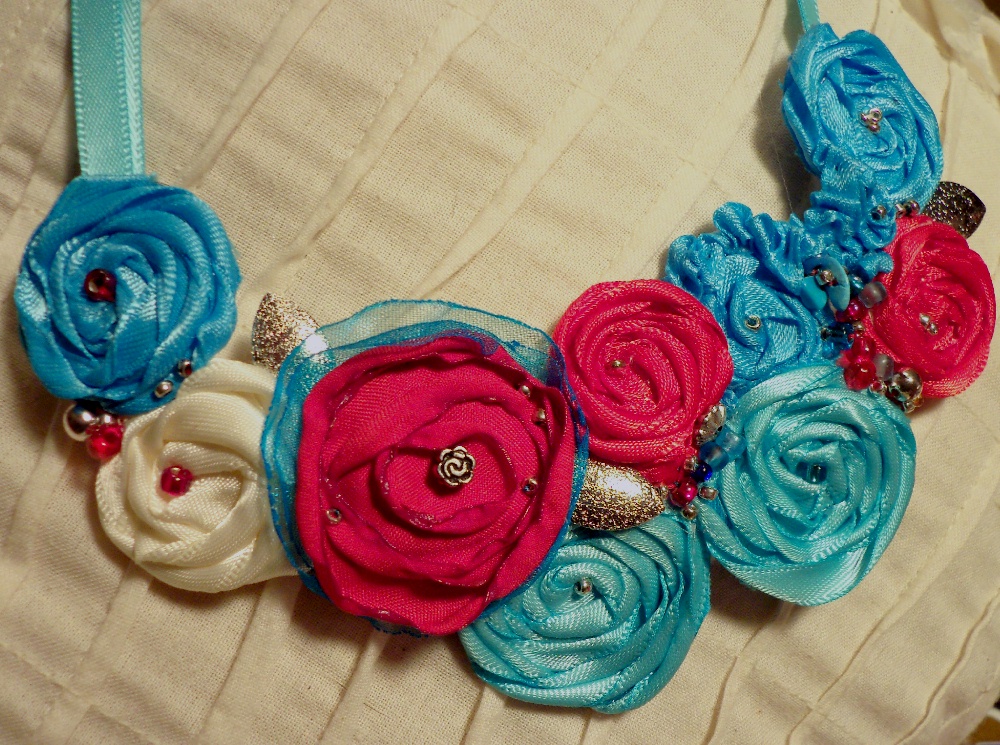
I love ALL the colors used in this wonderfully organized craft space. I even made a necklace for my shop in these colors. LOVE them!


I see this mix of colors everywhere now. What a bright mix of cool blues and hot reds. I'll also throw in a bit of pink and cream and of course, my recycled book page storage boxes.

This is the most recent storage solution I've come up with. The Welding Man built it for my space, and I've added the foam core backing to each shelf. Sturdy, but plain and boring. I got out my Apple Barrel paint in turquoise and burnt umber and went to town.

Here is the top, painted and antiqued. I love the way the burnt umber ages the edges. The other shelves are still drying, but you can see the great color.

You knew I'd be throwing some recycled book pages in here somewhere, and that's what I used to "dress" the foam backer boards. I just love the way this looks with the bright shelf color.

I like it. I like it alot!

I wanted an aged, vintage, rustic look so I layered glaze and a lighter turquoise color until it looked just right to me. This pic shows the colors lighter than reality. The true color is below.

And here it is, loaded up. I use glass jars for almost all my small supplies and I love having them all out where I can see them. One of my best buys ever was a case of 1/2 gallon size mason jars, they are wide mouth and large enough to hold alot. I've used 3 of them on these shelves plus lots of quart and pint size jars.

And here it is in place, right next to the door and butted up against the side of my enormous steel tank desk. It's a good start and now I'm energized to tackle the rest of my room.


As you can see the organization hasn't extended any further than this. Trust me, I didn't show you the real mess in there. I have so much stuff and I use it ALL! But now I have to decide, how much do I want to paint turquoise and how much red?

Book Page Christmas DIY

Most of you have figured out I am a color freak with an obsession  for turquoise, red and cobalt blue.  However, I also obsess about ...