Showing posts with label DIY gifts. Show all posts

Saturday, August 26, 2017

Colorful Felt Pillow Covers

I make these appliqued felt pillow covers for family gifts and decor. 
I use straight stitching on my Singer and I'm not too awful picky
 about keeping everything neat and tidy. I like the texture that
 the multiple stitching gives to the thick felt and
 LOVE all the colors available. 


 Here's a gallery of my designs so far. This year I'm going to try some 
Halloween and Christmas designs, those should be fun!
It really is a simple process. Cut out the felt shapes and sew them in layers
 on your pillow fabric. You can be as neat and accurate or as abstract and casual as you prefer. 

Do you have questions about the DIY? Just ask them below and I'll answer them all!
Thanks for stopping by!

Tuesday, October 1, 2013

For Gifting Season-Freezer Paper Stencil Custom Tee


I made this cute Yoda tee for my son's birthday. I decided to go for something a bit more complex than just a simple "nerd" tee shirt, and boy, do I LOVE how this came out!


First I  found two designs online that I knew he would like. The design on the left is from the movie Pacific Rim and it is the insignia for the Jaeger warrior robots. I decided to go for Yoda with the headphones.


I printed the design in black and white then taped a piece of freezer paper (shiny side down) over the top. Make sure your freezer paper is a generous size so you won't have any designs cut too close to the edge. I used a razor craft knife which gives me a new, sharp cutting edge just by breaking off the blade at pre marked sizes. I also tape my design and freezer paper to a mirror for good light and a nice sharp edge on my cuts.


I simplified the design a bit and premarked with an x for those parts which would be "free floating" and not attached to the rest of the design when I ironed it down. I prefer to do the floaters this way, other makers make narrow bridges to the rest of the design and then hand paint the bridges out on the tee shirt once the stencil painting is done. It is up to you!


Here is Yoda ironed to the tee shirt, using a hot iron on a padded surface and NO STEAM. The wax paper layer on the freezer paper adheres nicely to the tee shirt when it is ironed, giving you a clean and immovable stencil.


I prefer a mottled look to my tee shirt projects so here I have mixed black and white acrylic craft paint with  some textile medium (which is clear). I use a third of each and use a make up wedge to mix them up.


Place a piece of cardboard inside the tee shirt then straighten it out on your work surface. Here you go!
Pounce, or bounce, your painting sponge, or brush, straight up and down in each area of your stencil. Do NOT rub back and forth or you will lift the edges of the paper. Put on a light layer at first then go back and add more paint until you like the coverage you have. Remember, the paint will dry a lighter shade.


Do not wait until the paint is completely dry. Your stencil will stick to the paint! While your paint is still damp, carefully peel the freezer paper away from the tee shirt.  Oooh aaah!


I always add dry brushed high lights to give the designs a bit of dimension. This gives the already custom tee shirt design an even more unique look. As for laundry instructions? I wash these tees just like I do regular tee shirts but I turn them inside out. Cold wash, tumble dry. They hold up quite well and over the years the slight fading doesn't detract from the design. All in all this is one of my TOP favorite craft projects.

Our family gives out a TON of custom tee shirts at Christmas and this year will be no exception. In fact, I am starting to get special requests for sayings on tee shirts that will only have significance to the close family. Gotta love that! 
This is a simple and inexpensive project for gifts or home decor all year long. You should try it out. You can do it and then you'll be hooked!

Come check out the link parties on my sidebar. I'll be linking up there, you should be too!

Sunday, February 12, 2012

DIY Wrapped Charm Watch Bracelets

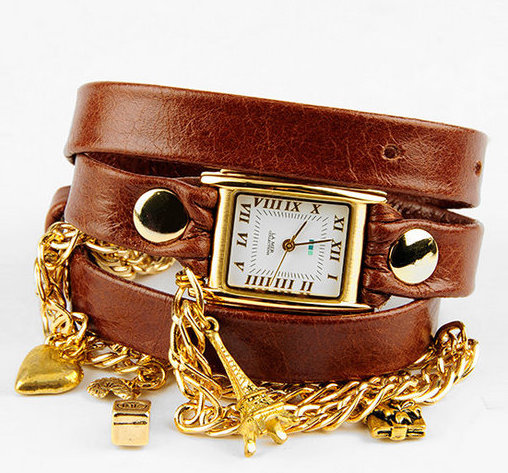
Last year I started noticing these gorgeous triple wrapped watch and charm bracelet combinations by La Mer, among others, out there in blog land. At over $100 a pop, they were way out of my budget but still drool worthy. See what I mean?


And then sweet, creative Donna at Flamingo Toes posted how to make this charming jewelry. I was hooked and knew I had to make some for Christmas gifts. Now that gifting is long gone I can finally post how I made them.

Here is Donna's link, her instructions are clear and easy to follow. She is one smart, creative gal!


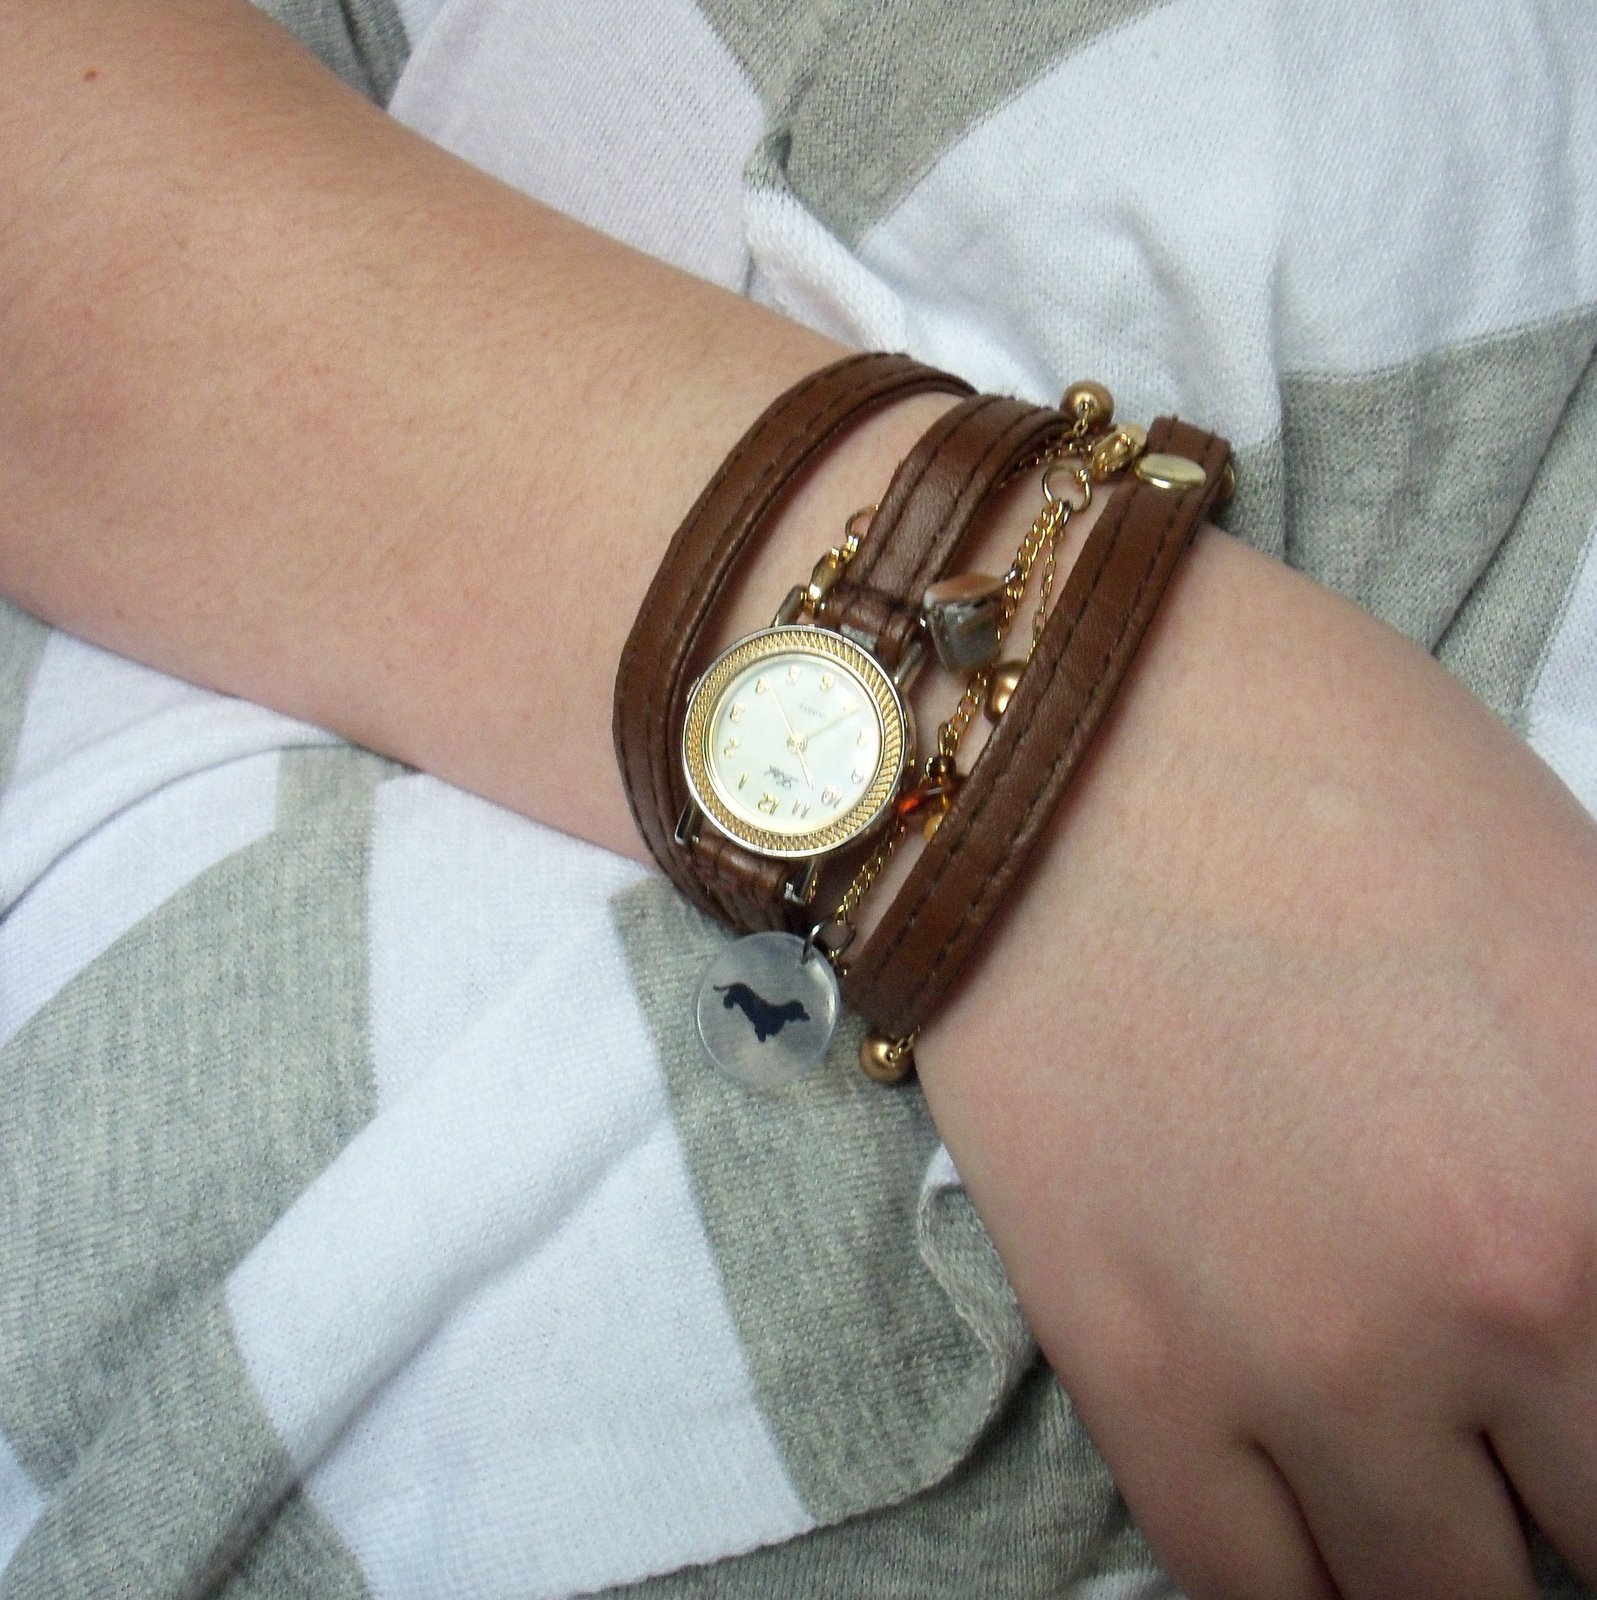
Here is my first attempt, and I included a wee dachshund shrinky dink charm. My daughter loved it!


And here's my second one with the wonderful teal and turquoise beads that go so well with the brown leather. My granddaughter loves hers!


Of course I started with watches from my jewelry box. I have lots more than I thought since I wear them as jewelry, like bracelets. I chose watch faces which would work with a skinny strap.

I ran into a glitch when I could not find skinny belts anywhere until I ran across the purses at the local thrift store. SCORE! Not just skinny leather straps but cool brass swivel headed hook up hardware, too.

Following Donna's instructions, I put each watch/bracelet together. I cut one strap in two to the measurement I needed and kept the hardware intact at each end, then folded the cut ends over each side of the watch face. Where I didn't have a rivet to attach the leather loops, I punched holes in the straps and hand sewed them with strong stitches in matching thread. A drop of super glue on the sewing keeps the thread from loosening.

Into my bead and jewelry stash for chain, lobster clasps, rings and more beads, plus a few dangly bits. This was fun!

And the charm bracelet can be worn separately!

A lobster clasp connects the ends of the charm bracelet to the watch.

And here's that cute doxie charm made from shrinky dink plastic. Add two lengths of satin ribbon to the ends and this charm bracelet makes a pretty necklace, too.

I still have lots of watches and a couple of thrift store purses with skinny straps, so I'll be making myself one of these for Valentine's Day. The girls loved their wrap charm watches and I see them wearing them all the time. THAT tells me they really DO like them!

I'll be linking up to the parties in my sidebar. Come visit and see the creativity that's out in blog land, you'll have a great time.


Book Page Christmas DIY

Most of you have figured out I am a color freak with an obsession  for turquoise, red and cobalt blue.  However, I also obsess about ...