Showing posts with label burlap decor. Show all posts

Saturday, September 26, 2020

Easter Eggs to Giant Acorns DIY

I am ready to start decorating for Fall so I crashed my stash and
 found these large size Easter  eggs from the Dollar Store.
 I knew I could make something perfect for my autumn decor...


...and here's what I did with them. 
I made giant acorns!


I like them alot!

Here's how...I started by painting the eggs brown with craft paint.


I cut ovals out of burlap and hot glued them around the eggs with plenty of pleats. 
Let the glue cool completely. 

I used a deconstructed pine cone for the first one I made but I wasn't thrilled with the way it looked.
 I decided to make the next ones using only the smaller, 
rounder end of the eggs. Plenty of hot glue held wrapped garden twine
around the top of my acorn shape.
I like the way this one came out!


A short twig makes a nice stem and now I've got this figured out. 
Then I made several more and displayed them in a wood bowl with
 my home made faux moss balls.


So which ones do you prefer? The wrapped twine toppers or the pinecone parts? 
Either way they sure look good and are perfect for my autumn tablescape.
The total cost is $1 for six eggs and another $1 for the garden twine.

That's a win win in my book!


Friday, June 8, 2012

On Sale in my Etsy Shop....

Yes, dear readers, like many of you I have an Etsy shop! I just finished setting up the special sales on my listings this month. If you're a fan of my burlap pillows....or rosette necklaces....or my original vintage style Halloween banners, click on over there!


A vintage brooch centers this pretty rosette necklace!


A pretty red and black necklace with a Steampunk vibe and a teeny tiny skull with red crystal eyes!


One of my popular Halloween banners hand painted in a vintage carnival style.


Click on over and check out my shop. You never know what you will find!


Saturday, February 4, 2012

Pretty Craft Room Jars

Ooh aah.


I am hip deep in my craft studio redo and I'm storing everything I can in glass jars and bottles. Since completing chemo and radiation last year I find my memory is not as good as before and I need to see what I've got in order to visualize a project. I am lucky enough to have lots of  Mason jars from pint size all the way to half gallon that I use as is. And I already had dozens of other bottles on hand and after a shout out to the fam on Facebook, I had lots more.

Most jars were ready to use but some had problems which I had to address.

See the mark on the $1 price tag? Half price, baby! But this fish bowl's hard-water stains just wouldn't come off.

And this almond label would just NOT come off, even after an overnight soak. Even tho this is a plastic container, it is clear as glass and a really neat square shape.


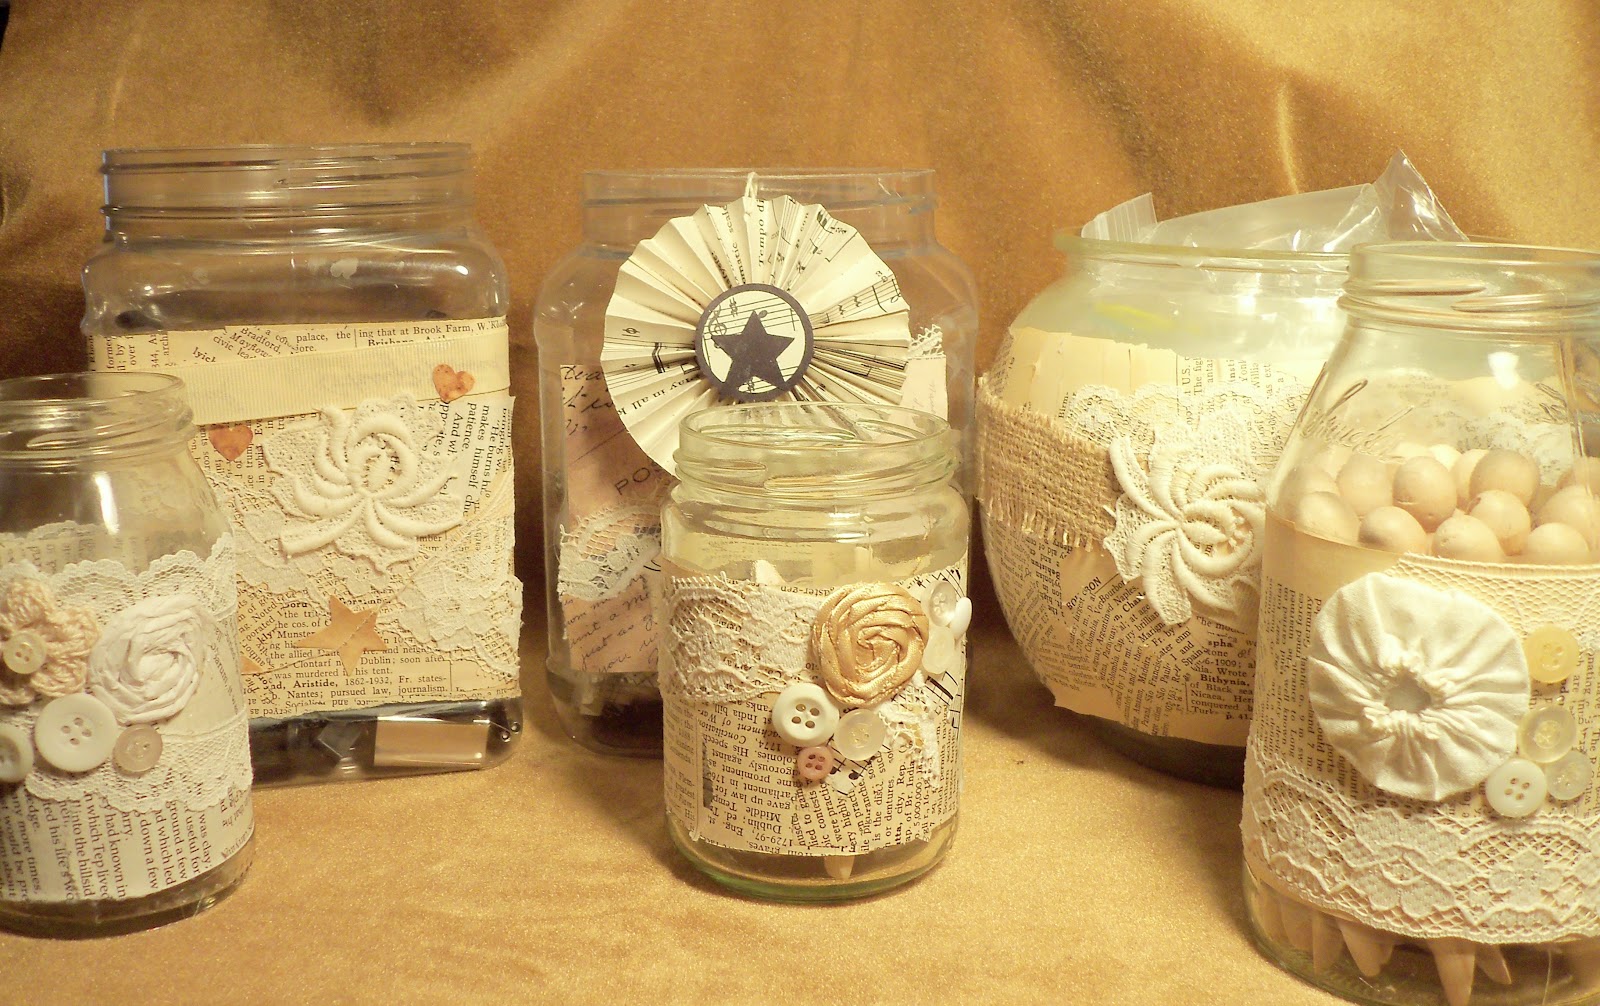
So with Elmer's glue, Mod Podge and various recycled book pages, music sheets, lace, ribbons, flower trims, scrap book paper, burlap and heart and star trims, those jars were transformed into pretty storage for my craft room!

I love how the mixed neutral trims and the clear glass contrast with the weave of the baskets on my old painted bookcase. I added the NEST garland made by Insanely Creative Christy, and this display makes me smile every time I see it.

Here is a stubborn label on a perfectly usable mayonnaise jar. It is a good storage jar but ugly. So I gave it and two others "the treatment" and here's how they turned out....

Everything is from my stash...a fabric yoyo, lace trims, buttons, hot glued on top of recycled book pages. So pretty!


The two smaller pint jars have a bit of music paper, a satin ribbon rosette, a crocheted flower and lots of buttons. I LOVE the way these came out! And you can't tell there are grungy labels underneath those pretty trims.

So pretty! And not only simple, but very very cheap. The jars were free and the trims were odds and ends in my stash. That's the kind of project I like-maximum impact and practicality and almost free. So with the shelf I painted turquoise and stocked with glass jars last week to this week's pretty glass storage jars, my studio redo is getting a good kick start. NEXT-easy, inexpensive and stylish craft room storage boxes on the CHEAP. So, stay tuned!

I'll be joining the blog parties on my sidebar. Come visit and be amazed at all the creativity out in blogland. I have to admit after seeing the wonderful projects on all these blogs, I am much less impressed with Martha Stewart and much more impressed with the consistently imaginative designs I see on creative blogs. And ladies, bloggers do it without any staff. You are amazing!


Posted by Picasa

Tuesday, December 20, 2011

Burlap Santa Claus

I am still getting my fine motor skills back after my breast cancer treatment, so sewing and painting have been on my list of skills I want to rebuild and maintain. Usually I make LOTS of Santas for my Etsy shop at this time of year, including from paper mache, but as I said, I'm still coming back.

That said, I am REALLY pleased with this primitive Santa Claus doll with an outfit and accessories made of burlap. Once I painted his face I knew he was a "go." He is my doll #921 and he made me smile. Of all the dolls I make, my Santas are my favorites!

He stands 20" tall and I had a great time putting all the details together.

I added burlap ruffles to a twig wreath and added one of my string angels and a tiny twig star. They are perfect together!

The jointed teddy bear in the stocking is golden plush and a tiny beauty. I buy them whenever I see them, they are the perfect size for my dolls. The stocking is white burlap trimmed with tan furry felt.


With his wired arms this Santa is totally poseable and he can hold small items. His hat is wired, too, so it can be twisted and turned.


Evidently a Santa in a burlap outfit is NOT a nutty idea, since this handsome guy sold in my Etsy shop in about a week! Really, burlap, who knew? I wish Christmas wasn't so close upon us because I'd make more of this style Santa if I had time. Perhaps I'll make one for practice and inventory and if he doesn't sell, well, he would look GREAT with my holiday decorations! I'll call that the plan, that's the ticket.

Thanks for checking my burlap Santa out. The world is a wide and interesting place, you never know which idea will please somebody out there.

Friday, February 18, 2011

Burlap Ruffled Bulletin Boards

Here are the finished bulletin boards...I like them alot! Read on to see where I started.


I've been seeing some gorgeous desk and office redos out in blogland and I knew I wanted to do something about my own desktop and office space but without spending any money, as usual. I have a massive steel desk with a large desktop surface, so first I moved my printer up top right next to my monitor and keyboard.


But ewww, look at those ugly walls! I definitely wanted something prettier and more practical, like a pair of bulletin/ribbon boards.


And look, another ugly picture of the project in progress. I padded two cardboard rectangles with a double layer of an old clean blanket for thickness and duct taped the whole shebang. It gets better after this, trust me.


I covered each padded form with natural osnaburg and added criss cross lace for a nice design touch. I love the subtle combo of the white lace and beige osnaburg, so pretty.


I crashed my stash of white buttons and hot glued a nice one to each lace junction. Pretty!


Then I added generous burlap ruffles to each ribbon board. LOVE the contrast of the rough, tan burlap against the lace, buttons and beige fabric!


Here is one board in place next to the printer. It already looks much better!


And here is how this corner of my desktop looks like now with both boards in place. Ah, much better! My glasses are sitting on a glass display plate stand which I've decoupaged with old book pages. The book pages make this old piece look like vintage bake lite plastic, I love it! In fact, I like the book page look so much, I decided to redo the rest of my desk space with old book pages. I'll be blogging about those projects very soon!


I'll be joining the parties on my sidebar this week, come visit and see all the wonderful creativity out in blogland!

Book Page Christmas DIY

Most of you have figured out I am a color freak with an obsession  for turquoise, red and cobalt blue.  However, I also obsess about ...