Showing posts with label pallet boards. Show all posts

Friday, April 19, 2019

Pallet Boards and Nursery Tree Pots = Vintage Style Planters on a Budget!

Gardening season is almost here and I was eagerly looking for some big vintage style wooden planters for my garden.

Dang! Big planters are SPENDY!

So look what we did...


Here's our solution using FREE wood salvaged from pallets and really cheap tree pots from our local nursery.


This 23 gallon planter is 24" across and 14" high. It was only $6 and
 it is plenty big enough for loads of flowers or veggies.

But yikes! It was ugly.


But here it is NOW.

Oooh aaaah!

It has just the perfect vintage vibe I was hoping for!

Look at this lovely FREE wood we salvaged from old pallets. 

We did not have to pull the pallets apart. Some of them were already falling apart and the others we just cut between the support boards. Two old pallets gave us got plenty of lumber pieces long enough for this project. 

Ahem. The Welding Man cut them to length with his big manly saw.

The boards are a mix of fir and cedar and have not been chemically treated, so the sawdust was not a hazard.


For this project we decided to go under the rim around the top of the planter. We laid out a few boards  and marked them before cutting off any of the ends that had nails sticking out.


Laying the planter on its side, we fastened the boards with a slight gap between them at the top because of the angle on the pot. We totally eyeballed the spacing so it isn't perfect. Then we used my favorite power tool of all time...the handy dandy air powered brad nailer.

 Kachunk! LOVE that brad nailer!


Ahhhh! Loving how this project is coming together As you can see the brads are sticking through to the inside of the plastic. The ends are easily bent down by hand or with a pair of pliers. If you cut them off you lose some of the fastening power of the brads and the boards could come loose.


The cost for these two vintage style beauties? $12 total for both of the pots. The pallet wood was free and we already had the tools and the brads.

We didn't even have to sand the boards!


I like them alot! 

Tomorrow I will do a  bit of dry brushing to the boards with the turquoise blue paint from the deck and maybe a bit of white. Don't know yet if I want to paint the black rims at the tops. I'll let you know and post photos if I do.

Don't you love it when an idea becomes a project and it works and it's just so darn CHEAP?


Thursday, June 2, 2016

Pallet Wood Planter Covers Part 2


One of my post popular posts this last year was this DIY using pallet boards to cover black plastic nursery pots.

 I LOVE the way they came out!


Here's the link to part 1....


And here is what we did to finish them off and how they look filled to overflowing with flowers and plants. 


These are the type of planters we get at our local tree nursery. The smallest we used for this project are about 10 gallon size and the largest are about 25 gallon size. The big ones measure about 24" across the top.


We did not sand the boards. We just cut them to length. On the bigger planters we wedged each board under the top rim then used the brad nailer to attach each board.

We also spaced the boards closer together at the bottom than the top to allow for the taper in the planters.


Here is one of the biggest 25 gallon planters. It took a bit of finagling and mitering, but The Welding Man added a nice, neat frame to the top rim. It finishes it off quite nicely!


I like the natural wood look but on a whim added a bit of dry brushing with the trim color from our deck. The Walker's Low Catmint fills this pot to overflowing with purple flowers all summer long.

I like it alot!


Here is a comparison of natural wood and dry brushed planters. For my garden I prefer the painted look!


I checked online on the expected longevity of these plastic pots. Since they are made for commercial nurseries they have a high UV tolerance rating. They are made to last for years. That is good to know.

We have several more pots and a bunch of pallets ready for more planters. I've already bought new rosebushes so we better get to it.

And the best thing about this project? The plastic planters are less than $6 each, even for the biggest ones.

Sunday, April 10, 2016

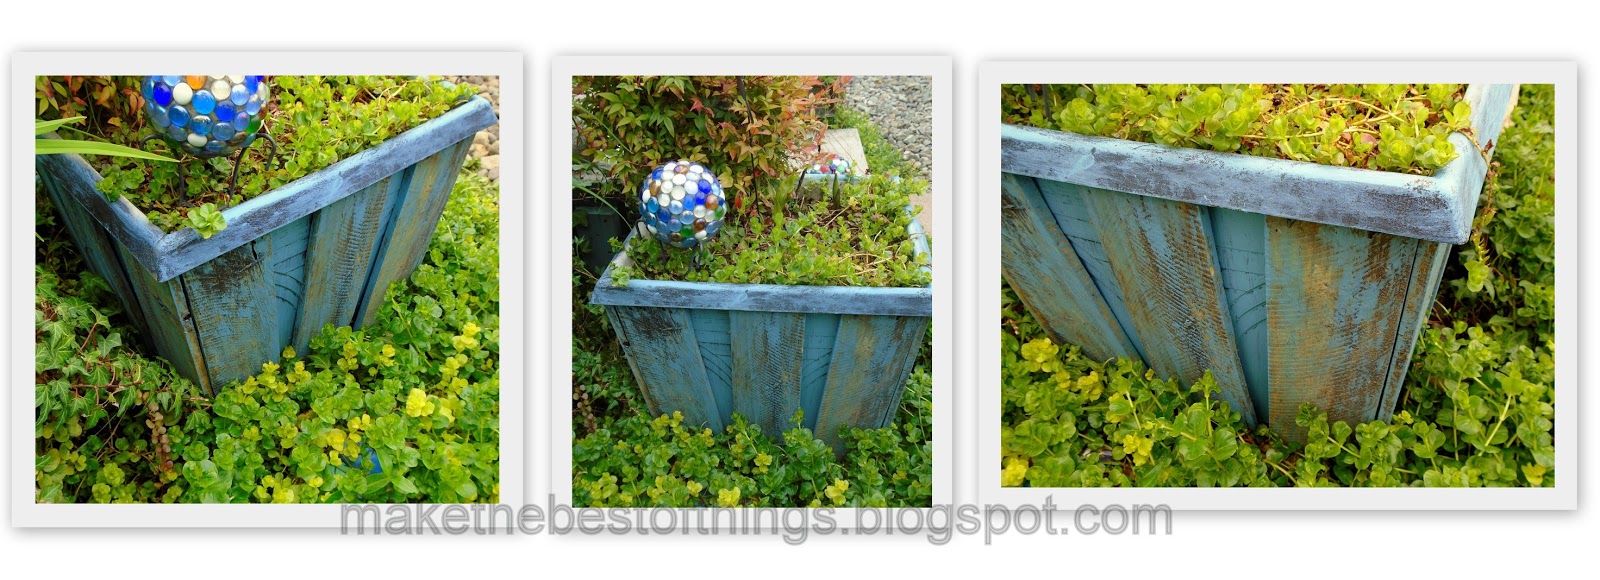
Painted Pallet Boards on Square Planter


I'm always looking for ways to use pallet boards in my garden. 
Since we covered black nursery pots with pallet boards my mind has been spinning!


I figured if pallet boards can make black pots look good,
 how about the other planters in my yard?

Here is the before of the kinda grubby square planter by my front steps last summer. 


Last week I painted it with primer then used our house trim color to paint it 
(and almost everything else) turquoise blue.

 I love the blue against all the shades of green and the flowers!

And here is how it looks NOW-


 For this project I drybrushed the turquoise paint on some pallet boards and used
 our handy dandy brad nailer gun to attach them.

You could also use outdoor construction adhesive but we like the
 security and ease of the nail gun.

We didn't even move it from the yard.
 We just rocked it up at an angle and nailed the boards in place.


Oooh!

 I like the whole vintage vibe this gives that plain planter!! It looks like
an old wooden container that has aged for years.


Aged, 
vintage, 
rustic
 and BLUE! 

Exactly my style!


In the future we MIGHT go ahead and cut some pallet boards
 to fit into the triangular spaces.

 But for now I really like the texture and AGE 
the painted boards give to this plain square planter!

Hmmmm, what else can I do with the rest of my pallet boards?


Book Page Christmas DIY

Most of you have figured out I am a color freak with an obsession  for turquoise, red and cobalt blue.  However, I also obsess about ...