Showing posts with label book page decor. Show all posts

Sunday, October 7, 2018

Book Page Leaf Garlands and Decor

I admit I am a color junky, but I've also have a serious love of books, and I hate to get rid of them. When they are beyond their useful life I use as many as I can in my projects
including recycling old book pages for all sorts of crafts and decor. 

Here's my latest...a garland made of book pages and I am smitten once again!


The Welding Man built me a wonderful bakers rack to hold my blue glassware, 
but that collection has grown quite large and moved to the kitchen bay windows
 So I decorate my backers rack seasonally with different looks. 

I am loving this combo of galvanized metals, grey barn "boards," natural wood tones 
and white pottery. I gathered a bunch of my book page projects and set them up.

But the leaf garlands really pulls everything together.


Yup, I will pretty much cover anything with old book pages to see how it looks. LOL.
My kids tell The Welding Man not to sit in one place too long because...wink wink nod...
Mom will cover you with book pages.

So far he hasn't sat still long enough. Just sayin'.


Thrift store vases...check.
Old Christmas balls...check.
Plastic clock...check.
Paper mache birds...check.
Cardboard letters...check.
Book page leaves on painted branches...check.
Pizza cardboard book page wreath?...check check check.


In my NEXT post I will show you how to make this very simple, very appealing garland. 
Stay tuned!I'll post a link at the bottom when that DIY post is active.

Thanks for stopping by. Please leave a comment, if you would. 
I enjoy reading what you have to say!


Saturday, October 3, 2015

Book Page Leaves And Fall Garlands


Loving your fall garlands but ready for a bit of a refresh? Add book page leaves to punch them up with great texture and neutral color. It's easy!


I am always on the lookout for autumn leaf garlands at thrift stores and yard sales. And there is always the Dollar Store! Then I add leaves cut from book pages to give them a little extra decor kick. You probably have everything you need on hand already. 


Here's how to do it...


Make a template from one of the garland leaves. We used cereal box cardboard. Trace the leaves on pages of a book you don't mind using. We used a 25 cent paperback that was ruined by water on one corner.

You can layer the pages and cut up to six pages at a time. Use a smaller pair of scissors, such as manicure scissors, for this task. It makes it easier!


Use a glue stick on one leaf. Add a long 8" stem of florist wire then glue a second leaf on top. Putting glue on the second leaf helps to make a secure bond.


Add your leaves to your garland, twisting the florist wire around and around the existing garland for a good hold. Curve your leaves just a bit. The wire inside them helps hold the curve and makes them look more pleasing then just flat leaf shapes.


See how the book page printing gives interesting texture to the colorful garland? I like this alot!


I love the way the new book leaves punch up this garland.


For beautiful table decor use a garland as a runner and add other book page accents. So pretty!


They look great against my muslin curtains. But then I couldn't leave well enough alone and so I added....


twinkly lights!

Ooh aah.

This is a fun and easy project. Plus, cheap. 

Try it out!

I'll be joining these fun linky parties. Drop on by!

Wednesday, February 19, 2014

Easy Matching Storage Boxes with Book Pages

For the shelf above my desk I've been using a whole row of black wire baskets, which look good when they're empty but when they are full to overflowing they just look messy and unkempt. I didn't want to buy/waste money on new matching desk boxes. Hmmmm. The little cubby shelf I restyled with book pages and wrapping paper came out like this...


I love the way it looks now! Stylish and vintage at the same time! So I decided to make matching storage boxes for my shelf and here's how their new look...


I like how the Mod Podge medium actually darkens the edges of the pages, giving them a golden hue. And notice the red edge to the pages? Gotta love that. Here's what I did....


I picked out some good sturdy boxes in various sizes, including a round box that looked like an old ice cream carton. First I glued the pages on then finished with a layer of Mod Podge and matte spray sealer. Easy peasy and CHEAP too.

There is no set plan to this project, altho when my daughter, Insanely Creative Christy, decoupages with book pages she uses smaller, neater, well trimmed pieces applied in nice designs. Me? Not so much, lol!


I used a silver pencil to give the label frames a pewter looking finish then used chalkboard paint on the labels so I could change them up.


I'm still thinking about adding gold or copper brads to the labels to give them a vintage hardware look. But I like the way these boxes turned out and the cost was mere pennies.


Here they are on the shelf above my desk, and you can see how well they go with the little book page cubby shelf and even my burlap ruffled bulletin boards. So for a bit of effort and creativity but not alot of money, I'm getting a desk/office makeover that is making me very happy.

And if I'm happy at my desk I'll blog more, take more photos and be more creative, right? That's my story and I'm stickin' to it!

I took this idea one step further and totally redid my craft room with book pages and assorted boxes. Let's hear a cheer for cheap, easy, stylish and pretty craft storage!


And THIS room makes me very happy! Win win!

Saturday, October 26, 2013

Use Your Imagination, Not $$$$ To Decorate for Fall


I am just as dazzled as the next gal by all the beautiful bling and glittery decor in the stores this time of year. I want to buy it all! BUT, reality and our budget intrude and I have to pull back. Way back. What do I do when I want beautiful decor without spending any ducats? I use my imagination and what I have on hand.

I start out with some twiggy branches from our yard. Florist foam anchors them in a painted black planter and then I start adding....stuff.


 Fake leaves and pumpkins from my stash plus different containers and candlesticks got me going. Then I made the pumpkins from fabric scraps, string and stuffing with cinnamon sticks for stems. Easy and FREE.

Here's the same display area fixed up, on the cheap, for Halloween.


I used crepe paper for the fluttery bats and the rosettes on the wreath. The Halloween balls are recycled Christmas balls and mod podged tissue paper. Black spray paint made the plastic ferns appropriately Octoberish. I gathered together some other spooky elements plus my very own silver button blingy decor ball and it all came together nicely for no money.


I hot glued the leaves to the black branches and also used them on a twig wreath that had seen better days. I added some book page leaves for contrast and then painted a banner for the middle of the wreath saying, "Thankful." Painting the muslin with country white paint gave it enough body to curve and hold it's shape when I glued it in place. Simple, easy and again, free! A colorful spray of silk leaves is in the white vase now instead of the black ferns.

I've found that with a good pair of craft scissors you can cut 8 layers of paper at a time, so very quickly you can have LOTS of maple and oak leaves cut from book pages for your autumn decor. They are very versatile, I use them alot every year.


With just a bit of tweaking and more glossy black spray paint, the three candle holders got a face lift. The old candles were up cycled with jute twine, hot glue and little black bows. How beautiful! I love the way this display came together. It was fun to do and didn't cost me anything. I call that a win win!

 I'll be posting to the parties in my sidebar since they are so much fun. Come check them out, the creativity out in blogland is amazing.

Sunday, February 26, 2012

Book Page Chandelier


I made this book page chandelier today, and I LOVE the way it came out!


It's Sunday, and I decided to do something fun and frivolous for my craft room. It started when we changed a light bulb in my overhead light and this was sitting on my work top.


Hmmm, I don't want to just hang this back up there. I wonder if hot glue will hold string on glass?

This curvy red chandelier is going up there eventually, once The Welding Man checks if it needs rewired and makes sure it is safe. $7 at a thrift store, baby! It will be perfect when it's done.

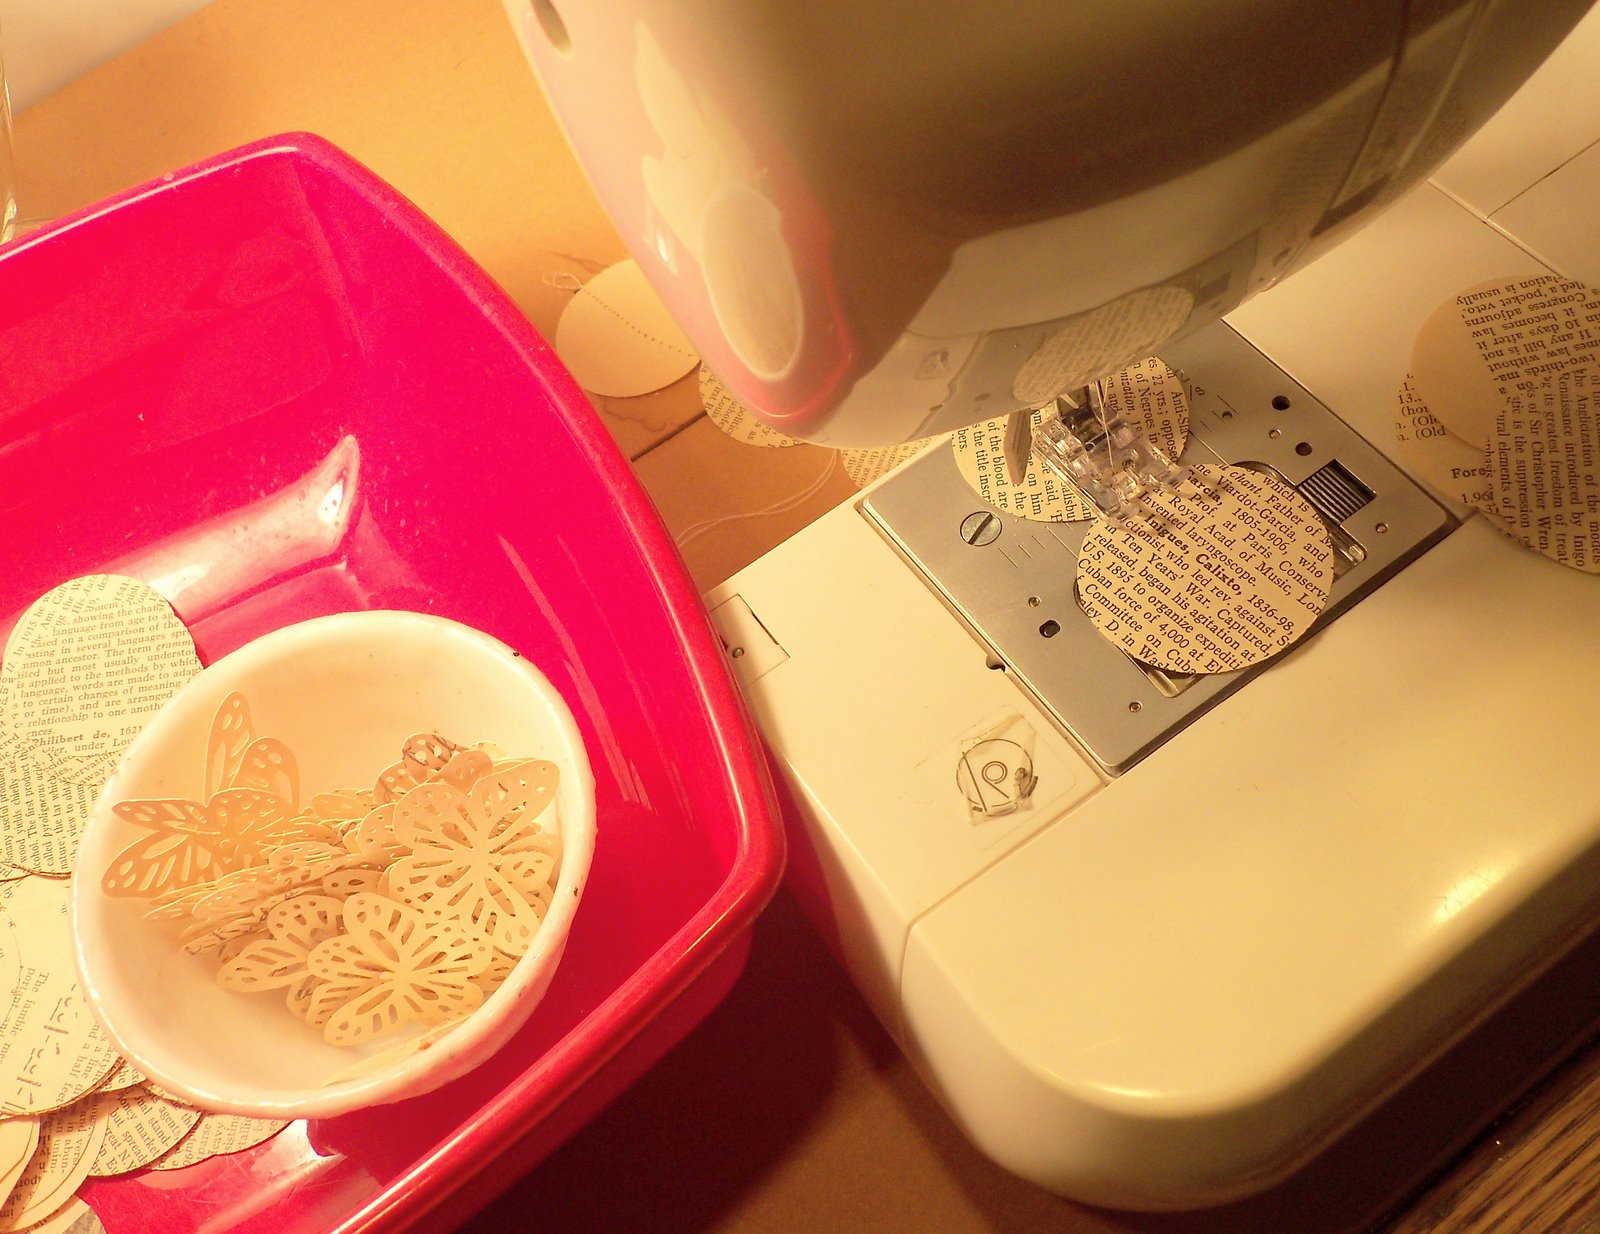
With all the book page recycling I've used in my craft studio, I decided to make a temporary chandelier using a circle punch. I knew I'd need at least 450 circles, so I made 500. I could do 5 pages at a time and get 7 circles from each set of pages, so this did not take long at all.

I also used this gorgeous butterfly punch and made about 50 of them out of heavier paper, since they have so many open spaces, the book pages are too fragile to use the way I planned.

I sewed 12 circles and 1 butterfly together for each 18" long string.

A dot of hot glue holds the lightweight strings perfectly. If I ever want to return the glass shade to it's original condition, the glue pops off with a little help from my heat gun.


The book pages I used were very delicate, so this happened early on. I just used a glue stick on another circle and put it over the top, covering the tear and the thread.

The repair does not even show once all the strings are glued on. I sewed about a dozen strings and had to do alot of repairs. There had to be a better way.

So I changed tactics and laid out the circles and butterflies then stretched some crochet thread across them, securing them with dots of hot glue. A dot of hot glue on the string holds it down on the table and makes it easier to lay across the hot glue on the circles. This was just as fast and easy as sewing them together! Before lifting the string of circles up get rid of glue wisps with a heat gun.

Here are a sewn string and several glued strings side by side. I prefer the cleaner look of the glued strings.


And here is the chandelier put back in place over the light fixture. I like it. I like it alot!


I LOVE the random placement of the butterflies!
It diffuses the bright overhead light nicely without making the room feel dark or shadowy. I will try to get some shots in the daylight and see if it still makes me happy. I have a hunch it will! So that was fun, throwing away my "to do" list and creating something on a whim. Sometimes you just have to go for it!

Posted by Picasa


Tuesday, March 1, 2011

Two Tissue Boxes For My Desk Redo


For my continuing desk/office space remodel I had two tissue box covers I'd found at a Thrift Store. They were flowery and oh so eighties but they were .99 each so I nabbed them. Here's the first one which my daughter, Insanely Creative Christy, Mod Podged with cleanly cut book pages. She is neat and methodical in her craftiness while I am more untidy and, um, let's say, flightier in my craftiness. ;0) But I did add the chalkboard label. See how nicely it came out between the two of us?


And it matches the Mod Podged storage boxes and the little cubbyhole shelf so well!


Then I remembered this post over at Can't Stop Making Things about making faux first editions with hot glue and tissue paper. Here's the inspiration pic....

And here's the link...
http://www.cantstopmakingthings.com/2010/09/leather-bound-first-edition.html

So cool! This is just one of many neat projects on that clever blog.

I used a very similar technique in my own blog post, but I never thought to make faux books with it! Here's my link.....

http://makethebestofthings.blogspot.com/2010/05/3-d-effect-with-hot-glue.html


So I added dimension with hot glue, then decoupaged crinkled tissue paper over everything and painted the whole shebang black. I brushed on Elmer's glue then white paint for a cool crackled look, then dry brushed with black. NOTE-let the glue get tacky and brush on the paint in one direction only. You will see the crackle magically appear as the glue and paint dry! It is VERY COOL.

Here's a link to my Elmer's glue crackle paint post-

http://makethebestofthings.blogspot.com/2010/05/crackle-finish-with-elmers-glue.html

I added more details and a number with a Sharpie then glued on a vintage style heart and skeleton key. Lovin' it!

And now I have TWO tissue box covers for my desk. Hmmm. I like them both. Instead of choosing between them, I'll just have to put one on each side, lol!

These were both fun, easy projects and cheap, too. That's a win win in my book. I'll be linking up to the parties in my sidebar, come visit and see what's cooking in blogland this week!

Book Page Christmas DIY

Most of you have figured out I am a color freak with an obsession  for turquoise, red and cobalt blue.  However, I also obsess about ...