Showing posts with label chalkboard labels. Show all posts

Sunday, March 15, 2015

THAT Dollar Store Contact Paper

Here's the contact paper I'm talking about.

That one print in the Dollar Store's inventory of faux wood and fruit and boring looking contact paper. It's been a regular item there for years, even tho the rolls are not quite as big as they used to be. The black and white toile print  looks a bit vintage, a bit shabby chic. It's a nice clean graphic and goes with just about any style.


See? You DO recognize it! 


I've discovered it goes so well with my book paper and black and white printed craft room boxes, and I've gone a bit crazy using it. 


So many labels are printed on the plastic containers now that covering them up is the best option. ALSO, if you cover them up you do not have to deal with the mess of removing the labels and the sticky residue.


No container goes uncovered in my craft room. Especially if they have red or black lids.


I try to have a couple of rolls handy all the time, especially since I rearrange my supplies as I use them up. Here's an important tip that will save you no end of frustration... 

LABEL EVERY CONTAINER!

Chalkboard labels are cheap and hey, I just found chalkboard contact paper at our local Dollar Store.

That's what I call a win win!

Saturday, November 8, 2014

Matching Storage Boxes with Book Pages

You don't have to spend lots of money to get pretty and practical craft room storage boxes. Just use the containers you already have and cover them with old book pages.

That's what I do!


I painted this tall ice cream carton with white craft paint to cover up the bright design. Once it was dry  I brushed Dollar Store school glue over each section and laid down pages torn from a throw away book. In this case, an old paperback. The older books have nice golden hued pages that look great overlapped like this.

I smoothed the pages down with the same stiff brush dipped in more school glue. Let it dry thoroughly.


Then you can seal the box with spray acrylic or a layer of Mod Podge in whatever sheen you choose. I especially like their gloss hard coat for finished projects.

I add chalkboard labels so I can list what's inside my boxes.


I use a mix of lots of different kinds of containers in my studio and also use loads of book pages, Dollar Store contact paper and Mod Podged tissue or gift wrap on my storage. Even plastic coffee containers look good with a bit of contact paper and a new label! I like how all the designs blend with my jars full of supplies.


Here are bankers boxes we used for our move which I have covered and prettied up for my craft room. Now I just need to add labels and fill them up!

Once you start recycling containers with book pages and other papers, you will save money and have a neat and practical way to store your stuff.

I call that a win win!


Sunday, September 12, 2010

Cheap chic organizer boxes for my craft room


Here is one of the 3 counters in my studio. It looks pretty good in this photo because I was cleaning it up and trying to get better organized in there. When I'm working on a project I usually trash the joint, so this is looking acceptable.

I have alot of stuff crammed into my studio. ALOT. I love the multi drawer units for all my small stuff and I've never met a glass jar that I couldn't use for lace, buttons, flowers, ribbons... the list is endless. I also have five bookcases full of fabric, I kid you not. But for the in between stuff I made do for a long time with an assortment of mismatched dollar store baskets, priority mail cardboard boxes, shoe boxes and what have you. I can store alot of stuff that way, but my craft space wasn't looking too pretty or organized. And I wasn't going to spend a bundle on matching containers!

So with all the Mod Podge projects blazing their way thru blogland these days, I knew I could make a big difference in there.


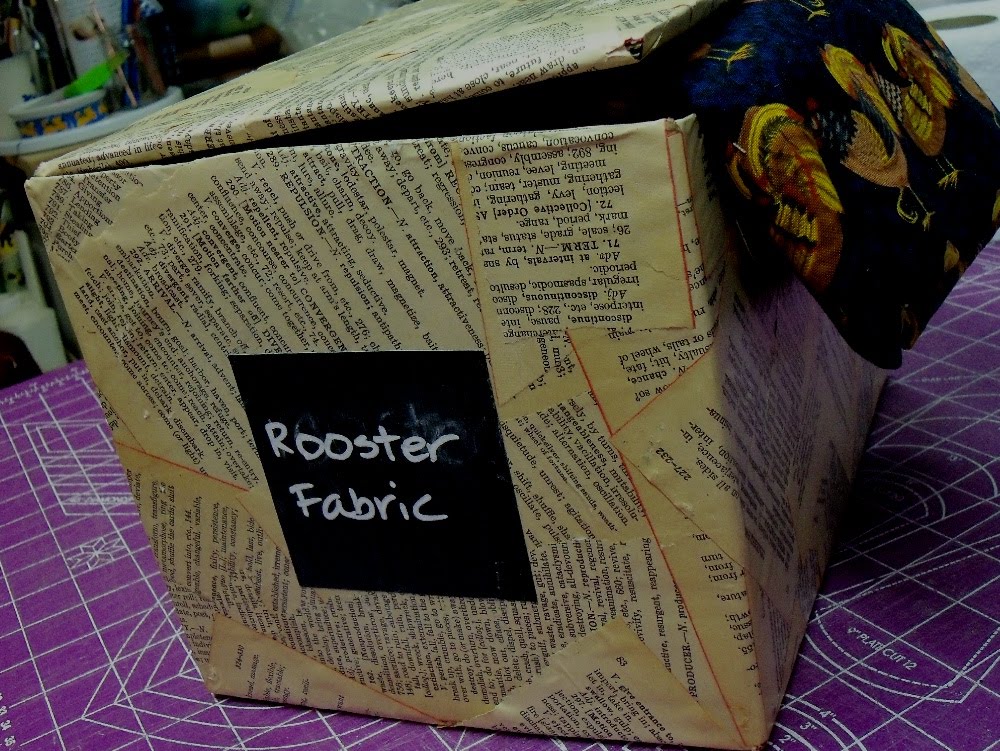
Here's a sturdy box with a lid flap that will fit excellently on my high shelves. I sat down with a cup of coffee, an ancient and dilapidated paperback thesaurus and some music on the CD player and a while later I had this.....


I know, it's a painful sight. But this old tired thesaurus was in such bad shape that the pages tore even when you just opened the book. At least I gave those pages new life with this project! Soon, I had this....


LOL! I guess the paper was flying every which way because at the end of the day I had 18 boxes that look like THIS....


I made some labels from card stock and chalkboard paint and there ya go, changeable labels on my super cheap organizer boxes.


Ahhhh, much better! I have more storage than I can shake a stick at now and the boxes look good and make me smile. The Mod Podge actually brought out the golden hues of the paper edges really well, so they look all mellow and vintage. I like that alot!

I even added a book page panel to the right hand space on my waterbed headboard that I use as a wall display unit. I just Mod Podged the pages to a piece of foam board and voila, a coordinated background to go behind some of my stuff.

AND, that project for my studio led to this project for my Etsy shop. I thought with a little more effort and some finishing details like muslin liners and better labels, these would be a nice addition to my store. Take a look....

And then, because the look of the vintage book pages was just too compelling, I did this....
I like it. I like it alot! It looks like old bakelite and it really disguised the flaws in this old glass piece. Now I'm wondering what else I can do with old book pages....hey, that old shelf is looking kind of shabby......

I'll be linking up to the fun parties on my sidebar this week. Come join me there!

Book Page Christmas DIY

Most of you have figured out I am a color freak with an obsession  for turquoise, red and cobalt blue.  However, I also obsess about ...