Showing posts with label DIY projects. Show all posts

Wednesday, June 17, 2020

Wax Paper Capiz Shell Tabletop Chandelier

Pin ItI've been seeing lots of chandeliers made of faux capiz shells out in blogland
 with some made out of wax paper, plastic cups, laminated rice paper,
 even wax paper mod podged onto parchment paper.

I figured I can do that and so, I did!

 I chose a $2 thrist store tabletop lamp for the bookcase in our hallway.


And I love the way this came out!


It has a soft glow, great texture and a bit of movement when you walk by.
 Even The Welding Man likes it, he says it reminds him of a wedding dress. :o)


I took two lamp shades from my stash and removed the covers. I knew I wanted the rings to be larger at the top and smaller at the bottom. So I wired them together and even added another ring with craft wire secured with florist wire.

 What is needed is a sturdy shape with at least two different sized rings to hold your fake shells in layers.

After a coat of white spray paint I flipped it over and got all my fake capiz shell circles ready.


Dollar Store wax paper, baby!!

Next I made the wax paper "shells." I used a dry iron on cotton and put
 parchment paper on the bottom between the ironing board and wax paper.

Four sheets torn off close to the same size melt together nicely
and make a good, stiff 4 ply sheet. Let the wax paper cool then start punching.
 I found my punches did best with 4 sheets of 4 ply wax paper,
 your punch might do better with more or less.

I used a 2" and an 1 3/4" circle punch. I figured I needed about 400 circles total,
plus I cut a few extra in case of mistakes or design changes.

I sewed my circles together using my machine's longest stitch and placed 9 circles on each "run."
 I sewed several sets of nine together in a single sitting with about three inches
of thread between each set. I cut them apart into sets
 of nine and started assembling.

I wound the thread from one set of circles twice around the middle ring and put a dab of hot glue over the thread. I placed each string of circles about 1" apart.
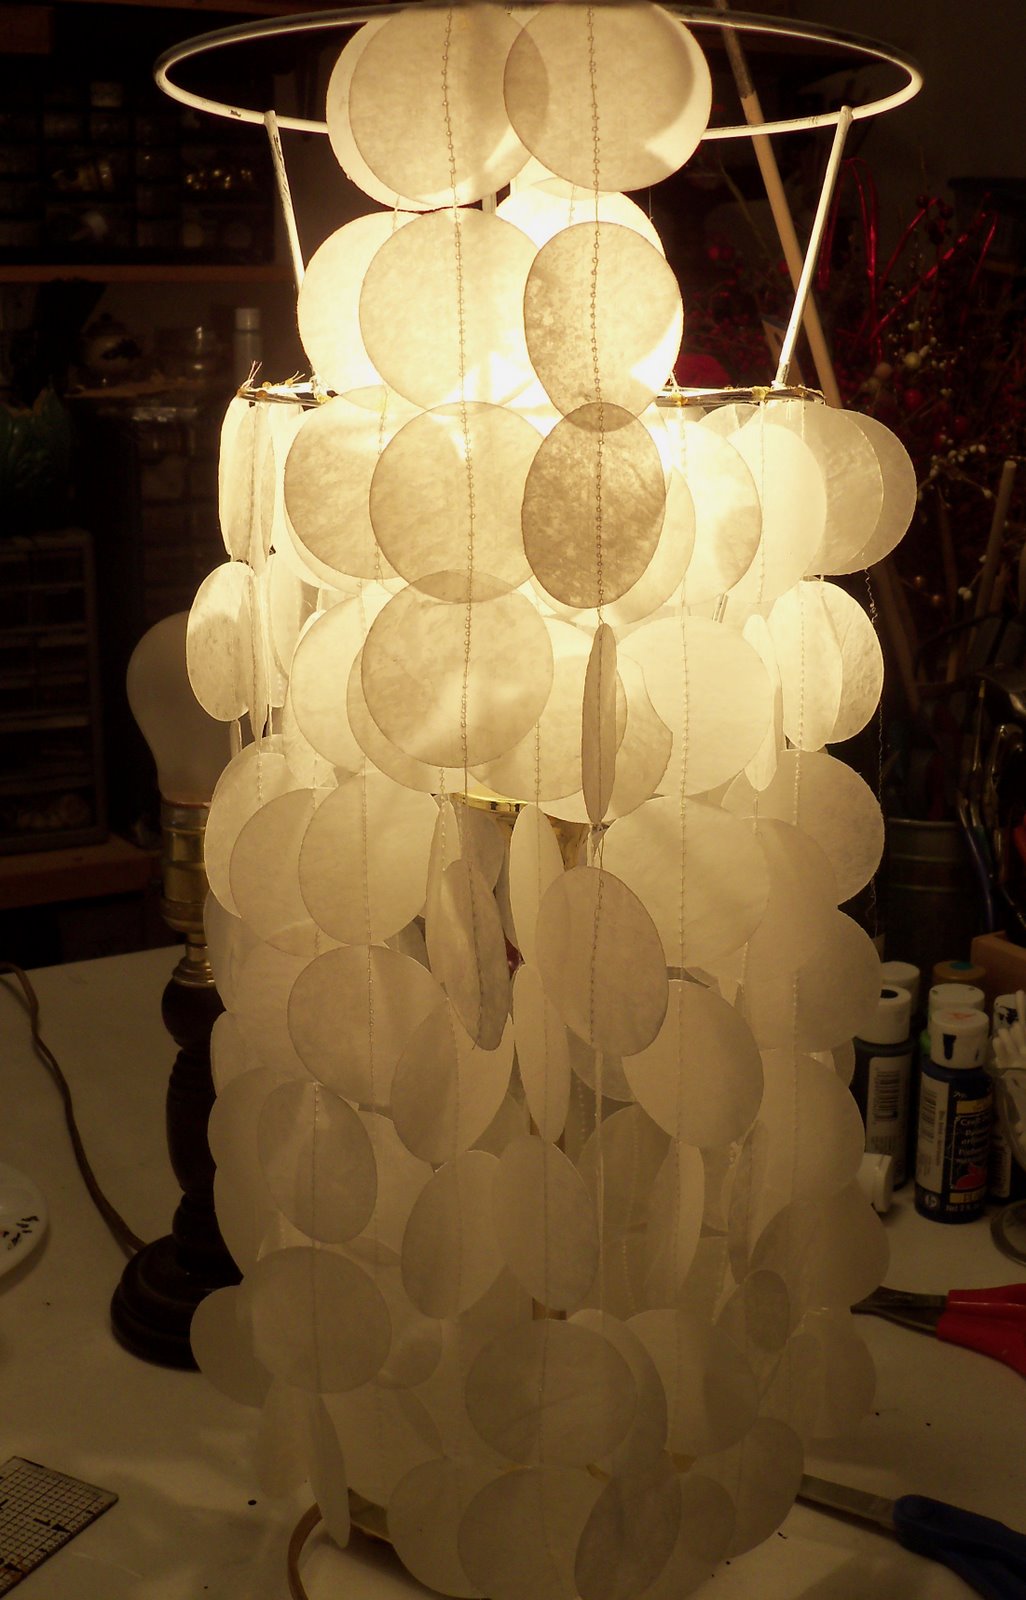
For the top ring I let six of the circles on a string hang down outside
and folded the other three over inside the frame, using a dab of hot glue
 on the thread at the top. This gave the upper half of the lamp a fluffier look
 and more visual "weight."


Extra circles folded in half and hot glued around the upper ring give the lamp a finished look.


As you can see, the stitched circles diffuse the light and overlap nicely, giving a nice soft glow to the evening. During the day they give that corner a bit of reflected light and nice texture.


I am already thinking ahead to doing this with my dining room light. Maybe with a little color and a bit of glitter? When I figure it out and make it I'll be posting right here.

Monday, August 27, 2018

DIY Slipcover...Worth The Hassle? Absolutely!


I scored this settee at a local yard sale after checking it out thoroughly. The frame is solid and it has good lines tho the very pretty brocade fabric is just shattered. I put it on the back deck and deep deep cleaned and sanitized it to a fare thee well. 

Slipcover time!


I totally scored a pair of lined canvas drapes at the thrift store. After deconstructing them and laundering I started draping and dinking around with the fabric. I ended up with about 10 yards of canvas plus the same amount of the softer lining fabric. The best part? Total fabric cost $5.00!


I cut rectangles roughly the size of each area and started pin fitting each piece. There are countless tutorials online on the pin fitting technique and I read lots of them before diving into this project. I marked the actual seam lines with pencil then pinned each piece. Then I trimmed the seams leaving a generous seam allowance. This sounds harder than it is, trust me!


Smooth your fabric and pin pin pin along the seams. Clip your curves to make fitting easier and don't stint on the pins.


This is before I trimmed the seams on this side. Start with plenty of fabric, you can always trim it down. If you don't start with enough material your project is screwed! Don't ask me how I know. 

Ahem.

Three hours in I knew this cover was going to look AWESOME. So before I even sewed it together, I did this....


Because that is what I do! I get excited as a project comes together and leap ahead to the logical end use...settee as photo prop!! I LOVE how all the textures and pale colors of the pillows from my Etsy shop look against the canvas cover.


LOVE THIS!  I'm sewing the seams this morning and adding a pleated flounce to the bottom
 so  my daughter can use it in a family photo shoot. 


I still have to add the flounce and sew it together so I'll have about 6 hours into this project. 
So worth it to me! This does not include the time it took to clean and sanitize the settee and deconstruct the drapes and launder the fabric. Even buying a new drop
 cloth instead would still make this an affordable project.


And here she is ready for a photo shoot. 

GORGEOUS!

I'm so enthused that I still have over 6 yards of canvas left. I scored a large throne chair 
for cheap and it's gorgeous and sturdy and stylish and it's PINK. But my 
living room is brown, red and turquoise.So guess what 
gets the next canvas slipcover?


Monday, January 16, 2012

2011 Top Tutorials Part One


Pin It


I had so much fun with my blog this year, and I saw so many neat projects in blogland. ALL of my Top Ten are tutorials. Here are my own Top Ten from 2011 starting with this cool Halloween decor idea.

Make easy Halloween window decorations from poster board!

http://makethebestofthings.blogspot.com/2011/10/halloween-windows-from-poster-board.html


Number 9....my white, silver and teal Christmas wreath makeover.

So pretty, gorgeous color and so CHEAP! This is third redo of this twig wreath, with more coming up.

http://makethebestofthings.blogspot.com/2011/12/teal-silver-and-white-wreath-redo.html


Number eight....red rosette wreath and butterfly decor for Valentine's Day.


Back when I was deep in chemotherapy, Insanely Creative Christy helped me put this display together.
http://makethebestofthings.blogspot.com/2011/02/red-felt-roses-and-wave-of-butterflies.html


Number seven...how to make pretty lace pumpkins....

Complete instructions for a great fall decoration.

http://makethebestofthings.blogspot.com/2011/10/pretty-lace-pumpkins.html


Number six is a double project...recycling tissue box covers for your desk or craft room.

I show you two different ways to upstyle these staples of your household.

http://makethebestofthings.blogspot.com/2011/03/two-tissue-boxes-for-my-desk-redo.html

Number five and one of my personal favorites.....make mini reindeer from wine corks!

A simple project with complete instructions using items you probably already have on hand!

http://makethebestofthings.blogspot.com/2011/12/wine-cork-reindeer.html

These blog posts garnered thousands of hits and who knows how many pins on Pinterest!
Following up with my TOP FIVE of 2011 coming next!

I'll be posting at the fun parties on my sidebar, come visit and check out all the great ideas.

Book Page Christmas DIY

Most of you have figured out I am a color freak with an obsession  for turquoise, red and cobalt blue.  However, I also obsess about ...