Showing posts sorted by date for query halloween. Sort by relevance Show all posts

Tuesday, May 25, 2021

Paint Pen and River Rocks, Gotta Love Them!


One of the best things about our family vacation spot is the private swimming hole
 with its wonderful  sandy beach in the curve of the nicely landscaped yard. 
 The weather was perfect, the house was excellent
 and the swimming hole was fantastic.


I spent lots of time on the water and sitting in the sun with a book, 
and then I remembered I brought a paint pen to try out.

I usually use acrylic paints and paint brushes for these projects
 but this paint pen won me over!


The biggest rock is 5" across and the smallest (the skull rock) is about 2" tall.
 Once they are sealed with clear acrylic, the subtle colors of the stones brighten up
 and make the black paint really stand out.

 We left one rock with our hosts as a thank you gift. They loved it!

Now I'm thinking of taking a bigger rock and painting our address on it 
then using a paint pen to dress it up with some swirls and curlicues. 
 How easy would it be to really do a fancy paint job on a pumpkin for Halloween? 

 And what about a tree design on a table runner or a pillow?


I'll be bringing paint pens with me on vacation from now on!

Thursday, March 28, 2019

Part 2 Restyle Old Books into Vintage Style Decor

Here is a row of my restyled books in my bookshelf. They aren't antique collectors' editions, they are all modern hardbacks that I've redone for a vintage look. Please note-no books are destroyed making them over like this. They are all still readable!


In Part One of this post I showed how I decoupaged pretty papers to hardback books using Mod Podge, hot glue and paint. Here's a link...


Here in Part Two I'll show you how to use a cheap and easy crackle technique with Elmer's school glue and craft paint. You can give your books a cool antique look and upstyle your bookcases and decor.


Here is a set of three books redone in black and red and a little bit of gold paint. See how cool they turned out? For these projects you will need hard back books, craft paint, hot glue, Elmer's school glue and paint brushes. You probably already have everything on hand in your stash!


 First, choose your book and paint the whole cover in the base color you want to show under the finished crackle. I used black craft paint on this book, then added fake "stitching" with hot glue. The ruler helps get the "stitching" straight and evenly spaced. Note-It took two more coats of black paint to cover the title on the spine.


Once the craft paint is dry I painted a coat of slightly watered down Elmer's school glue over the whole cover. Dollar Store school glue also works for this technique. Brush the glue on in an even layer then let it dry for a few minutes. For the next step the glue MUST BE TACKY. If it is NOT STICKY the top layer of paint will not crack!


Using a soft bristled brush and long strokes in one direction ONLY, add your top coat in your choice of color of acrylic latex craft paint. Do NOT brush back and forth or dab your paint. Use long even strokes going one way for an even crackle texture to form.

Within a few moments the cracks will start to show. I LOVE watching this part!


Once the crackled paint was dry, I added precut labels to two of my books and a skeleton key to the other. Then I dry brushed black paint over all the edges and the "stitched" spines to bring out the details. I also added gold metallic paint to one label.


Here's another look at the three finished red books. For additional texture on the bottom and top books, I first Mod Podged crinkled up tissue paper before painting the base color, then proceeded with the glue and paint crackling. The dry brushing at the end really highlights the crinkled paper, making it look like old leather.


My livingroom colors are turquoise, red and brown, so these books are PERFECT for making my livingroom pretty and colorful!


My books have never looked this GOOD! I did not spend any money on restyling these books since I had everything on hand in my stash. Mod Podge, hot glue, paint, tissue, Elmer's glue and pre cut labels.

I'm making them in sets of three in different colors and trying them out for wedding decor. We have three family weddings this year and these will look beautiful on the reception tables.


And more...


and even skeleton keys for Halloween!


And last but not least, turquoise with black patterned papers, including damask!


This is a fun and inexpensive way to add beautiful color and texture to your home's decor. Try it, you'll like it!

Sunday, October 28, 2018

VHS Tapes Make Wonderful Creepy Halloween Streamers

The year we decorated our porch with strips of Dollar Store plastic tablecloths 
I loved the way the streamers draped and flounced and flared in the wind. 
The trick or treaters loved walking through the "curtains" too, 
except for one little girl who refused to even step into our yard. lol
I made the floating flying bats out of painted foam meat trays and curly wire.

So this year when we decorated the back deck with lights we wanted to add 
streamers but didn't want to fiddle around with cutting plastic tablecloths into strips.


Then we remembered that we'd used old VHS tapes 
to make a huge spider web in the yard. 


Off we go to the thrift store where we picked up this tape for a quarter. 
So, faster than you can say, "You're a streamer, Harry!" 
we had totally awesome, easy and thrifty Halloween decor
 that looks creepy and cool!


It was so EASY. 
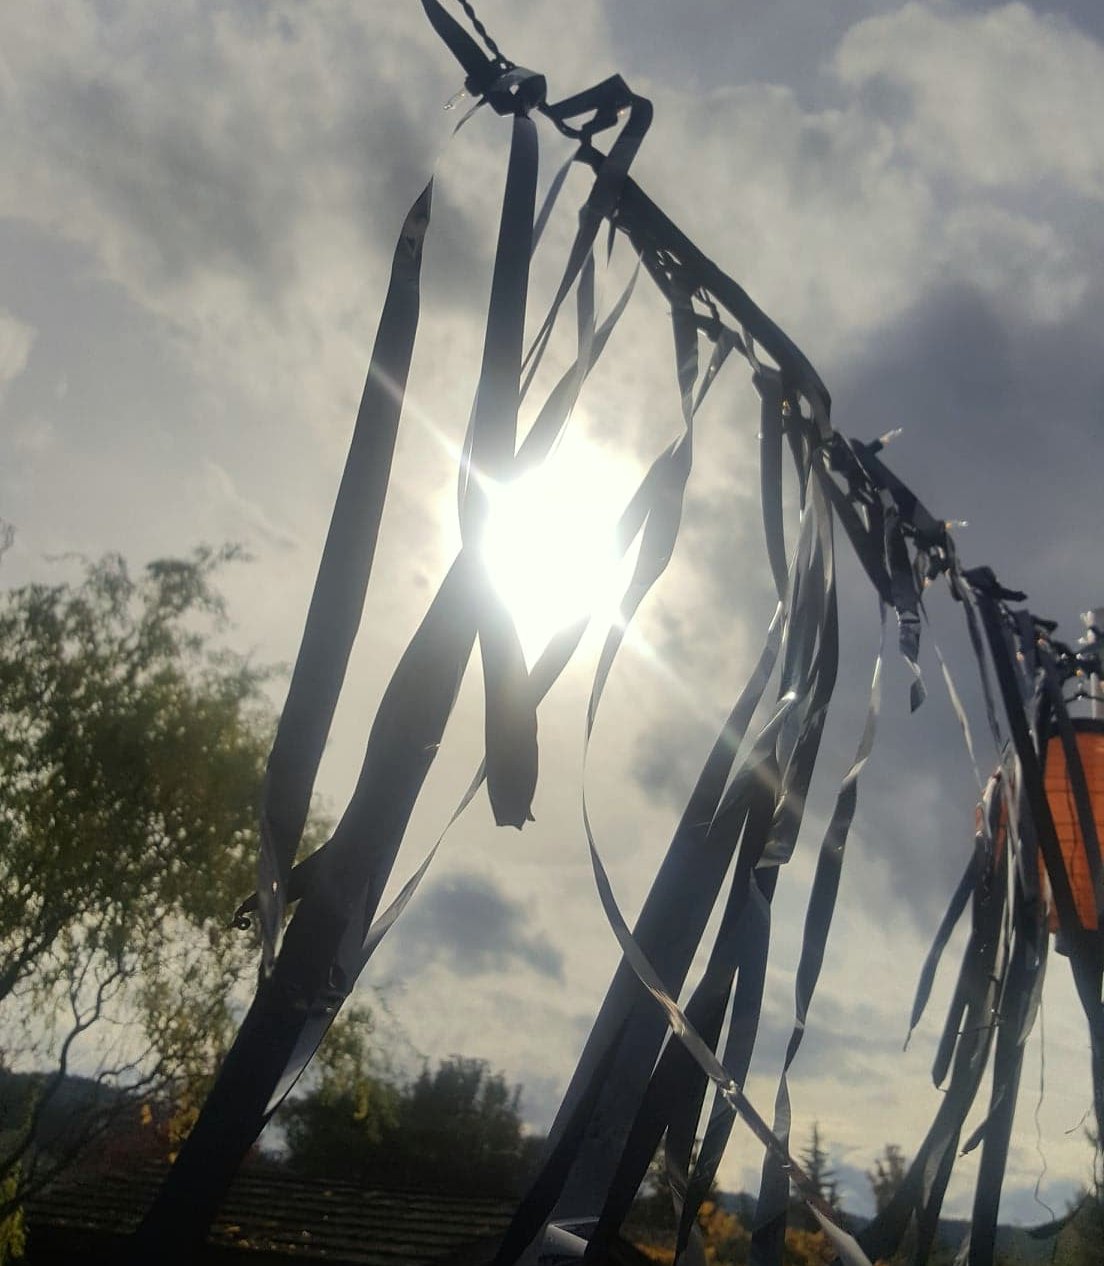
We tied random lengths of tape to the strung lights around our deck 
and we LOVE the way it came out. A cloudy sky and little breeze 
made the shiny tape streamers look crazy spooky!


The tapes looked so cool that now we're discussing using them
 for some creepy costume ideas.Think how awesome a witch outfit would look 
with dozens of these tape streamers flowing around it?
Or a Dementor from the Harry Potter movies?
Or a Nazgul from Lord of the Rings?

Just picture this with MUCH MORE tattered streamer action!

This could be so much fun!

Grab yourself some old VHS tapes and 
go wild with your Halloween decorating!

Saturday, August 26, 2017

Colorful Felt Pillow Covers

I make these appliqued felt pillow covers for family gifts and decor. 
I use straight stitching on my Singer and I'm not too awful picky
 about keeping everything neat and tidy. I like the texture that
 the multiple stitching gives to the thick felt and
 LOVE all the colors available. 


 Here's a gallery of my designs so far. This year I'm going to try some 
Halloween and Christmas designs, those should be fun!
It really is a simple process. Cut out the felt shapes and sew them in layers
 on your pillow fabric. You can be as neat and accurate or as abstract and casual as you prefer. 

Do you have questions about the DIY? Just ask them below and I'll answer them all!
Thanks for stopping by!

Thursday, October 6, 2016

Make Spooky Floaty Bats for Halloween Decor


I wanted to make black bats that would float and drift around in the October breezes but I couldn't figure out how to hang them. Then I got the idea to put them on curly wires instead!

I LOVE how they came out!


I found that I had these black foam meat trays in my stash. 
After running them through the dishwasher, I knew I 
could use them for something and they were perfect
 for these flighty bats.


I drew a simple pattern and cut them out with a razor knife.

We cut long lengths of sturdy wire and curled them around a broom handle
 then wrapped one end around a foam bat shape.


We stuck them into our deck planters to see how they looked in the wind. 
We were so pleased when even the slightest breeze made them turn and twist and shiver!

So we made more and attached them to our Halloween archway.


They look great!

Not only were they fun and easy to make, but they are 100% weatherproof 
and easy to store for next year. 

That's a win win in my book!

Halloween Decor From Video Tape and Trash Bags


Here is my Halloween porch, chock full of fun and CHEAP decor ideas.
 I have a few pieces I keep from year to year, like the pumpkin lights 
and the painted signs, but most of my 
Halloween look is made out of old VCR tapes and trash bags.

Dollar Store, here I come!


The big fat orange pumpkins are Halloween trash bags filled with crumpled newspaper. So easy to do  and so easy to store. But they aren't the real surprise here.


These spooky flyaway torn "curtains" are the most fun part of this decor,
 and I made them from black trash bags cut to open all the seams
 then cut in strips for creepy flyaway curtains.

The Welding Man set up a simple archway with scrap lumber 
and I stapled lots of black plastic strips all over. 
My grandkids made the sign out of twigs and an old board.

I LOVE how they look when the wind blows!


Then we took a couple of old VCR tapes and stripped them loose from their cases so we could do THIS!

You'll need at least one more person to make this giant web 
and the results are so worth it!

We did the horizontal stringers first then wrapped 
the vertical stringers last. 
We wrapped each joint with black electrical tape and
 stood back for the finishing touch.

Every giant spider web needs a giant spider.


We filled two black trash bags with more crumpled newspaper then wired them
 in place on our garden arch. We attached long pieces of strong wire
 and bent them into leg shapes then wrapped them with strips
 of black plastic and electrical tape.

The eyes and fangs are red felt.

So cool!


On the left side of the photo you can see the start of another huge spider web.
We had fun doing this and it was so easy and 
CHEAP!

On another post I'll show how I made the easy and cheap but 
still creepy and floaty black bats. 
I'll link it up right here.....


Sunday, May 29, 2016

Three D Effect With Hot Glue


I had this idea of adding a raised, three dimensional design on a glass vase and kept wondering just how could I do it?


I wanted it to be simple and quick and, of course, cheap. I also wanted to use supplies that I or just about anyone out in DIY land had in their craft stash. Here's the list of things I used...

Use hot glue, tissue paper, Mod Podge (or school glue) and craft paint to turn a plain Dollar Store vase into a unique decor item.

Here is how I-


 For my first design I chose a simple fleur de lis shape and drew it on plain paper. 
You could also print out the shape you choose.

Tape it INSIDE the container you are decorating.


Fill in that shape with hot glue. Be generous and fill it in completely.

 Do not worry about being too precise or getting all the lines exactly so. 
This process actually looks better if it is not too exact, because next you will be
 adding texture to the entire outside surface of the vase.

Melt any glue strings that are hanging off your design with a heat gun or hair dryer.


Tear the tissue paper in irregular shapes and crumple tightly, 
then smooth out. Have your stack of tissue
 ready for the next step.


Working on the 3 dimensional design first, brush a generous coat of glue or Mod Podge on top of it. Carefully lay the tissue over the design and gently coax the tissue into the edges and details with a soft brush. Brush more glue on top. Go slowly and carefully so you do not tear the tissue.
If it does tear, just smooth it down with your brush and place another piece over the tear.

Glue tissue over the entire outside surface of the vase, including
 folded over the top lip by about an inch and down around the bottom.

I let it sit overnight until it is completely dry. The glue or Mod Podge 
will dry to a hard surface on the glass with really interesting textures.


Next, use acrylic craft paint for the base color of your vase. 
I used Country White which has a buttery hue.

Cover all of the tissue paper and let it dry completely.


And now, the final step to bring out all that great texture and really make
 that 3 dimensional design pop. Dip your paintbrush in black craft paint
 and wipe off most of the paint on a rag or paper towel so your brush is almost dry. 

Gently drag the contrast color over your design.
 Go slowly and add more if you want the design to stand out.

 If you add too much contrast you can touch it up with your base color. 
Dry brush your contrast color over all the edges...
top rim, bottom edge and every little crease and crinkle of textured tissue paper.

And VOILA! You've turned a plain jane vase into a great looking decor piece!

Remember, this decorated vase should be wiped down only, never immersed in water or even run through the dishwasher. The paint, glue and paper will come loose.

You could do roses, monograms, cartoons, logos and Halloween skulls. 
The possibilities are endless.

AND, you probably have everything you need already in your craft stash!

Tuesday, March 8, 2016

Twig Wreath Redo for Spring

I'm a bit of a wreath fanatic. There, I've said it.

When I found this twig wreath for $2 at a yard sale I knew it's 24" size 
was perfect for my front door. It came with bits of dried eucalyptus branches and fake roses and I kept them in place.

So first, I spray painted it glossy black and added Dollar Store leaves and flowers for fall and Halloween.


LOVE!
See the black roses and dried eucalyptus? 


Then for winter/Christmas I spray painted it gloss white and added lots of glossy turquoise. 
I am always on the look out for more turquoise bits and bobs 
plus glittery snowflakes and Christmas bulbs.

And there are the eucalyptus and roses painted bright white.


And now for spring, the white wreath is ready to shine in beautiful shades of green. Courtesy of the Dollar Store, thrift stores and yard sales, of course.


This time the white roses are under the ferns and butterflies.


Here are some of my finds during the year. I used some for this wreath. 
I have a list of things I am always looking for.


When I couldn't find green curlicues I just painted some curled wire. I do believe in making things I need/want and then making things work without spending loads of money.

Ooh aaah!


This year I've even turned it over and tried it out on this octagon window.
I removed the nest and added more butterflies and a wind chime. 
I painted the wind chime butterfly as a Monarch for a pop of color. 

What do you think? Should I add a wreath on the door, too? 

Can I ever have too many wreaths? Lol.

What are you doing for your spring decor? 


Book Page Christmas DIY

Most of you have figured out I am a color freak with an obsession  for turquoise, red and cobalt blue.  However, I also obsess about ...